
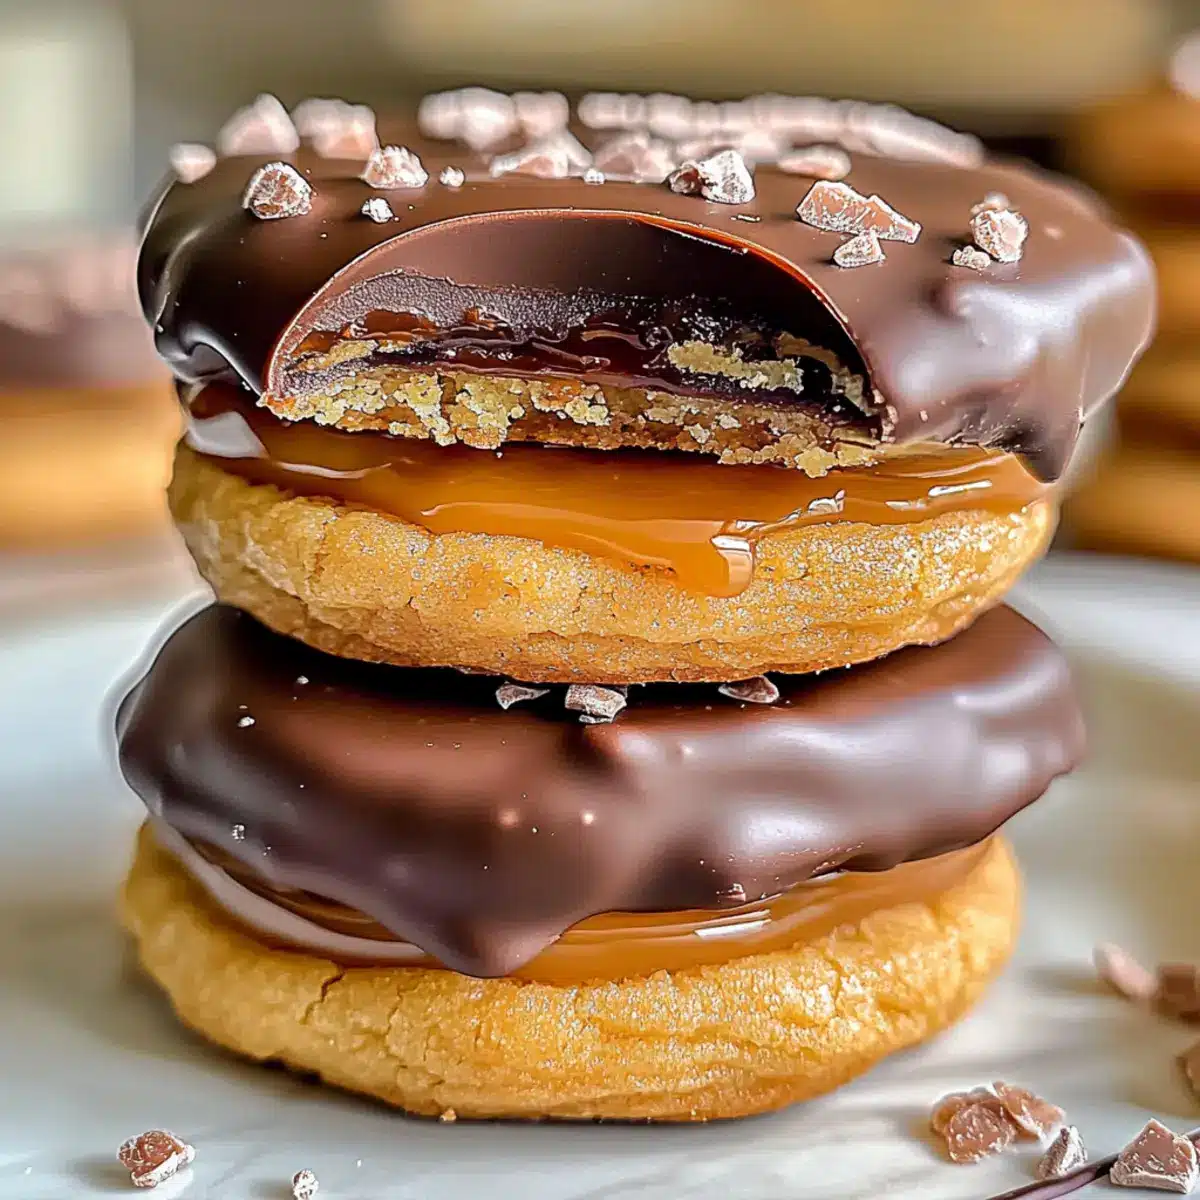
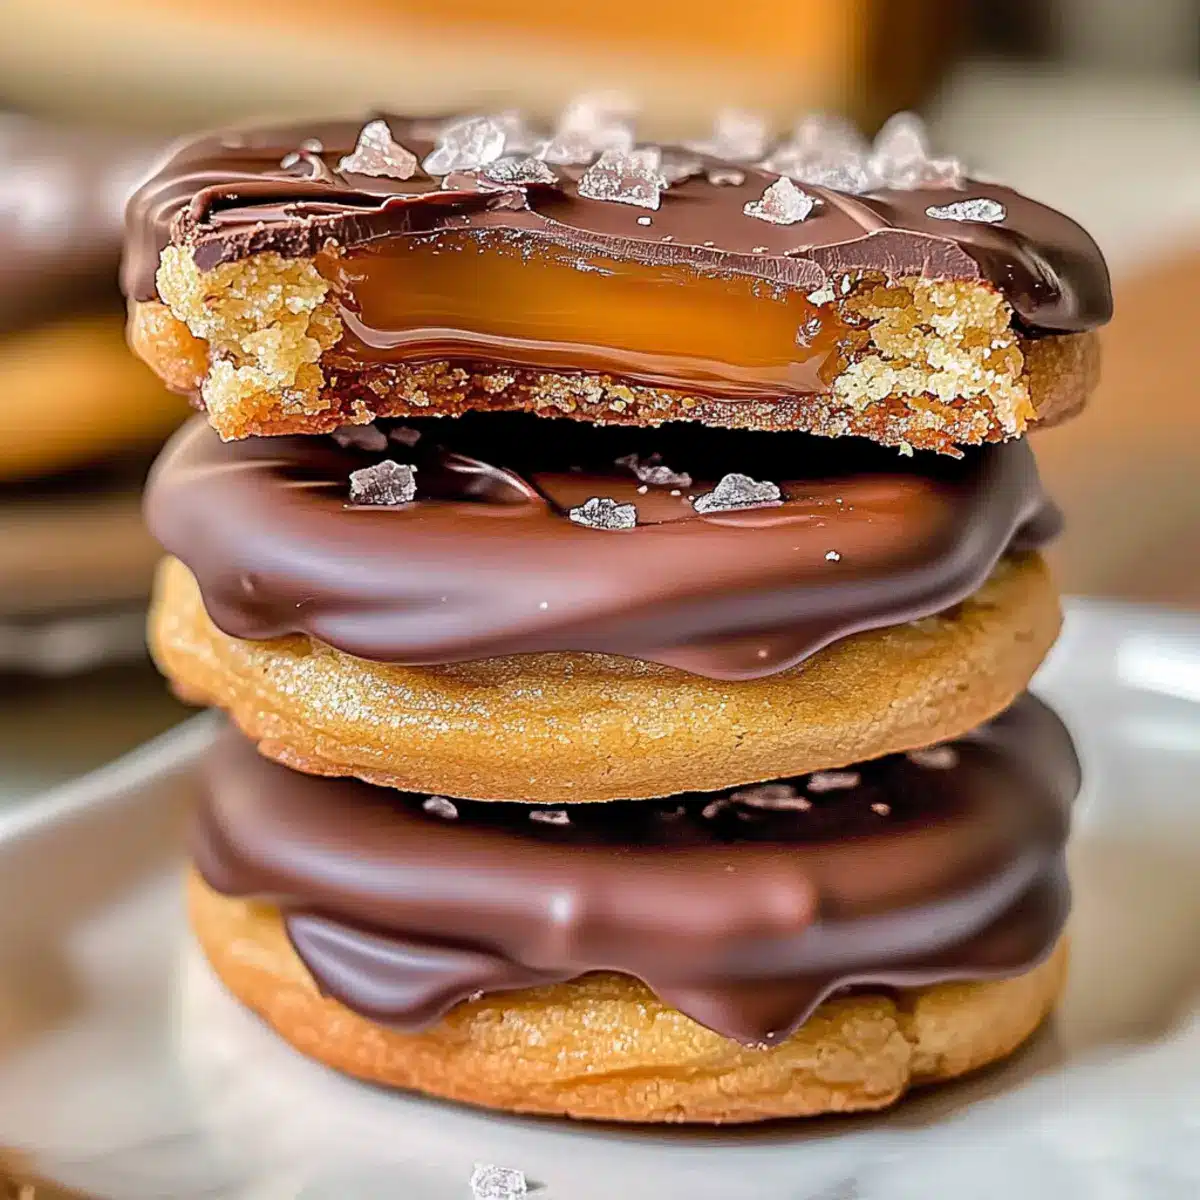
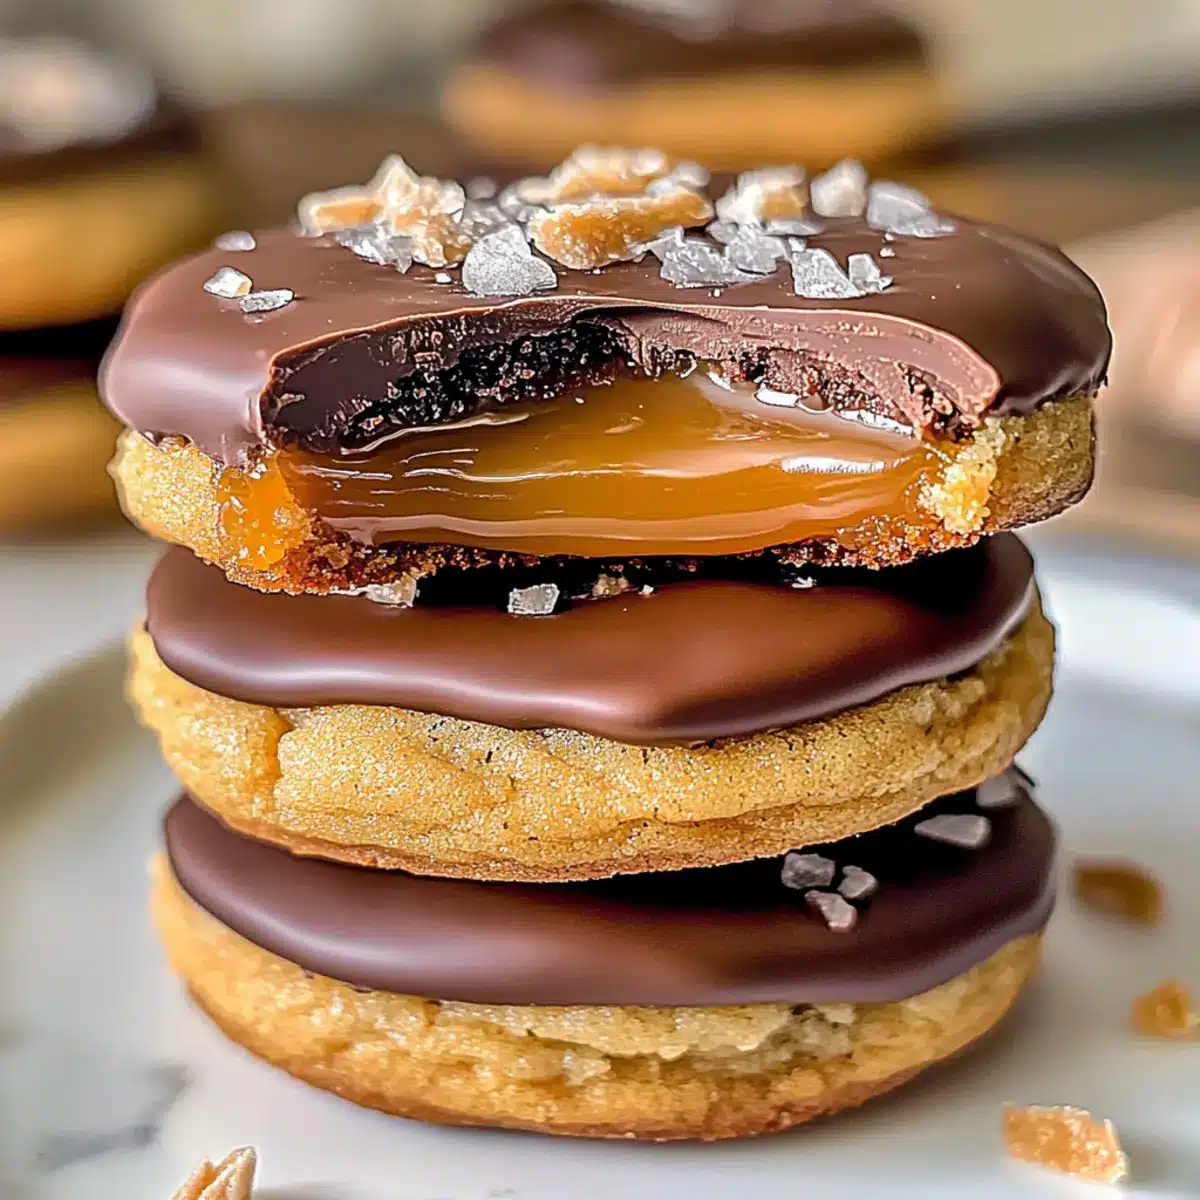
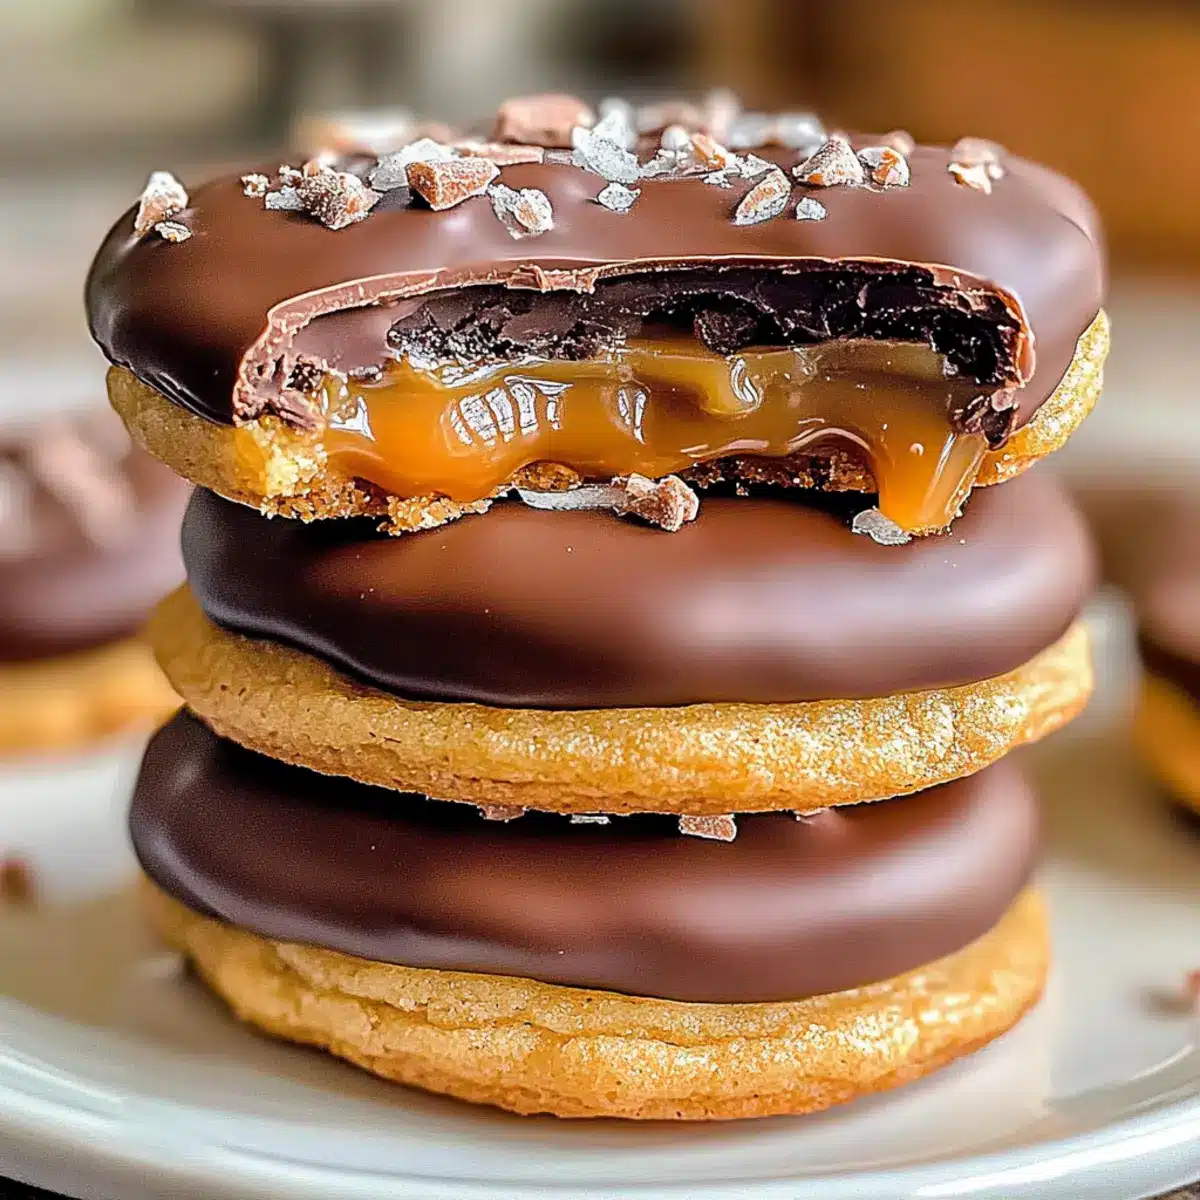
As I opened the oven door, a wave of nostalgia swept over me, reminiscent of cozy childhood afternoons spent baking sweet treats. Today, I’m thrilled to share my Ultimate Twix-Style Cookies, a delightful combination of buttery cookie bliss, luscious caramel layers, and a glossy chocolate drizzle that rivals your favorite candy bar. These heavenly cookies not only promise quick prep time, making them perfect for last-minute gatherings, but they also serve as a guaranteed crowd-pleaser, satisfying the sweet cravings of family and friends alike. Whether you’re looking to indulge yourself or impress your guests, this recipe is just what you need! Ready to create something irresistible together? Let’s dive into the world of baking magic!
Why Are These Cookies So Irresistible?
Decadent Layers: With a buttery cookie base, rich caramel, and smooth chocolate, each bite is a heavenly experience that satisfies your sweet tooth perfectly.
Customizable Delight: Want to mix things up? Swap caramel for homemade chocolate ganache or try a salted caramel twist for a unique flavor experience!
Quick and Easy: These cookies come together with minimal effort, making them your go-to treat for last-minute gatherings.
Crowd Favorite: Ideal for sharing! They’re sure to impress everyone from kids to adults, proving that homemade sweets can outshine any fast food dessert.
Nostalgic Comfort: Relish the charm of childhood memories, enjoying every scrumptious bite just like your favorite candy bar.
For more delightful treats, check out these scrumptious Cannoli Cookies Capture and Hawaiian Pineapple Cookies.
Twix-Style Cookies Ingredients
Here’s everything you need to bring these delicious Twix-Style Cookies to life!
For the Cookie Base
- Unsalted Butter – This ingredient provides richness and flavor; substitute with margarine for a dairy-free option.
- Granulated Sugar – Adds sweetness and structure; try coconut sugar for a less refined touch.
- Brown Sugar – Contributes moisture and a deep, rich flavor; either light or dark brown sugar works just fine.
- Eggs – Acts as a binder for the dough; use flax eggs for a vegan version.
- All-Purpose Flour – Provides structure; opt for a gluten-free flour blend if needed.
- Baking Powder – A leavening agent that helps the cookies rise; check for freshness to ensure the best results.
- Salt – Enhances flavor, balancing the sweetness perfectly.
For the Caramel Layer
- Caramel Sauce – Adds a gooey, sweet layer; store-bought is convenient, but homemade can elevate the taste.
For the Chocolate Drizzle
- Chocolate Chips – Offers that classic chocolate finish on top; feel free to swap for dark or white chocolate chips based on your preference.
With these ingredients, you’ll be well on your way to creating some unforgettable Twix-Style Cookies that will be a hit with everyone!
Step‑by‑Step Instructions for Twix-Style Cookies
Step 1: Preheat and Prepare
Begin by preheating your oven to 350°F (175°C) and lining a baking sheet with parchment paper to ensure easy cleanup. This creates a non-stick surface for our Twix-Style Cookies. While the oven heats, gather your mixing bowls and measuring tools, preparing yourself for a fun baking session!
Step 2: Cream the Butters and Sugars
In a large mixing bowl, cream together 1 cup of unsalted butter, ½ cup of granulated sugar, and ½ cup of brown sugar until light and fluffy, about 3-4 minutes with an electric mixer. This step is crucial as it adds air to the mixture, giving your Twix-Style Cookies a delightful texture. Make sure everything is well incorporated before moving on.
Step 3: Add the Eggs
Next, add two large eggs to the creamed mixture, one at a time, mixing well after each addition. This ensures that the eggs are fully absorbed and helps bind the ingredients together smoothly. You’ll see the batter become richer and more cohesive, indicating you’re on the right track to creating delicious Twix-Style Cookies!
Step 4: Combine the Dry Ingredients
In a separate bowl, whisk together 2 cups of all-purpose flour, 1 teaspoon of baking powder, and ½ teaspoon of salt. Gradually add this dry mixture to the wet ingredients, stirring until just combined. Avoid overmixing, as you want to maintain the tenderness of your cookie base, essential for that melt-in-your-mouth experience!
Step 5: Shape the Dough
Using a cookie scoop or spoon, drop dough onto the prepared baking sheet, spacing them about 2 inches apart. Gently create an indent in the center of each cookie with your thumb—this will hold the delicious caramel layer later. You’ll want the dough to have a slightly rounded shape, perfect for holding that sweet topping!
Step 6: Bake the Cookies
Place the baking sheet in your preheated oven and bake for 10–12 minutes, or until the edges are golden brown while the centers remain soft. Keep an eye on them, as the goal is that perfect combination of crispy edges and chewy centers in your Twix-Style Cookies. Once done, remove them and allow to cool slightly on the sheet.
Step 7: Add the Caramel Layer
Once the cookies have cooled for about 5 minutes, fill each indent with your desired caramel sauce. You can use store-bought or homemade caramel; either way, it should be gooey and luscious. Allow the caramel to set slightly before proceeding to the final chocolate drizzle, making sure it complements the warm cookies.
Step 8: Drizzle the Chocolate
In a microwave-safe bowl, melt 1 cup of chocolate chips in 30-second intervals, stirring in between until smooth. Drizzle the melted chocolate over the cookies using a fork or a piping bag for more control. Let the chocolate set at room temperature before serving, and feel free to sprinkle a pinch of sea salt for an extra gourmet touch to your Twix-Style Cookies!
Expert Tips for Twix-Style Cookies
-
Chill the Dough: Refrigerate the dough for at least 30 minutes before baking to prevent spreading. This helps achieve thick, perfectly shaped Twix-Style Cookies.
-
Melt Chocolate Carefully: Use a microwave in 30-second bursts or a double boiler for melting chocolate. Avoid overheating, which can lead to a gritty texture.
-
Measure Accurately: Weighing ingredients ensures precision. Accurate measurements are key to achieving the perfect texture in your Twix-Style Cookies.
-
Watch Baking Time: Keep an eye on your cookies while they bake—slightly underbaking allows for a soft center, while golden edges add to the overall texture.
-
Add Sea Salt: A sprinkle of flaky sea salt before the chocolate sets enhances flavor, balancing the sweetness with a delightful savory note.
Twix-Style Cookies Variations
Feel free to let your creativity shine as you customize these cookies to your heart’s delight!
-
Vegan Option: Use flax eggs instead of regular eggs and margarine instead of butter for a delicious vegan twist.
With this simple swap, you’ll keep all the indulgence while catering to dietary preferences. -
Dairy-Free Delight: Substitute regular chocolate chips with dairy-free chocolate chips for a lactose-free treat.
This keeps the rich chocolate goodness without compromising on taste for those avoiding dairy! -
Sugar-Free Alternatives: Use a sugar substitute like erythritol to make these cookies lower in sugar.
You can enjoy a sweet moment without the extra calories; just adjust according to taste, as some substitutes are sweeter than sugar. -
Nutty Flavor: Incorporate some finely chopped nuts like pecans or walnuts into the dough for a delightful crunch.
A warm cookie with nutty bits brings unexpected joy to each bite, enhancing the overall texture. -
Flavored Extracts: Get adventurous with flavored extracts! Consider adding almond or hazelnut extract for a unique flavor profile.
These subtle but delightful notes can elevate your cookies to something truly special, making them versatile for any occasion. -
Salted Caramel Twist: Drizzle salted caramel on top before the chocolate sets for an added layer of flavor.
This contrast between sweet and salty enhances the overall experience, making it even more memorable. -
Chocolate Ganache: Swap the caramel for a luscious homemade chocolate ganache to change up the layers.
This rich decadence can elevate your Twix-Style Cookies, creating a truly indulgent treat that will impress everyone!
For even more delightful cookie inspiration, don’t miss our scrumptious Hawaiian Pineapple Cookies or the classic Cannoli Cookies Capture.
Make Ahead Options
These Ultimate Twix-Style Cookies are perfect for meal prep, allowing you to enjoy delicious treats even on busy days! You can prepare the cookie dough and refrigerate it for up to 24 hours—just make sure to shape the dough into balls and chill on a baking sheet covered with plastic wrap to prevent drying out. The caramel layer can also be made in advance and stored in an airtight container in the refrigerator for up to 3 days. When you’re ready to bake, simply scoop the dough onto a baking sheet, make the indents, and bake as directed. For optimal quality, ensure the cookies cool completely before adding the caramel and chocolate drizzle, so they remain just as decadent and irresistible!
How to Store and Freeze Twix-Style Cookies
Room Temperature: Store cookies in an airtight container at room temperature for up to 7 days to maintain their freshness and soft texture.
Fridge: For extended freshness, you can refrigerate the Twix-Style Cookies for up to 2 weeks. Ensure they’re in a sealed container to prevent moisture loss.
Freezer: Freeze cookies for up to 3 months. Place them in a single layer in a freezer-safe container or wrap them tightly in plastic wrap, then in aluminum foil.
Reheating: Thaw cookies at room temperature before serving, or warm them in the microwave for 10-15 seconds to bring back their delicious melty texture.
What to Serve with Ultimate Twix-Style Cookies?
Indulging in these sweet delights opens the door to a world of exciting pairings that will elevate your dessert experience.
- Vanilla Ice Cream: A classic pairing that brings a cool creaminess to every bite, enhancing the cookie’s rich flavors. Each scoop melts into the warm, gooey caramel.
- Chocolate Milk: This nostalgic beverage complements the chocolate drizzle perfectly, creating a sweet, cocoa-rich experience that’s simply irresistible.
- Fresh Berries: The tartness of strawberries or raspberries provides a refreshing contrast, balancing the sweetness of the cookies and adding a burst of color to your plate.
- Coffee: A hot cup of coffee offers a delightful bitterness that pairs beautifully with the cookies’ sweetness, making for a cozy treat time.
- Whipped Cream: Fluffy, airy whipped cream adds a rich texture, lightening up the decadent layers of your Twix-Style Cookies while providing another creamy element.
- Salted Caramel Sauce: For an indulgent twist, drizzle more caramel on top, enhancing the cookie’s gooey center while offering that perfect sweet-salty combination.
- Nutty Trail Mix: Crunchy nuts and dried fruits serve as a great snack option on the side, adding texture and a satisfying crunch that perfectly complements the cookie’s softness.
- Milkshakes: A luscious milkshake, either chocolate or caramel flavored, creates a fun, playful twist, giving you that classic diner vibe for your dessert spread.
- Dark Chocolate Truffles: For a rich addition, pair these cookies with dark chocolate truffles for a decadent treat that will please any chocolate lover.
Ultimate Twix-Style Cookies Recipe FAQs
How do I choose ripe ingredients?
Absolutely! For the best results, use unsalted butter that’s soft but not melted; it should yield to pressure when you press it. Eggs should be fresh—check the expiration date on the carton. If using homemade caramel, make sure it’s not overly sweetened, as you want a nice balance with the chocolate and cookie.
How should I store Twix-Style Cookies?
Very! Store your cookies in an airtight container at room temperature for up to 7 days to keep that soft, chewy texture. If you want to extend their life, pop them in the fridge for up to 2 weeks, ensuring they are well sealed to avoid any moisture loss.
Can I freeze these cookies, and how?
Absolutely! To freeze your Twix-Style Cookies, arrange them in a single layer on a baking sheet and freeze until solid. Once frozen, transfer them to a freezer-safe container or wrap each cookie tightly in plastic wrap and then in aluminum foil. They can be kept for up to 3 months. When you’re ready to enjoy, thaw them at room temperature for a few hours or microwave them for 10-15 seconds for that warm, gooey goodness!
What if my cookies spread too much while baking?
Oh no! If your cookies spread excessively, it may be due to too much butter or not chilling the dough beforehand. Ensure you refrigerate the dough for at least 30 minutes before baking, as this helps them hold their shape. Also, check the accuracy of your ingredient measurements—too much butter can lead to a puddle instead of a cookie!
Are these cookies safe for those with allergies?
Very! These cookies contain common allergens such as gluten (from flour) and dairy (from butter). If you’re baking for someone with allergies, consider using a gluten-free flour blend and substituting margarine for the butter. Also, be cautious about the caramel sauce you choose, as some contain milk or nuts. Always read labels!
Can I customize the ingredients in my Twix-Style Cookies?
You bet! Feel free to swap the caramel for chocolate ganache for a twist. You can also cut down on sugar by using coconut sugar instead. If you’re looking for a saltier bite, sprinkle some flaky sea salt on the caramel before drizzling with chocolate to create a salted caramel version. The more the merrier!
Decadent Twix-Style Cookies That Will Steal Your Heart
Ingredients
Equipment
Method
- Preheat your oven to 350°F (175°C) and line a baking sheet with parchment paper.
- Cream together the butter, granulated sugar, and brown sugar until light and fluffy.
- Add the eggs one at a time, mixing well after each addition.
- In a separate bowl, whisk together the flour, baking powder, and salt, then gradually add to the wet ingredients.
- Drop dough onto the prepared baking sheet, spacing them about 2 inches apart and creating an indent in each.
- Bake for 10-12 minutes until the edges are golden brown.
- Fill each indent with caramel sauce after cooling for 5 minutes.
- Melt chocolate chips and drizzle over cookies. Let set before serving.
Leave a Reply