
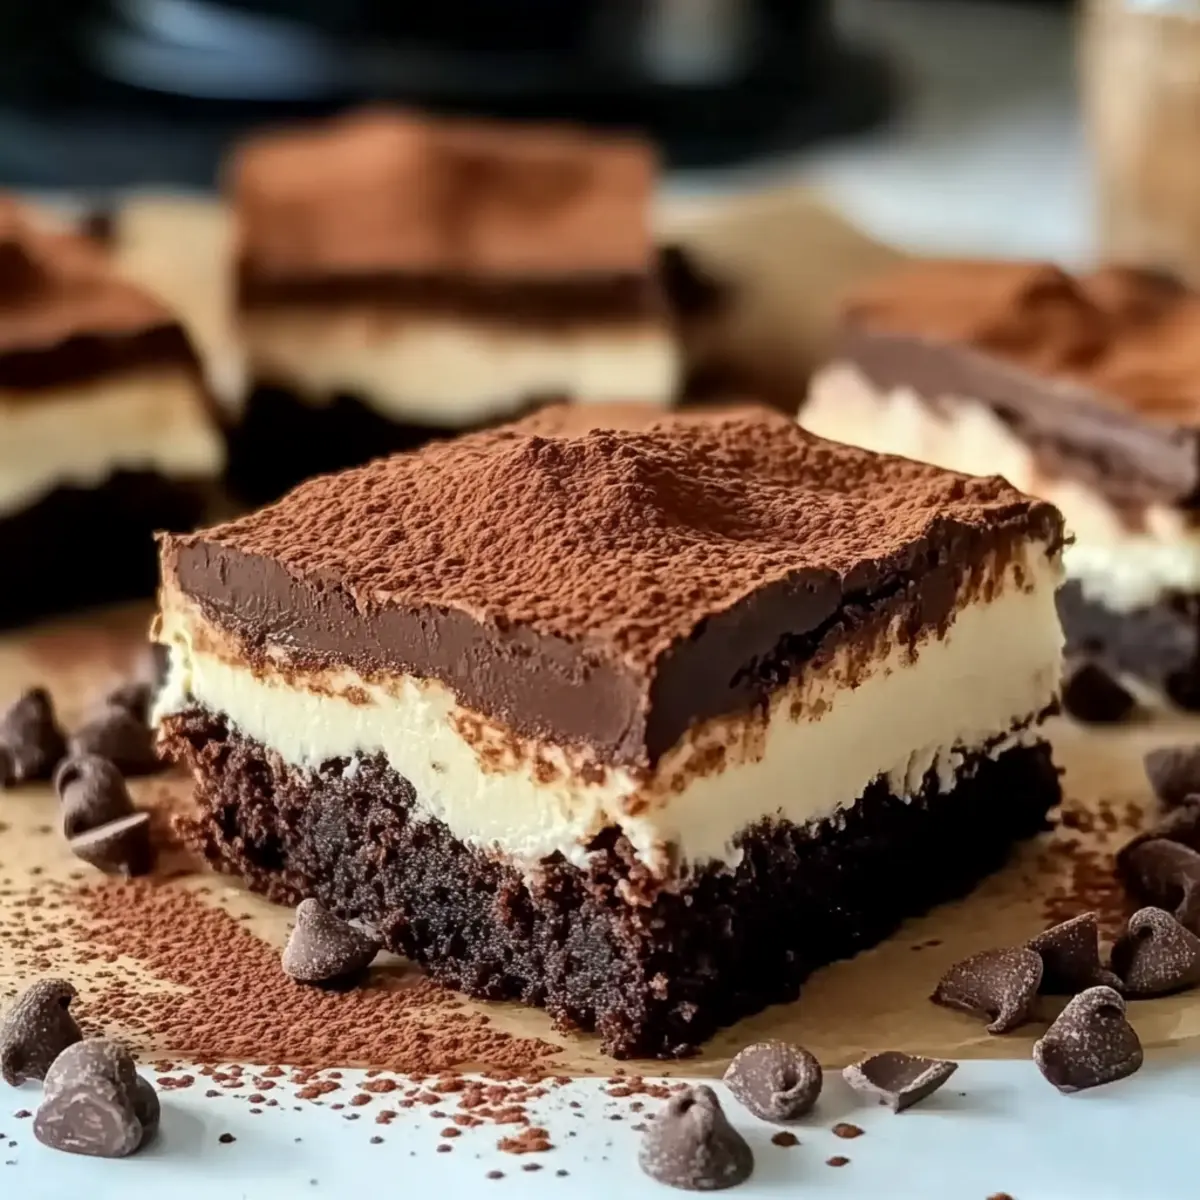
In the heart of every home-cooked feast, there’s a hidden gem waiting to be discovered: the magical fusion of chocolate and coffee. My Ultimate Tiramisu Brownies bring together the comforting richness of brownies with a luxurious twist that echoes the classic Italian dessert. This easy tiramisu recipe is not only effortless to whip up but also turns any gathering into a sophisticated dining experience. The creamy mascarpone layer atop the fudgy base creates an irresistible treat that feels indulgent yet simple enough for a weekday pick-me-up. So, are you ready to elevate your dessert game and impress your friends with a slice of this sweet joy?

Why Are Tiramisu Brownies Irresistible?
Indulgent flavors combine in these decadent brownies, creating a dessert experience you won’t forget. Simple to prepare, this tiramisu brownies recipe will have you impressing guests in no time. Versatile too, feel free to play with flavors—consider adding coffee liqueur for an adult touch or layering in crushed ladyfingers for texture. Whether it’s a gathering or a personal treat, these brownies elevate any occasion, making them truly special. Try pairing them with a dollop of whipped cream from my Chocolate Chip Cookie recipe!
Tiramisu Brownies Ingredients
• Gather everything you need to create these scrumptious treats!
-
For the Brownie Base
-
Dark Chocolate – Provides richness and depth; you can substitute with semi-sweet chocolate for a milder flavor.
-
Unsalted Butter – Adds moisture and fudgy texture; margarine can be used as a substitute.
-
Granulated Sugar – Sweetens the brownies and contributes to structure; brown sugar adds a deeper flavor.
-
Eggs – Binds ingredients together and adds moisture; flax eggs work as a great vegan alternative.
-
All-Purpose Flour – Offers structure; replace with a gluten-free flour blend for a gluten-free option.
-
For the Tiramisu Layer
-
Mascarpone Cheese – Creamy layer delivering the classic tiramisu flavor; cream cheese can be a tangier substitute.
-
Powdered Sugar – Sweetens the mascarpone layer; for a healthier option, consider agave syrup.
-
Espresso Powder – Imparts coffee flavor; finely ground coffee can be used for a milder taste.
-
Vanilla Extract – Enhances flavor; omit if you prefer a more straightforward taste.
-
For the Topping
-
Cocoa Powder – Sprinkles on top for that classic tiramisu finish; chocolate shavings offer a lovely twist.
Dive into this delightful tiramisu brownies recipe and prepare for a sweet indulgence that leaves everyone craving more!
Step‑by‑Step Instructions for Ultimate Tiramisu Brownies Recipe
Step 1: Prepare Brownie Base
Start by preheating your oven to 350°F (175°C). In a medium saucepan over low heat, melt the dark chocolate and unsalted butter together until completely smooth, stirring occasionally. Once melted, remove from heat and stir in granulated sugar until combined. Add eggs one by one, beating well after each addition, and gently fold in the all-purpose flour until just incorporated, ensuring no dry streaks remain.
Step 2: Bake Brownies
Pour the brownie mixture into a greased 9×9-inch baking pan, using a spatula to spread it evenly. Place the pan in the preheated oven and bake for about 30 minutes. Keep an eye on them; the edges should look set, and a toothpick inserted in the center should come out with a few moist crumbs. Once baked, take them out and let them cool completely in the pan on a wire rack.
Step 3: Make the Tiramisu Layer
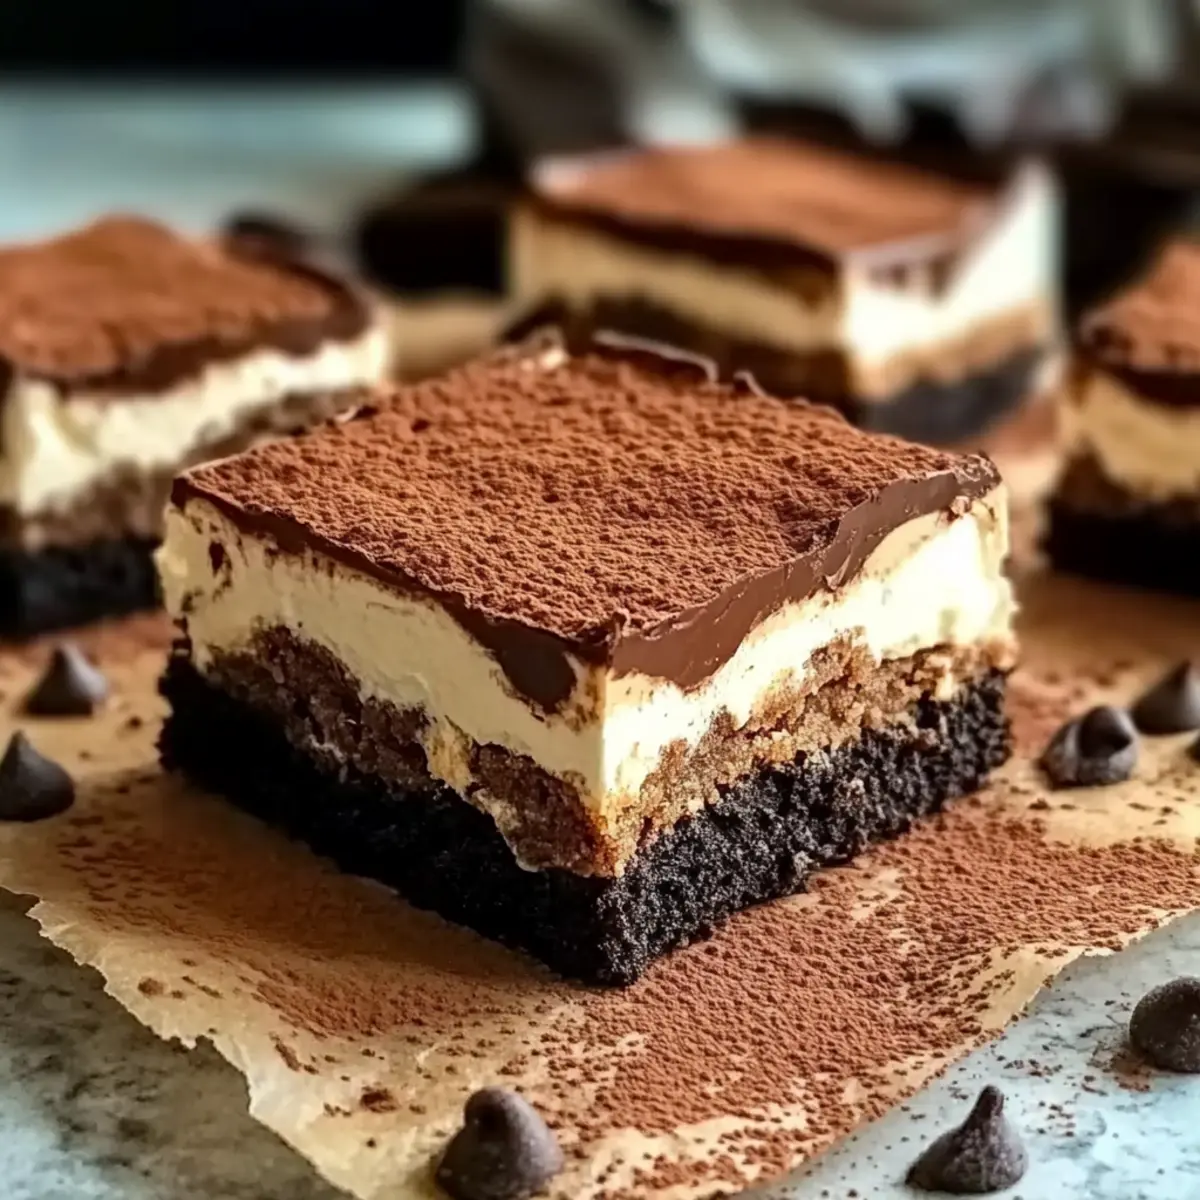
In a mixing bowl, combine mascarpone cheese, powdered sugar, espresso powder, and vanilla extract. Using an electric mixer, beat the mixture on medium speed until it is smooth and fluffy, should take about 2-3 minutes. This creamy mascarpone layer will beautifully balance the fudgy brownie base, so ensure it’s well combined for a delightful Ultimate Tiramisu Brownies experience.
Step 4: Assemble
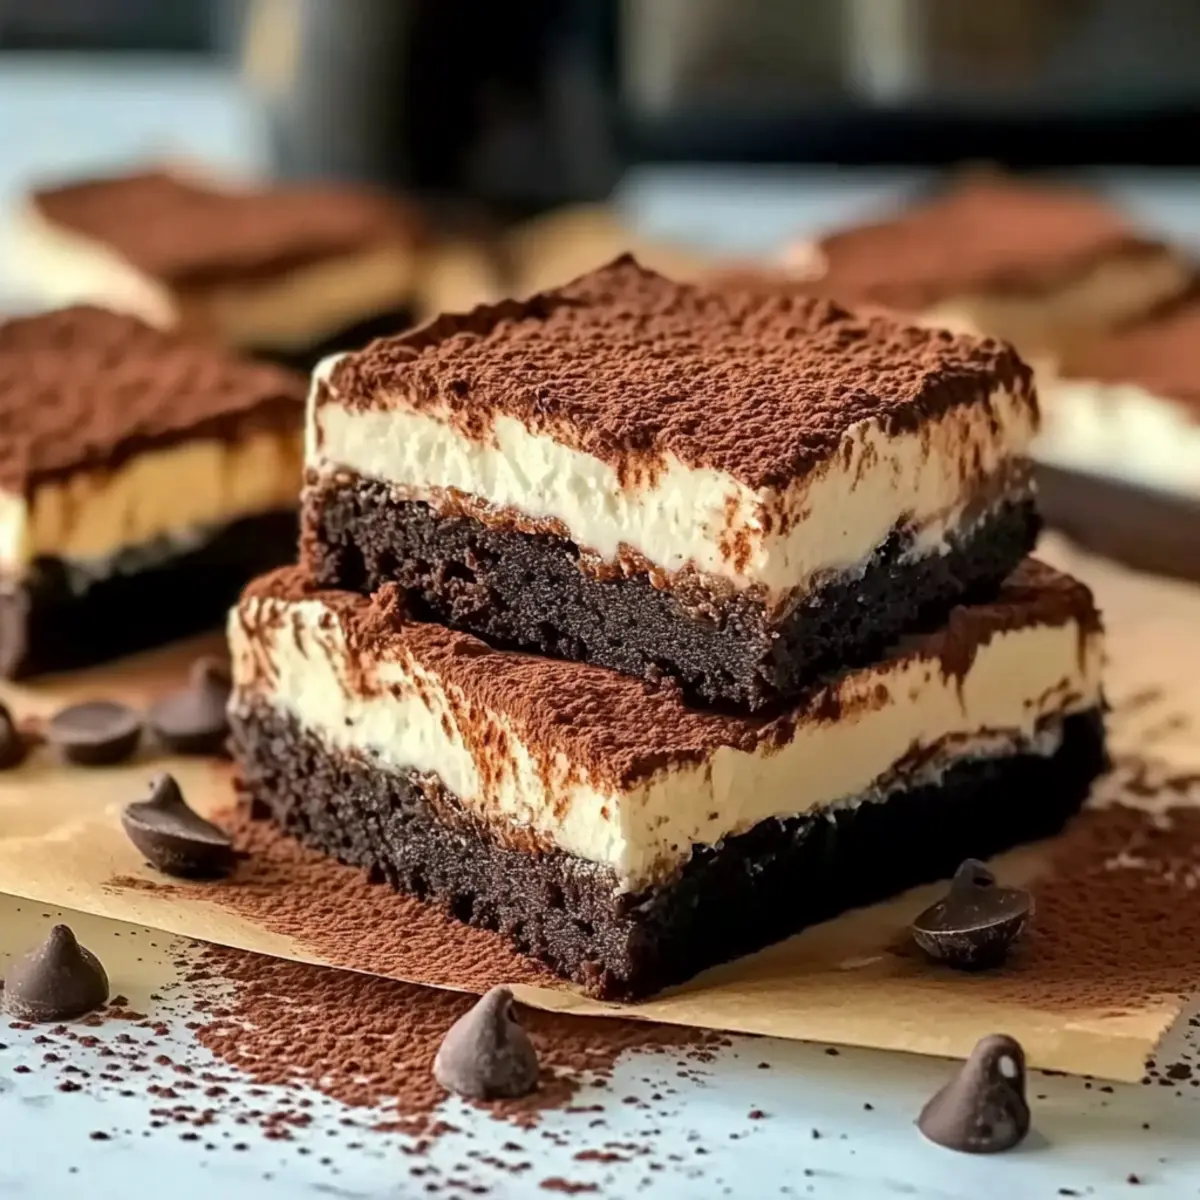
Once the brownies are completely cooled, gently spread the tiramisu layer evenly over the brownie base using a spatula. Smooth it out to create a beautiful layer that will enhance the overall texture of your Ultimate Tiramisu Brownies. For best results, cover the pan with plastic wrap and refrigerate for at least 2 hours to allow the flavors to meld and the layers to set nicely.
Step 5: Serve
After chilling, remove the brownie pan from the refrigerator. To serve, dust the top of the tiramisu layer with cocoa powder for that classic finish. Utilize a sharp knife dipped in hot water and wiped clean to slice through the brownies neatly. Each slice should reveal the luscious layers of brownie and mascarpone, ready to be enjoyed.
What to Serve with Ultimate Tiramisu Brownies?
Elevate your dessert experience with delightful pairings that complement the rich flavors of these decadent brownies.
- Whipped Cream: A dollop adds lightness and balances the fudgy brownies perfectly.
- Fresh Berries: Juicy raspberries or strawberries provide a refreshing contrast to the chocolatey richness.
- Espresso: An espresso shot enhances the coffee notes and makes for a sophisticated pairing.
- Ice Cream: Vanilla or hazelnut ice cream adds creaminess that pairs beautifully with the rich layers.
- Chocolate Ganache: Drizzling warm ganache intensifies the chocolate experience for true chocoholics.
- Chocolate Sauce: A light drizzle brings extra sweetness and can enhance the presentation too.
- Almond Biscotti: The crunchy texture contrasts delightfully with the creamy layer, each bite creating a balance.
- Port Wine: A glass of sweet port wine elevates the dessert’s sophistication and enhances the overall indulgence.
- Coconut Macaroons: Chewy coconut treats add another layer of flavor that pairs delightfully with coffee.
- Chilled Milk: Classic cold milk is a comforting, nostalgic choice that perfectly rounds off a sweet treat.
Storage Tips for Tiramisu Brownies
Fridge: Keep your Tiramisu Brownies covered in the refrigerator for up to 5 days. This helps maintain their moist texture and flavor.
Freezer: To store more long-term, freeze individual slices in airtight containers for up to 2 months. Be sure to label them for easy access later!
Thawing: When ready to enjoy, thaw frozen brownies overnight in the fridge. This way, they’ll be perfectly set and delicious when you’re ready to serve them.
Reheating: If you prefer warm brownies, gently reheat slices in the microwave for about 10-15 seconds, but watch carefully to avoid drying them out.
Expert Tips for Tiramisu Brownies
-
Cool Completely: Allow your brownies to cool fully before adding the mascarpone layer; this prevents melting and ensures clean layers.
-
Chill Generously: Don’t skip the chilling time! A good two-hour refrigeration helps the flavors meld beautifully and sets the tiramisu layer.
-
Slice with Care: For tidy slices, use a hot, clean knife. Wipe it after each cut to maintain the beautiful layers of your tiramisu brownies.
-
Flavor Variations: Feel free to experiment with additions like coffee liqueur or chocolate shavings in the mascarpone for a personalized touch.
-
Storage Tips: Keep leftovers covered in the fridge for up to 5 days or freeze individual slices in airtight containers for stunning desserts later!
Tiramisu Brownies Variations & Substitutions
Feel free to explore these delightful twists and substitutions to personalize your tiramisu brownies experience!
-
Coffee Liqueur: Add a splash of your favorite coffee liqueur to the mascarpone layer for an adult twist that elevates the dessert’s richness. This option brings a sophisticated note to your brownies.
-
Chopped Coffee Candy: Incorporate chopped coffee-flavored candy into the brownie batter for an extra burst of flavor. The chewy texture compliments the fudgy base beautifully, making each bite a new adventure!
-
Crushed Ladyfingers: Layer in crushed ladyfingers for an authentic tiramisu texture. This addition not only enhances the nostalgic vibe but also adds an intriguing crunch that contrasts with the creamy layer.
-
Nutty Crunch: Add chopped nuts, such as hazelnuts or walnuts, to the brownie batter. The nutty crunch gives a delightful contrast to the rich chocolate and smooth mascarpone, creating an exciting texture.
-
Gluten-Free Flour: Swap out the all-purpose flour for a gluten-free blend to make these brownies friendly for all diets. You’ll still enjoy the fudgy texture without compromising on taste!
-
Flavored Mascarpone: Experiment by mixing in flavored extract such as almond or orange zest into the mascarpone layer. This tiny twist opens up a whole new world of exciting flavors, transforming your brownies.
-
Dairy-Free Option: Replace mascarpone cheese with a vegan cream cheese alternative and use coconut cream for a luscious dairy-free tiramisu twist that doesn’t skip on creaminess.
-
Spice It Up: For a little kick, add a pinch of cinnamon or espresso powder to the brownie mix. This adds depth and warmth that complements the chocolate perfectly, inviting cozy feelings with each bite.
Remember, there’s no right or wrong way to enjoy your Ultimate Tiramisu Brownies! Whether you stick to the classic recipe or customize it with your creative variations, the joy of baking and sharing delicious food remains the same. For a sweet ending, you might enjoy pairing these with a cup of coffee or a slice of my Banana Cake Moist for a delightful dessert spread!
Make Ahead Options
These Ultimate Tiramisu Brownies are perfect for meal prep enthusiasts looking to save time on busy weeknights! You can prepare the brownie base up to 24 hours in advance. Simply bake, cool completely, and cover tightly with plastic wrap, ensuring it maintains its fudgy texture. The tiramisu layer can also be made up to 3 days ahead—simply whip up the mascarpone mixture and refrigerate it separately. When you’re ready to serve, spread the tiramisu layer over the brownies, chill for at least 2 hours for optimal flavor melding, and dust with cocoa powder just before slicing. With these make-ahead tips, you’ll enjoy just as delicious results with minimal effort!
Tiramisu Brownies Recipe FAQs
What chocolate should I use for Tiramisu Brownies?
I recommend using dark chocolate for a richer flavor, but semi-sweet chocolate works as a milder alternative. Look for chocolate that is at least 60% cacao for the best results!
How should I store Tiramisu Brownies?
Keep your Tiramisu Brownies covered in the refrigerator for up to 5 days. This helps maintain their moist texture and delicious flavor, so you’ll have a delightful treat ready when the craving strikes!
Can I freeze Tiramisu Brownies?
Absolutely! To freeze, individually wrap slices in plastic wrap and then place them in airtight containers. They can be frozen for up to 2 months. When you’re ready to enjoy, simply thaw them overnight in the fridge.
What should I do if my brownies are too dry?
Dry brownies? No worries! Next time, consider reducing the baking time slightly. Remove them from the oven as soon as a toothpick comes out with just a few moist crumbs. Adding a bit of extra butter or adjusting the flour can also help retain moisture.
Can I substitute mascarpone cheese?
Yes! If you can’t find mascarpone, cream cheese works as a tangier alternative. Just make sure to beat it until smooth to achieve that luscious texture for your Tiramisu layer.
Is it safe for pets or people with dairy allergies?
Since the Tiramisu layer contains dairy ingredients like mascarpone cheese and butter, it’s not suitable for pets or anyone with a dairy allergy. I suggest using dairy-free substitutes to cater to dietary needs while still enjoying the delicious flavors of these Tiramisu Brownies!
Decadent Tiramisu Brownies Recipe for a Sweet Indulgence
Ingredients
Equipment
Method
- Preheat your oven to 350°F (175°C). Melt dark chocolate and unsalted butter together over low heat until smooth. Stir in granulated sugar, then add eggs one by one, beating after each addition. Fold in flour until no dry streaks remain.
- Pour the brownie mixture into a greased baking pan and spread it evenly. Bake for about 30 minutes, until edges are set and a toothpick comes out with a few moist crumbs. Let cool completely.
- In a bowl, combine mascarpone cheese, powdered sugar, espresso powder, and vanilla extract. Beat on medium speed until smooth and fluffy, about 2-3 minutes.
- Spread the tiramisu layer over the cooled brownies evenly. Cover with plastic wrap and refrigerate for at least 2 hours.
- Dust the top with cocoa powder. Slice using a hot, clean knife for neat layers.
Leave a Reply