
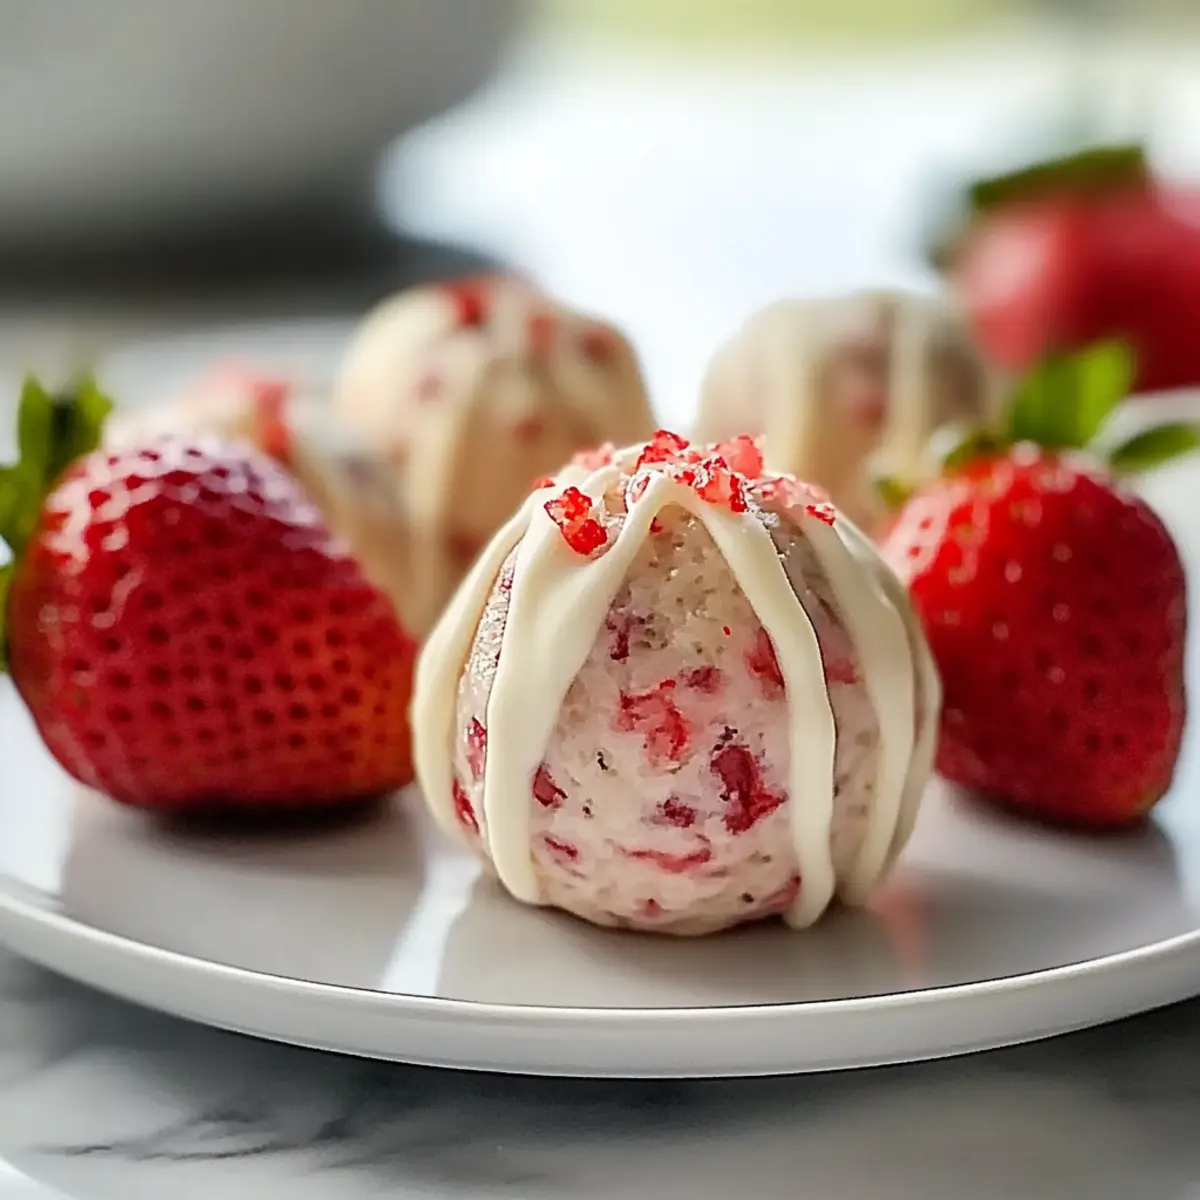
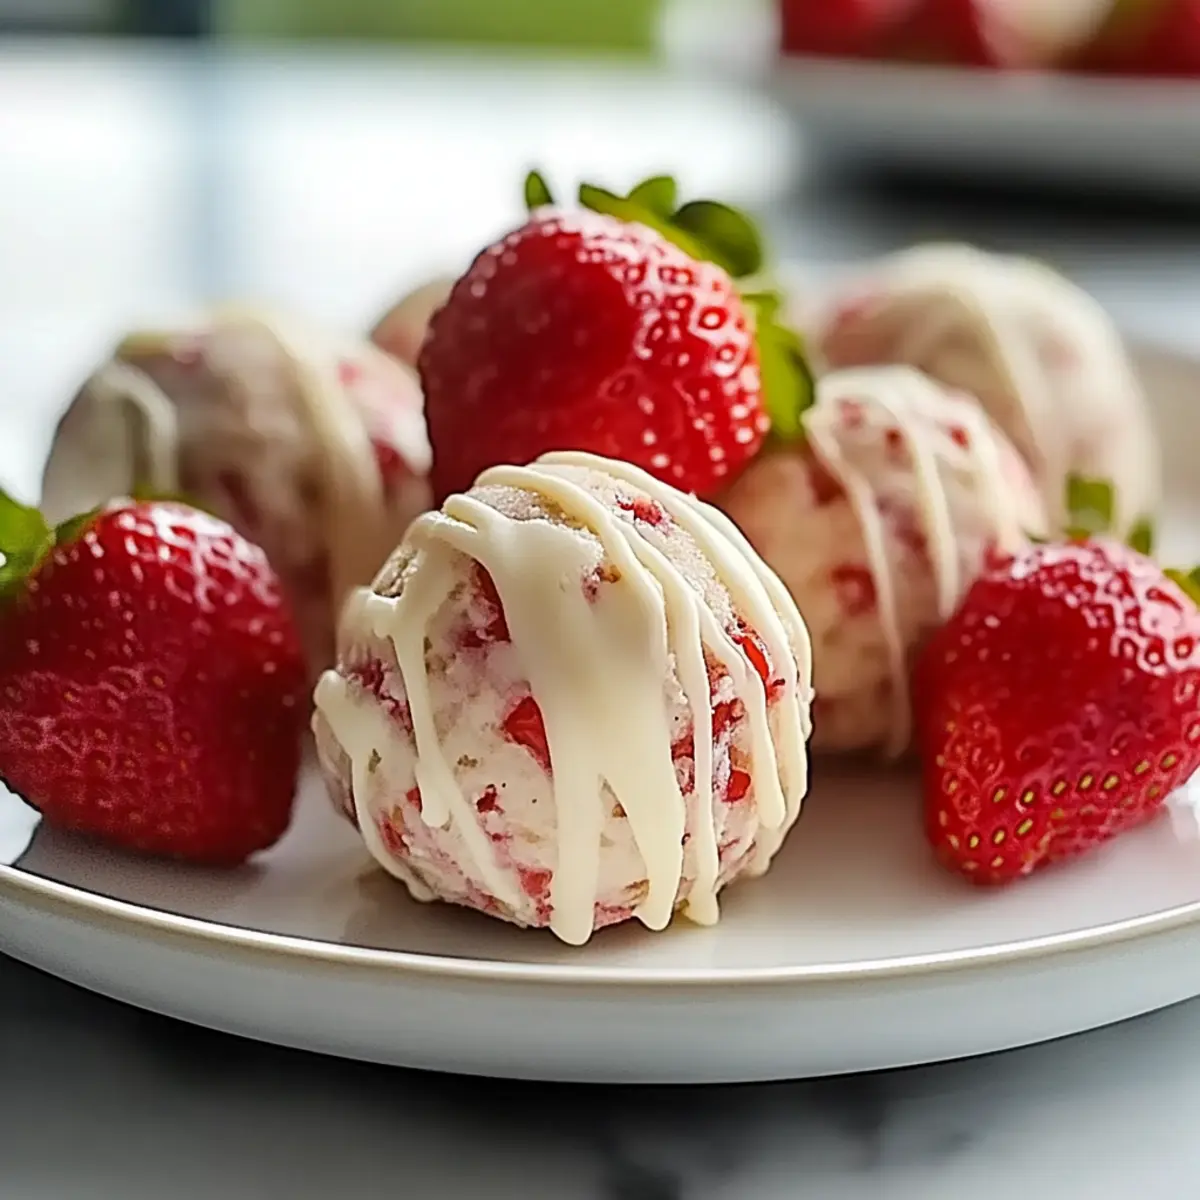
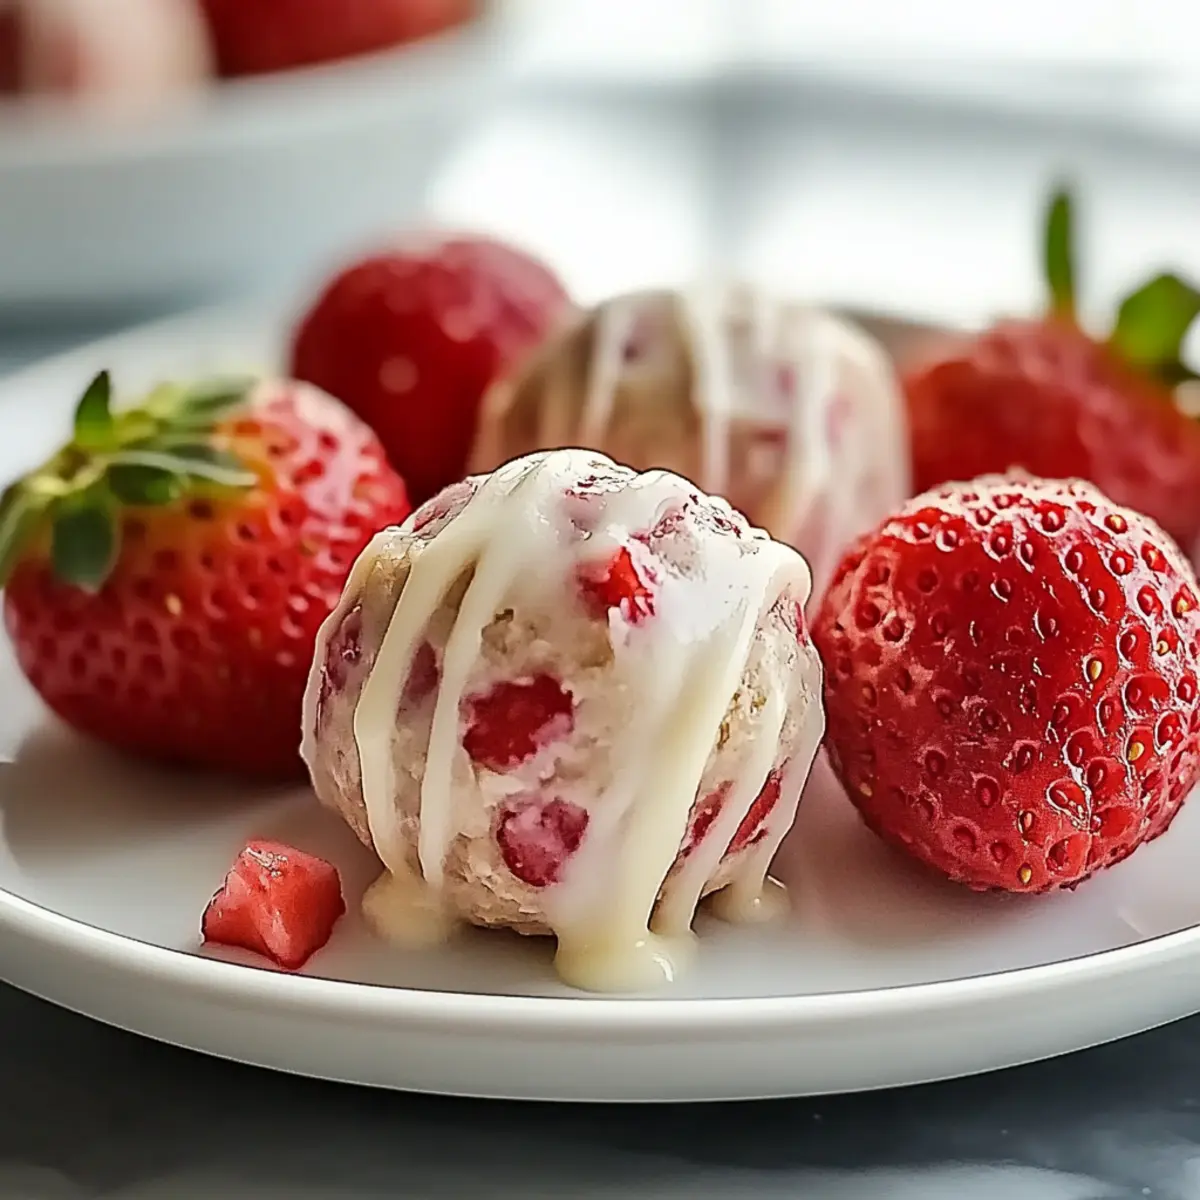
There was a time when I thought healthy snacks had to be bland and boring, but then I discovered the magic of no-bake Strawberry Cheesecake Protein Balls! These little gems are guilt-free and bring all the luscious creamy flavor of cheesecake right to your fingertips—no oven required. Perfect for those busy days when I need a quick energy boost, these protein-rich bites combine rolled oats with fresh strawberries for a satisfying sweet treat. Plus, they’re easily customizable; swap in your favorite berries or even a splash of chocolate for that extra twist. If you’re ready to elevate your snacking game with something delicious and nutritious, keep reading! What flavor combination will you try first?
Why Are These Protein Balls a Must-Try?
Satisfying, Guilt-Free Snack: These Strawberry Cheesecake Protein Balls provide all the indulgent flavor of cheesecake without the added calories, making them a perfect treat.
No-Bake Convenience: Whip them up in just a few minutes—no oven required! They’re perfect for busy lifestyles.
Endless Customization: Swap strawberries for blueberries or add in some dark chocolate chips for a unique twist that caters to your taste buds.
Healthy On-The-Go Energy: With 5g of protein per ball, they’re ideal for post-workout recovery or a midday boost.
Kid-Friendly Fun: Even the little ones will love these delicious bites! Perfect for lunchboxes or after-school snacks.
If you’re also interested in other healthy treats, don’t miss my recipes for Condensed Milk Snowballs and Spinach Garlic Meatballs; they are sure to delight your family too!
Strawberry Cheesecake Protein Balls Ingredients
• The perfect blend of flavors awaits!
For the Base
- Rolled Oats – A wholesome foundation full of fiber; swap with gluten-free oats for a dietary-friendly option.
- Vanilla Protein Powder – Infuses each bite with protein and a hint of sweetness; feel free to try chocolate-flavored for a fun twist!
- Almond Butter – Adds rich creaminess and healthy fats; use peanut butter or sunflower seed butter if you’re avoiding nuts.
For Sweetness
- Honey or Maple Syrup – Natural sweetener that binds everything together; agave syrup works as a vegan alternative.
For the Cheesecake Flavor
- Cream Cheese – Creates that classic cheesecake texture; Greek yogurt can lighten things up beautifully.
For the Fruity Burst
- Fresh Strawberries – Provides moisture and vibrant flavor; if you opt for frozen, make sure to thaw and drain well to prevent excess moisture.
These Strawberry Cheesecake Protein Balls are not only simple to make but also customizable to suit your tastes! Enjoy this guilt-free snack anytime you need a pick-me-up.
Step‑by‑Step Instructions for Strawberry Cheesecake Protein Balls
Step 1: Prepare Workspace
Begin by gathering your essential equipment: mixing bowls, a spatula, and measuring cups. You’ll also need a parchment-lined baking sheet for chilling the Strawberry Cheesecake Protein Balls later. Ensuring everything is organized will help streamline the recipe process and make it a fun experience.
Step 2: Mix Dry Ingredients
In a large mixing bowl, combine rolled oats and vanilla protein powder, stirring thoroughly to mix the ingredients evenly. Look for the dry mixture to take on a uniform color, ensuring there are no clumps. This blends flavors and textures that will create a solid base for your no-bake protein balls.
Step 3: Add Wet Ingredients
Next, pour in the almond butter and honey, using a spatula to blend them into the dry mixture. Continue mixing until the ingredients are fully moistened and cohesive, forming a sticky dough-like consistency. The combined texture should easily hold together when pressed, indicating it’s ready for the next step.
Step 4: Incorporate Cream Cheese and Strawberries
Gently fold in the softened cream cheese and finely chopped fresh strawberries into the mixture, being careful not to break the strawberries too much. This step not only adds the creamy cheesecake flavor but also infuses the mixture with vibrant fruitiness, perfect for our Strawberry Cheesecake Protein Balls.
Step 5: Form Into Balls
With clean hands, scoop out small portions of the mixture and shape them into approximately one-inch diameter balls. You should yield about a dozen protein balls. As you roll them, give them a gentle squeeze to ensure they firmly hold their shape, ready for chilling.
Step 6: Chill and Serve
Place each ball on the prepared parchment-lined baking sheet, spacing them evenly. Refrigerate the protein balls for at least 30 minutes to firm up, allowing the flavors to meld together. Once chilled, they are ready to be enjoyed as a delicious and nutritious snack, perfect for any time of day.
Expert Tips for Strawberry Cheesecake Protein Balls
-
Thorough Mixing: Ensure dry ingredients are well combined before adding wet. This guarantees an even flavor throughout your Strawberry Cheesecake Protein Balls.
-
Gentle Folding: Be careful when incorporating strawberries and cream cheese; over-mixing can break down the strawberries too much, changing the texture.
-
Uniform Size: Use a cookie scoop or your hands to create consistently sized balls for even chilling and a more appealing presentation.
-
Chill Time: Don’t skip the refrigeration step! Chilling for at least 30 minutes helps the protein balls firm up, making them easier to handle and eat.
-
Storage Tips: Keep your protein balls in an airtight container in the fridge to maintain freshness for up to a week. For longer storage, consider freezing them!
Make Ahead Options
These Strawberry Cheesecake Protein Balls are perfect for meal prep enthusiasts! You can mix the dry ingredients (rolled oats and vanilla protein powder) and the wet ingredients (almond butter and honey) up to 24 hours in advance, storing them separately in airtight containers in the refrigerator. To maintain quality, refrigerate the rolled finished protein balls for up to 3 days or freeze them for up to one month. When you’re ready to enjoy these delicious snacks, simply fold in the cream cheese and fresh strawberries, form into balls, and refrigerate for at least 30 minutes. This way, you’ll have nutritious, grab-and-go bites ready for your busy days!
How to Store and Freeze Strawberry Cheesecake Protein Balls
Fridge: Keep your Strawberry Cheesecake Protein Balls in an airtight container, where they will stay fresh for up to 1 week.
Freezer: To extend their shelf life, freeze the protein balls in a single layer on a baking sheet, then transfer them to a freezer-safe bag or container for up to 3 months.
Thawing: To enjoy frozen protein balls, simply thaw them in the fridge overnight or let them sit at room temperature for about 30 minutes before serving.
Reheating: These protein balls are best served cold or at room temperature. There’s no need to reheat—just grab and enjoy whenever you need a wholesome snack!
What to Serve with Strawberry Cheesecake Protein Balls
Treat yourself to more vibrant flavors that complement your juicy, sweet bites while creating a delightful snack experience!
-
Fresh Fruit Salad: A mix of seasonal fruits enhances the vibrant flavors of the protein balls. The freshness balances the creamy textures perfectly.
-
Greek Yogurt Parfait: Layer Greek yogurt with granola and berries for a refreshing contrast. This combination provides a delightful crunch and extra protein!
-
Nut Butter Dip: A smooth almond or peanut butter dip adds richness. The creamy texture pairs beautifully with the fruity notes of the protein balls.
-
Nutty Granola: Sprinkle some crunchy granola alongside for a satisfying bite. The added fiber makes this a wholesome snack duo.
-
Dark Chocolate Dipped Strawberries: Indulge your sweet tooth with these decadent treats that echo the flavors of the protein balls, adding a touch of romance to your snack.
-
Iced Green Tea: Refreshing and light, iced green tea is a superb beverage pairing that cleanses the palate while enhancing the fruity flavors.
-
Protein Shake: Fuel your body with a protein shake that mirrors the protein-rich goodness of the protein balls for a powerful snack combo.
-
Zesty Lemonade: A tangy, citrusy lemonade perfectly cuts through the sweetness, bringing a refreshing balance to your afternoon pick-me-up.
Strawberry Cheesecake Protein Balls Variations
Feel free to get creative with these delicious protein balls to match your taste preferences and dietary needs!
-
Berry Swap: Replace strawberries with blueberries or raspberries for a different fruity flavor.
-
Nut-Free Option: Use sunflower seed butter instead of almond butter to cater to nut allergies. Enjoy the same creamy goodness!
-
Choco-Lovers Delight: Add dark chocolate chips for an extra touch of indulgence that contrasts beautifully with the fruity notes.
-
Vegan-Friendly: Swap cream cheese for Greek yogurt and honey for agave syrup to keep it all plant-based. You won’t miss the dairy!
-
Texture Twist: Mix in some chopped nuts or seeds for added crunch. This will elevate the texture and keep things interesting.
-
Flavorful Protein: Experiment with flavored protein powders, like chocolate or vanilla, for a personalized flavor boost that’ll make each bite exciting.
-
Sweetness Adjustment: For a less sweet option, reduce the amount of honey or syrup; you can always add a sprinkle of cinnamon for warmth.
If you’re inspired by these swaps, don’t forget to explore my recipes for Condensed Milk Snowballs or Red Velvet Cheesecake; they may add even more variety to your culinary adventures!
Strawberry Cheesecake Protein Balls Recipe FAQs
How do I select ripe strawberries?
Absolutely! When choosing fresh strawberries, look for berries that are vibrant red and plump, with no dark spots or mold. The green leaves should be fresh and not wilted, indicating the strawberries are at their prime and bursting with flavor.
How should I store Strawberry Cheesecake Protein Balls?
To maintain their delightful taste and texture, store your protein balls in an airtight container in the fridge. They will stay fresh for up to one week. If you won’t finish them within that timeframe, freezing is a great option!
Can I freeze Strawberry Cheesecake Protein Balls?
Yes! Freezing your protein balls is very easy. First, lay them in a single layer on a parchment-lined baking sheet, making sure they’re not touching. Freeze for about 2 hours until firm, then transfer them to a freezer-safe bag or container. They can last up to 3 months. When you’re ready to enjoy, just thaw them in the fridge overnight or set them out at room temperature for about 30 minutes.
What should I do if my mixture is too dry?
If you find your mixture crumbling or too dry when forming the balls, don’t worry! Simply add a teaspoon of almond butter or honey at a time until the mixture comes together. A bit of moisture can make all the difference in achieving that perfect consistency.
Are these protein balls safe for people with nut allergies?
Good question! If someone has a nut allergy, feel free to substitute the almond butter with sunflower seed butter. This keeps the creamy texture intact while ensuring they’re safe for nut-free diets. Also, always double-check your protein powder’s ingredients for any potential allergens!
Can I use frozen strawberries instead of fresh?
Yes, you can use frozen strawberries! Just thaw and drain them well before folding them into the mixture to avoid excess moisture. This will ensure your Strawberry Cheesecake Protein Balls maintain their delicious texture. Enjoy this guilt-free treat!

Delicious Strawberry Cheesecake Protein Balls for Guilt-Free Snacking
Ingredients
Equipment
Method
- Begin by gathering your essential equipment: mixing bowls, a spatula, and measuring cups. You’ll also need a parchment-lined baking sheet for chilling.
- In a large mixing bowl, combine rolled oats and vanilla protein powder, stirring thoroughly to mix evenly.
- Pour in the almond butter and honey, using a spatula to blend them into the dry mixture until fully moistened.
- Gently fold in the softened cream cheese and finely chopped fresh strawberries into the mixture.
- Scoop out small portions of the mixture and shape them into approximately one-inch diameter balls.
- Place each ball on the prepared parchment-lined baking sheet and refrigerate for at least 30 minutes to firm up.
Leave a Reply