
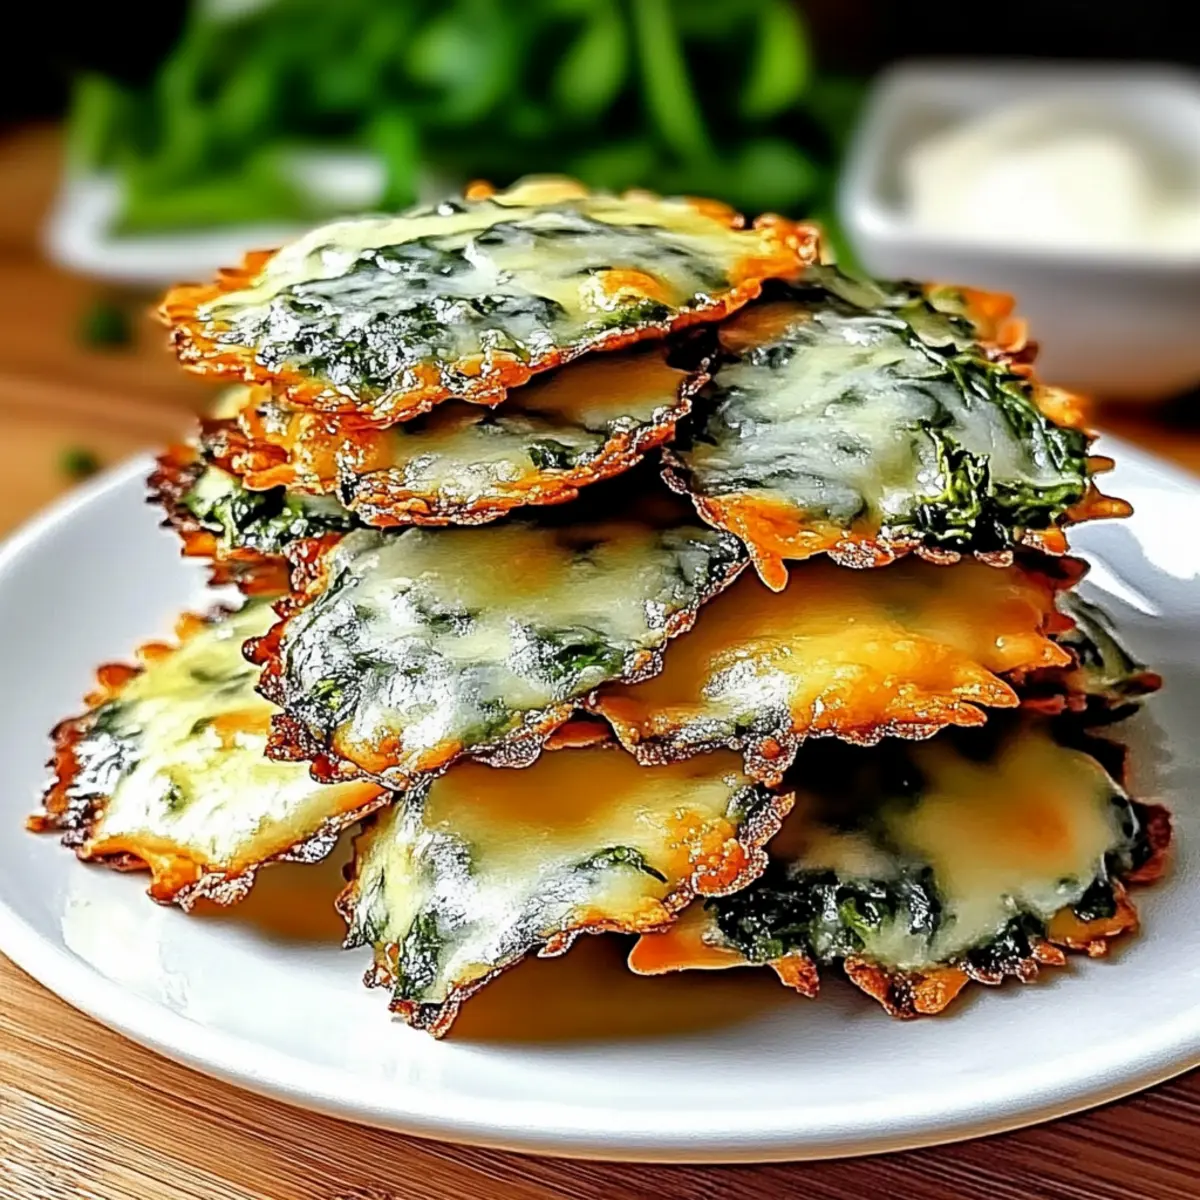
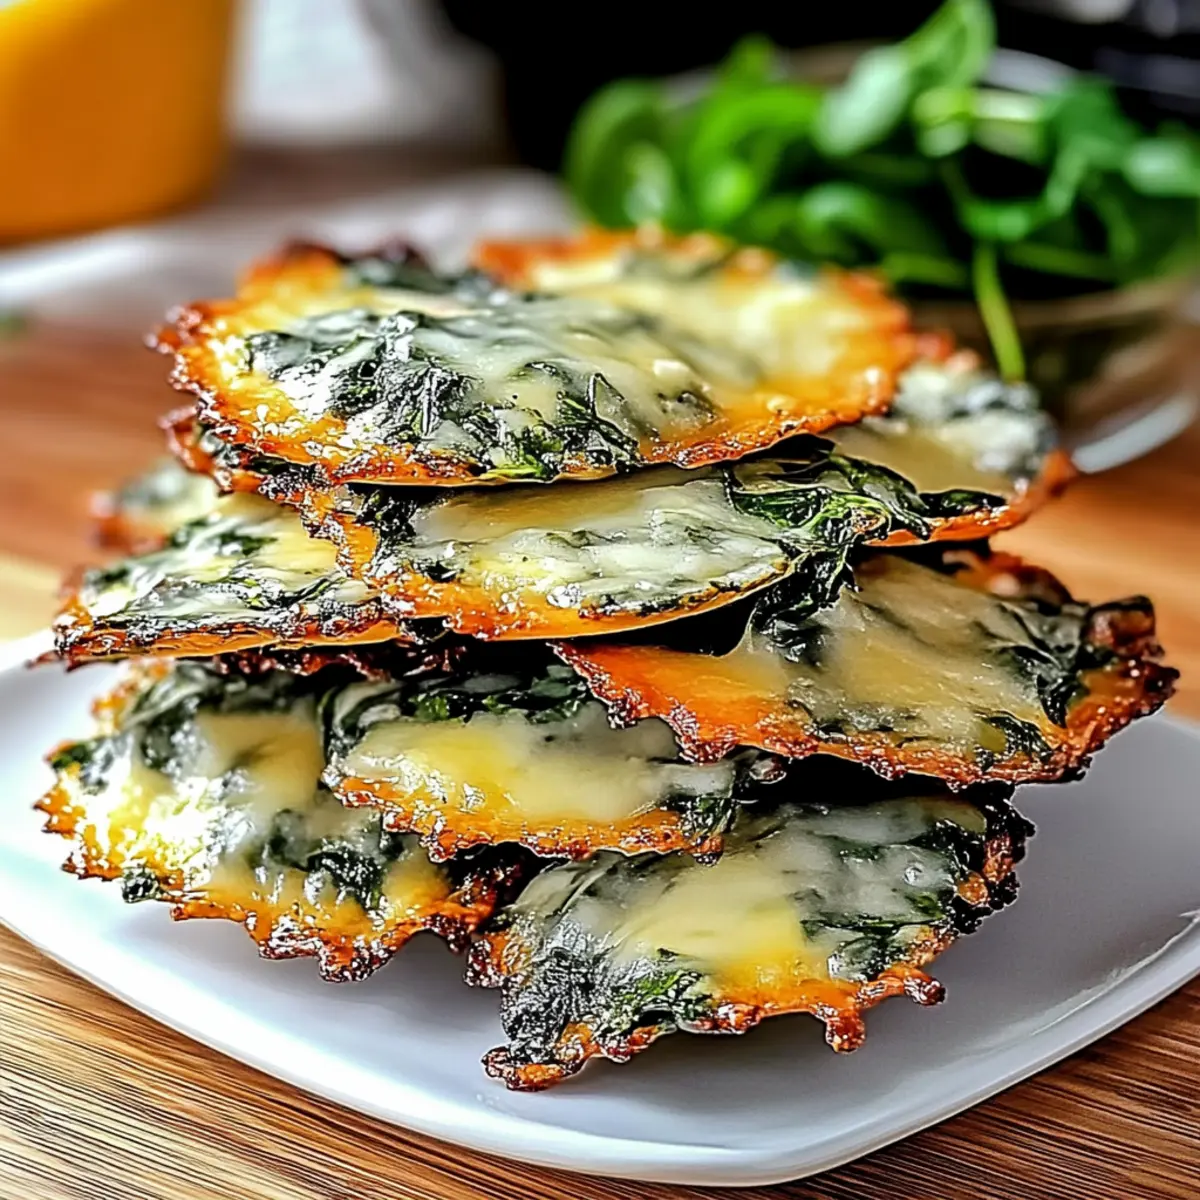
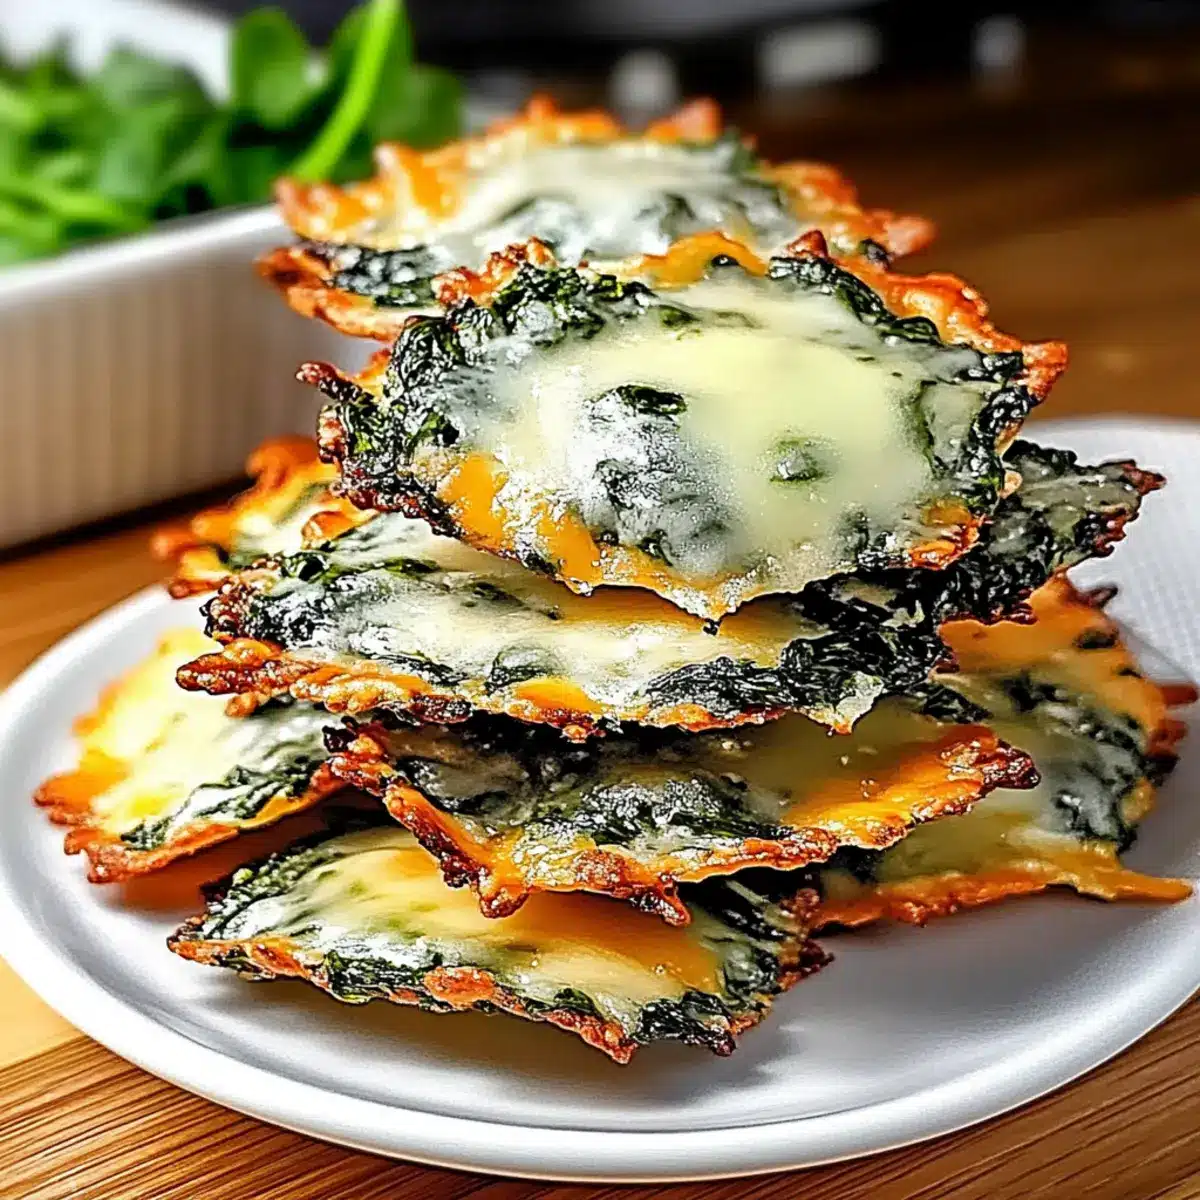
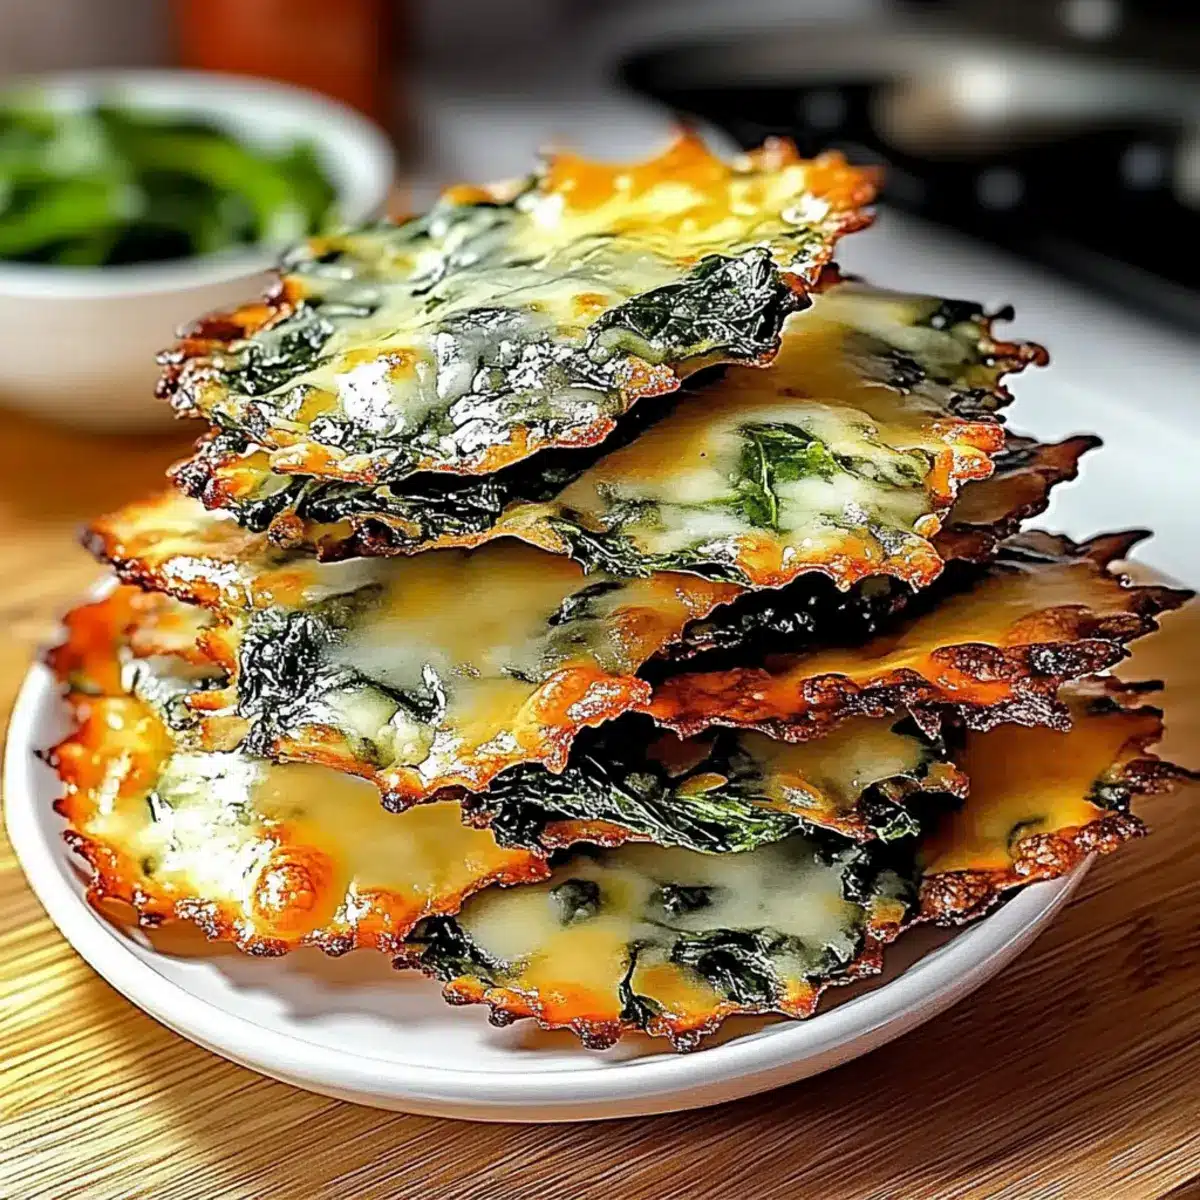
The aroma of melting cheese mingling with fresh spinach brings me back to cozy kitchen moments that always feel like a warm embrace. If you’re in search of an easy yet indulgent snack, these Spinach Cheese Crisps are your answer. Not only are they gluten-free and low-carb, making them perfect for snacking without guilt, but they also come together in a flash, ideal for those busy days when you crave something satisfying. Plus, they’re endlessly customizable—feel free to experiment with different spices or even go dairy-free! So, what will you add for your unique twist on this crunchy delight?
Why are Spinach Cheese Crisps so popular?
Crispy, Crunchy Delight: These Spinach Cheese Crisps offer a satisfying crunch that will keep you coming back for more.
Guilt-Free Indulgence: With low-carb and gluten-free ingredients, you can snack without any worries about your diet.
Customizable Flavor: Add your favorite spices or toppings—like jalapeños or pepperoni—to make these crisps uniquely yours. Need a fresh twist? Check out our Million Dollar Cheese for more cheesy goodness!
Quick and Easy: Whip these up in no time, perfect for busy weekdays or unexpected guests.
Crowd-Pleasing Snack: Serve them at your next gathering and watch them disappear! Pair with your favorite dips for an impressive appetizer.
Spinach Cheese Crisps Ingredients
Unlock the secrets to making these irresistible snacks!
For the Crisps
- Fresh Spinach – This nutrient-rich base gives your Spinach Cheese Crisps a mild, earthy flavor; be sure to chop it finely!
- Cream Cheese – It creates a creamy texture; let it soften before mixing for the best results.
- Shredded Mozzarella Cheese – Offering that gooey, melty goodness that holds everything together; you can swap it for dairy-free mozzarella for a vegan option.
- Grated Parmesan Cheese – It adds a sharp, salty flavor that beautifully complements the other cheeses; consider nutritional yeast for a vegan twist.
- Garlic Powder – Infuses the crisps with savory depth; opt for smoked paprika if you’re in the mood for a smoky kick.
- Onion Powder – This optional ingredient brings a subtle earthiness to the mix; balance flavors according to your taste.
- Salt – Essential for enhancing all the flavors; adjust as per your personal preference.
Feel free to mix and match ingredients to make these Spinach Cheese Crisps your own!
Step‑by‑Step Instructions for Spinach Cheese Crisps
Step 1: Prepare Cheese Base
Begin by softening the cream cheese at room temperature for about 15 minutes. In a mixing bowl, combine the softened cream cheese with shredded mozzarella and grated parmesan. Use a hand mixer or spatula to blend the cheeses together until the mixture is smooth and creamy, ensuring there are no lumps. This cheese base will create a rich flavor for your Spinach Cheese Crisps.
Step 2: Incorporate Spinach and Spices
Take a bunch of fresh spinach, finely chop it, and pat it dry with a clean kitchen towel. Gently fold the chopped spinach into the cheese mixture along with garlic powder, onion powder (if using), and a pinch of salt. Mix until the spinach is evenly distributed throughout the cheese, giving the mixture a vibrant green hue and enhancing the flavor of the Spinach Cheese Crisps.
Step 3: Shape the Crisps
Preheat your oven to 350°F (175°C) while preparing your baking sheet. Line it with parchment paper to prevent sticking. Using a tablespoon, scoop out portions of the mixture and place them onto the lined baking sheet, leaving enough space between each scoop. Gently flatten each portion with the back of the spoon to form small discs, making sure they are roughly the same size for even baking.
Step 4: Bake
Carefully place the baking sheet in the preheated oven and bake for 12–15 minutes. Keep a close eye on the crisps; they are ready when the edges turn golden brown and the centers are bubbly. The aroma will fill your kitchen as they bake, hinting at the delicious Spinach Cheese Crisps nearing completion.
Step 5: Cool and Serve
Once baked, remove the Spinach Cheese Crisps from the oven and allow them to cool on the baking sheet for about 5 minutes. This cooling time will help them firm up a bit. Then, gently transfer the crisps to a wire rack to cool completely. Serve them warm or at room temperature as a delightful snack or appetizer, and enjoy the crunchy goodness!
Make Ahead Options
These Spinach Cheese Crisps are perfect for those busy days when meal prep is essential! You can prepare the cheese mixture and chop the spinach up to 24 hours in advance, storing them separately in the refrigerator to maintain freshness. When you’re ready to enjoy your snacks, simply combine the cheese and spinach mixture and proceed with shaping the crisps. For the best results, place the formed crisps on the baking sheet and refrigerate for a few minutes before baking to help them hold their shape. Not only does this save you time, but you’ll still get deliciously crispy results that are just as delightful!
Storage Tips for Spinach Cheese Crisps
- Room Temperature: Store your Spinach Cheese Crisps in an airtight container at room temperature for up to 24 hours to retain crispiness.
- Fridge: If you’ve made a larger batch, keep them in the fridge for 3–4 days. Note that they may soften slightly, so reheating is recommended.
- Freezer: For longer storage, freeze the baked crisps in a single layer in a freezer-safe bag for up to 1 month. Thaw before reheating to ensure they don’t lose their crunch.
- Reheating: To restore the delightful crispiness, reheat in an air fryer or oven at 350°F (175°C) for about 5-7 minutes. Avoid microwaving, as it can make them chewy.
Spinach Cheese Crisps Variations
Make these delightful snacks uniquely yours by trying out these fun twists and substitutes.
- Dairy-Free: Use plant-based cream cheese and mozzarella for a vegan version that’s just as creamy and delicious.
- Herb-Infused: Mix in fresh dill or basil leaves for a fragrant punch that elevates the flavor profile.
- Spicy Kick: Incorporate chopped jalapeños or crushed red pepper flakes to satisfy your heat cravings and add zest.
- Savory Additions: Fold in diced sun-dried tomatoes or olives for a Mediterranean flair that adds bursts of flavor.
- Zesty Citrus: Add a touch of lemon zest for a refreshing brightness that enhances the overall taste of the crisps.
- Cheesy Varieties: Substitute cheddar or gouda for the mozzarella to introduce a sharper, richer cheesy experience.
- Crunchy Elements: Toss in crushed nuts or seeds for added texture and a nutritious boost that makes every bite delightful.
These variations open the door to infinite flavor combinations. For instance, if you’re in the mood for something heartier, try our Chicken Philly Cheese for another tasty treat!
What to Serve with Spinach Cheese Crisps
These delightful bites spark joy when paired with the right sides, elevating your snacking experience into a full-fledged feast.
-
Creamy Garlic Dip: This luscious dip melds perfectly with the crispy texture, enhancing the flavors and providing a rich contrast. It’s also a great way to add an extra layer of Garlic goodness!
-
Warm Marinara Sauce: The tangy sweetness of marinara complements the cheesy notes of the crisps, creating a delicious Italian-inspired snack that can’t be beaten.
-
Fresh Veggie Platter: Crisp carrots, bell peppers, and cucumbers add freshness and an appealing crunch, balancing the richness of the cheese. Plus, you get a burst of color on your table!
-
Charcuterie Board Treats: Serve with cured meats and olives to create a lovely charcuterie spread—each bite harmonizes with the savory flavors of the crisps.
-
Zesty Lemonade: A cool, refreshing drink offsets the savory tastes and can awaken your palate. The citrus notes bring brightness while quenching your thirst.
-
Simple Green Salad: A light salad with vinaigrette introduces a bit of acidity, enhancing every bite of the Spinach Cheese Crisps while adding freshness to your meal.
-
Mini Caprese Skewers: Juicy cherry tomatoes, fresh basil, and creamy mozzarella drizzled with balsamic glaze add an Italian flair that echoes the flavors in the crisps, making your snack-time more delightful.
-
Grilled Chicken Slices: For a protein-packed pairing, these tender slices balance out the snack and support those crunchy morsels, making it a wholesome option.
Expert Tips for Spinach Cheese Crisps
- Dry Spinach Thoroughly: Make sure to pat the spinach dry if using frozen. Excess moisture can lead to soggy crisps instead of the perfect crunch.
- Don’t Overcrowd: Leave enough space between each scoop on the baking sheet. This ensures that your Spinach Cheese Crisps bake evenly and stay crispy.
- Watch the Baking Time: Keep a close eye on your crisps during the last few minutes of baking to prevent burning and achieve that desirable golden edge.
- Use Fresh Ingredients: Whenever possible, opt for fresh spinach and top-quality cheese for the best flavor and texture in your Spinach Cheese Crisps.
- Reheat Wisely: If you have leftovers, use an air fryer or oven to reheat. This will restore their crispiness, unlike microwaving which can make them chewy.
Spinach Cheese Crisps Recipe FAQs
How do I choose fresh spinach for my Spinach Cheese Crisps?
Absolutely! When selecting fresh spinach, look for vibrant green leaves that are crisp and free from wilting or dark spots. The leaves should be firm and relatively dry, indicating they were stored properly. Avoid any bunches with yellowing or soggy sections, as they won’t deliver the best flavor in your crisps.
What’s the best way to store Spinach Cheese Crisps?
To keep your Spinach Cheese Crisps at their best, store them in an airtight container at room temperature for up to 24 hours. If you need to keep them longer, refrigerate them for 3-4 days. However, keep in mind that refrigeration can cause them to soften a bit, so reheating them in an air fryer or oven will help restore their delightful crunch!
Can I freeze my Spinach Cheese Crisps?
Yes, you can! To freeze your Spinach Cheese Crisps, first, allow them to cool completely. Then, arrange them in a single layer on a baking sheet and place them in the freezer until firm. Once solid, transfer them to a freezer-safe bag or container. They can be stored for up to 1 month. When you’re ready to enjoy them, thaw them in the fridge overnight and reheat in an air fryer or oven at 350°F (175°C) for about 5-7 minutes.
What if my Spinach Cheese Crisps don’t come out crispy?
If your Spinach Cheese Crisps are lacking crispiness, there are a few things to check: ensure that your spinach is thoroughly dried before mixing. If you used frozen spinach, make sure it’s well-drained. Additionally, avoid overcrowding the baking sheet, as this can trap steam and hinder crispiness during baking. If they still seem soft, give them a quick reheat in an air fryer or oven to help them achieve that perfect crunch!
Are there any dietary considerations I should be aware of?
Very much! If you or someone you’re serving has dairy allergies, you can easily make these Spinach Cheese Crisps dairy-free by substituting the mozzarella and parmesan with plant-based alternatives. Additionally, ensure that your chosen ingredients, such as spices or sauces you serve with them, align with any dietary restrictions you may have. Always double-check labels to ensure they meet your needs!
Crispy Spinach Cheese Crisps: The Ultimate Guilt-Free Snack
Ingredients
Equipment
Method
- Softening the cream cheese at room temperature for about 15 minutes. In a mixing bowl, combine the softened cream cheese with shredded mozzarella and grated parmesan. Blend until smooth and creamy.
- Finely chop the fresh spinach and pat it dry. Fold the chopped spinach into the cheese mixture along with garlic powder, onion powder, and a pinch of salt. Mix until evenly distributed.
- Preheat your oven to 350°F (175°C) and line your baking sheet with parchment paper. Scoop out portions of the mixture onto the sheet and flatten each portion to form discs.
- Bake for 12–15 minutes until edges are golden brown and centers are bubbly. Keep a close eye to avoid burning.
- Remove from the oven, cool on the baking sheet for 5 minutes, then transfer to a wire rack to cool completely before serving.
Leave a Reply