
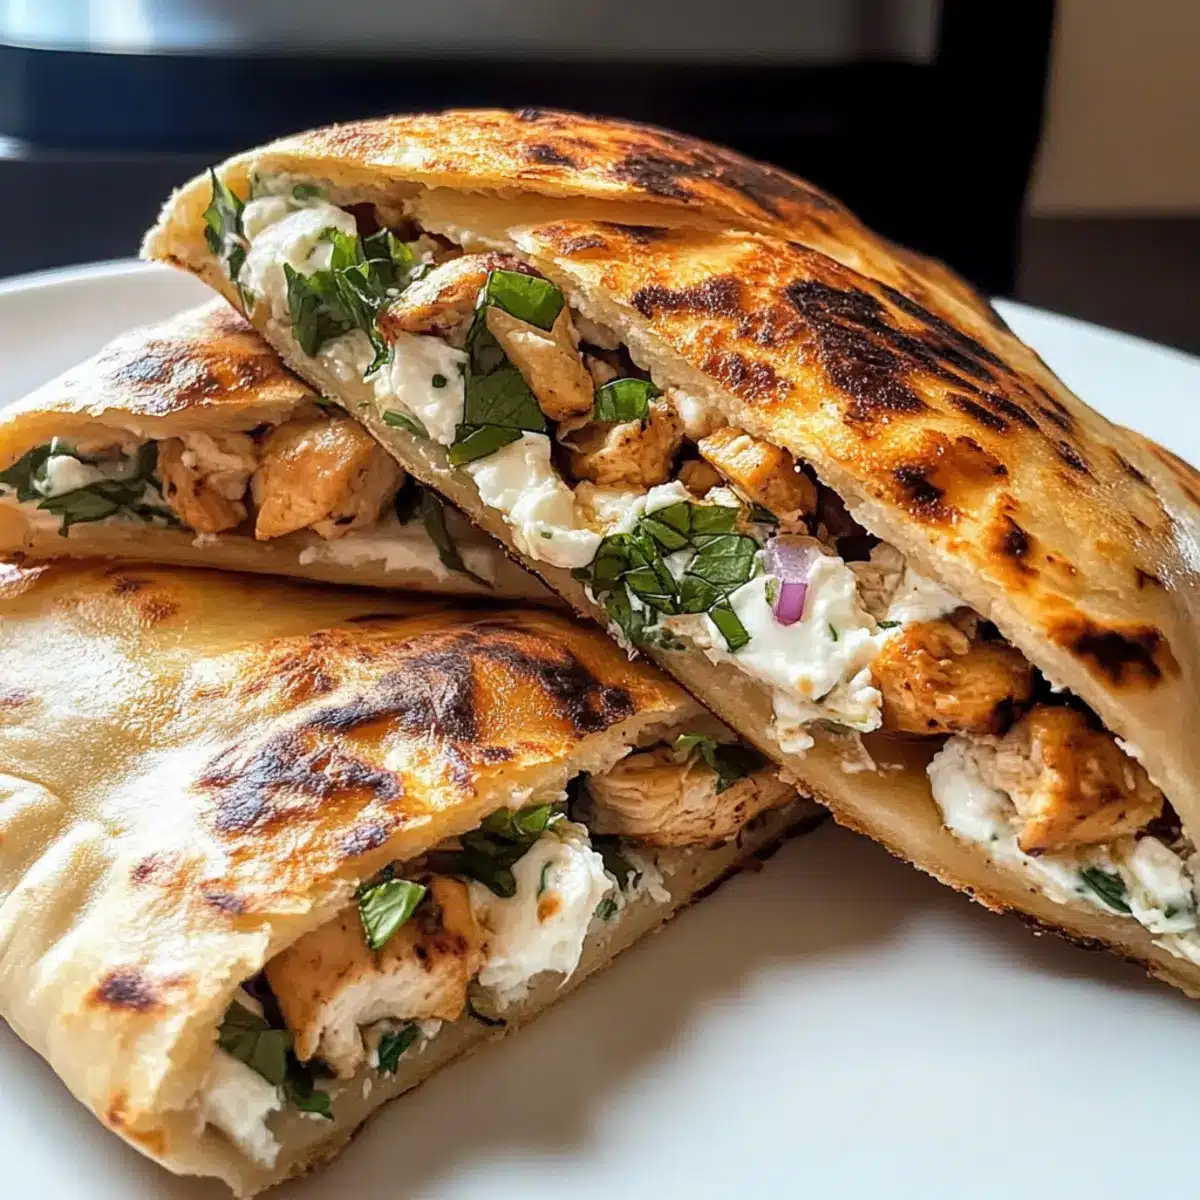
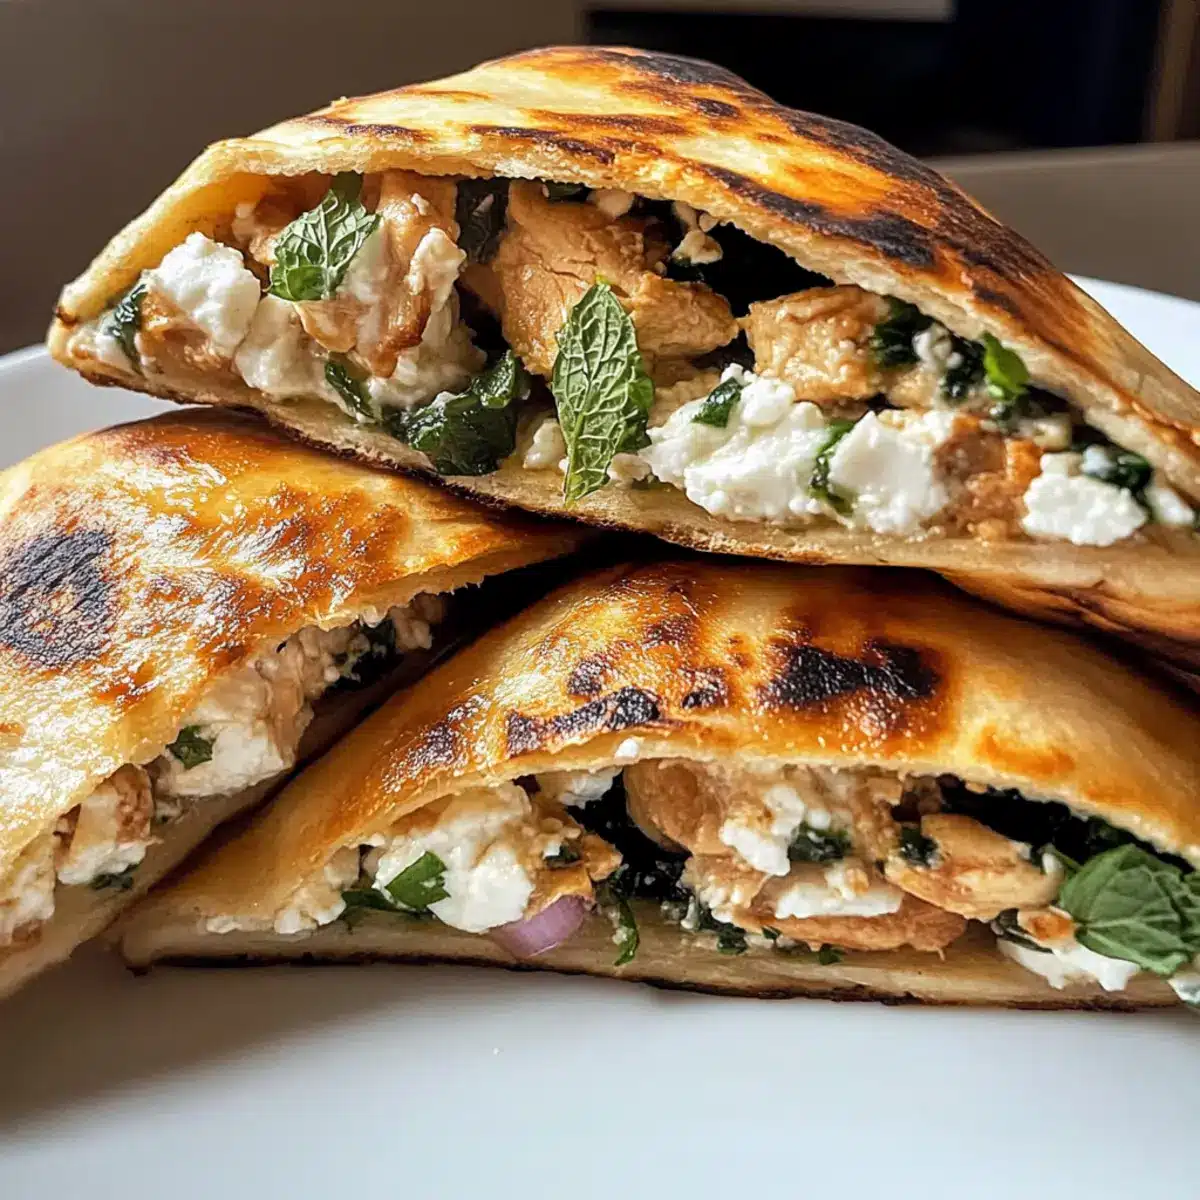
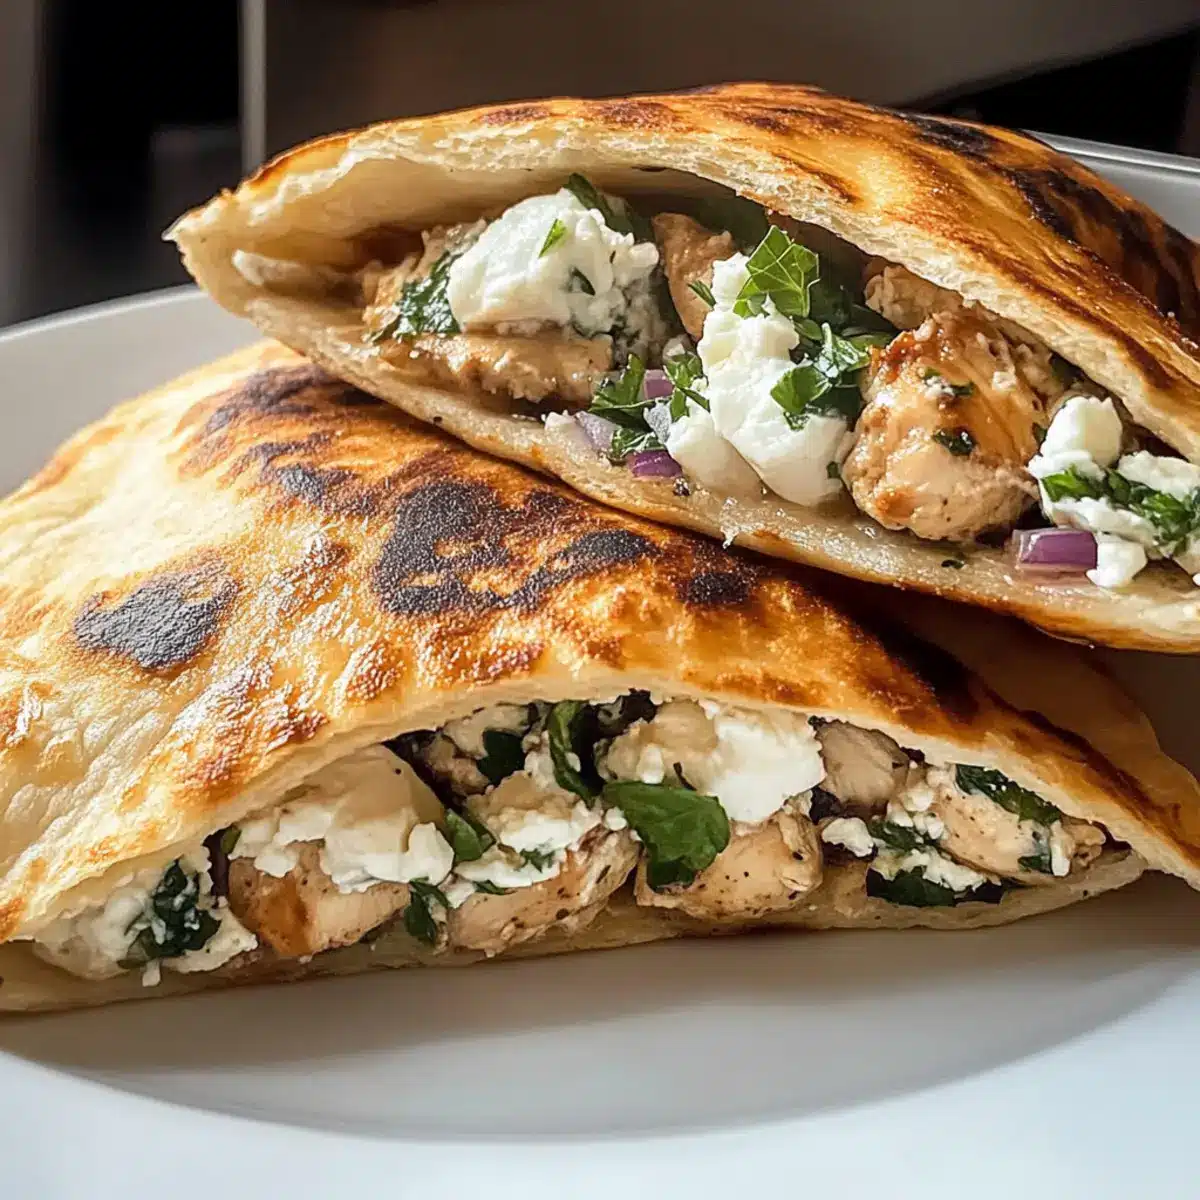
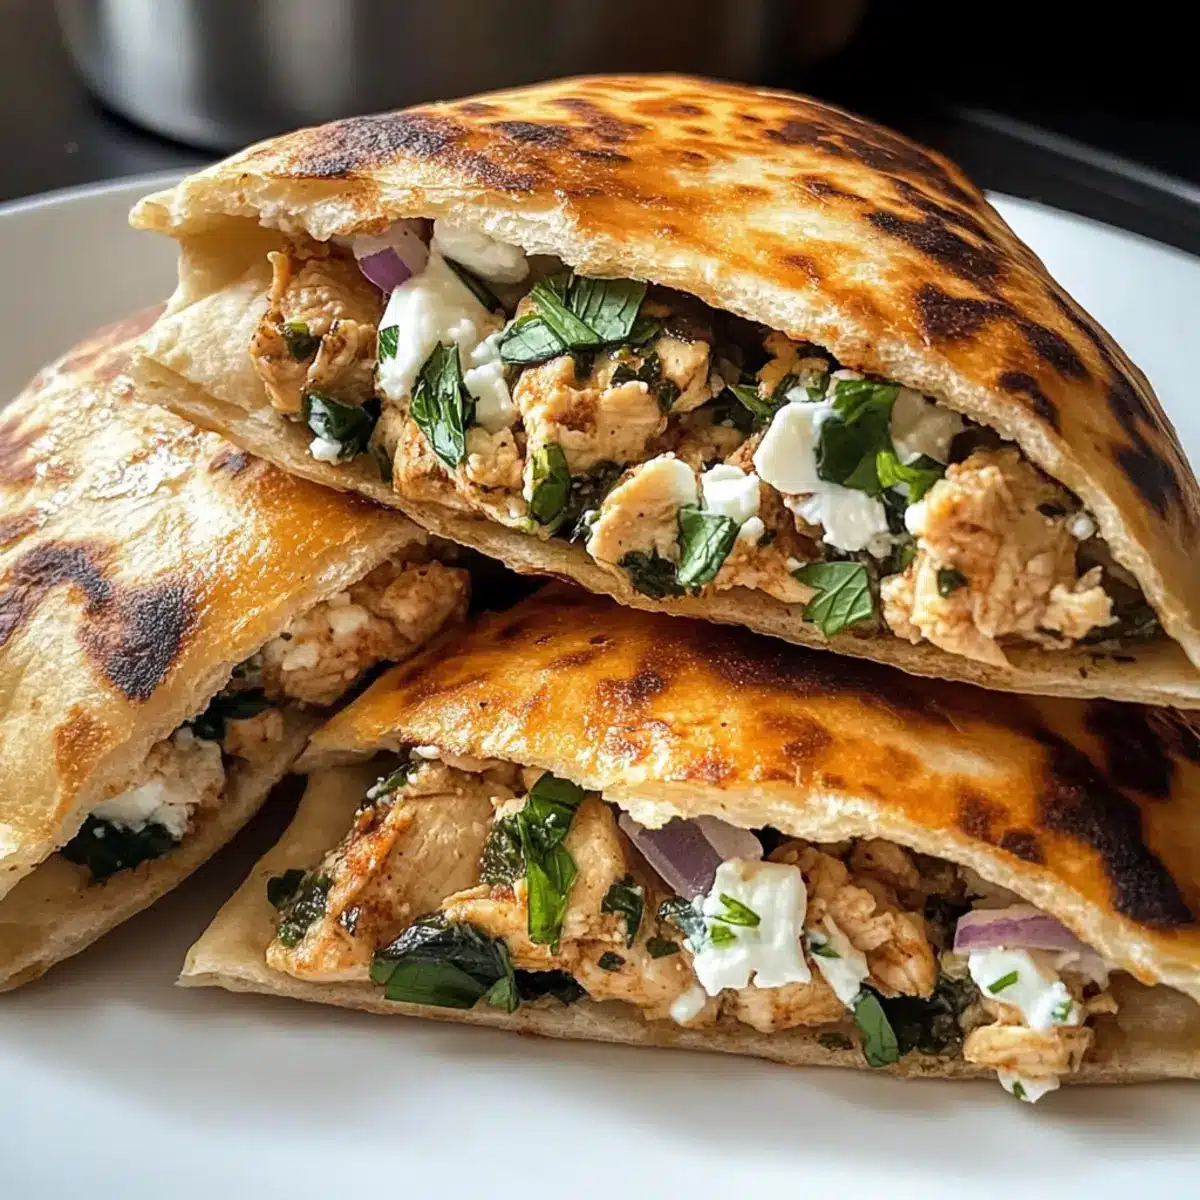
There’s nothing quite like the joy of biting into a crispy pita pocket, especially when it’s filled with tender chicken and creamy feta that practically dances on your taste buds. My Crispy Pita with Chicken & Feta recipe brings a little piece of the Mediterranean right into your kitchen, perfect for those nights when you crave homemade goodness without spending hours over the stove. In under 30 minutes, you can enjoy this high-protein delight that’s not just satisfying but also completely customizable for picky eaters. Whether you’re serving it as a quick weeknight meal or a fun appetizer for friends, you’ll find it’s a crowd-pleaser that never disappoints. Curious about how to make these golden, crispy pitas that are as comforting as they are delicious? Let’s dive in!
Why is this pita recipe a must-try?
Simplicity made delicious: This recipe requires minimal prep and is ready in under 30 minutes, perfect for busy weeknights.
Customizable to your taste: With options to swap chicken for roasted veggies or spice it up with jalapeños, everyone can enjoy their own version.
High-protein goodness: Packed with lean chicken and creamy feta, it’s a filling choice that keeps you satisfied.
Crowd-pleaser appeal: Serve these crispy pitas at your next gathering, alongside tzatziki or a fresh Greek salad, and watch them disappear!
Crispy texture delight: The golden exterior contrasts wonderfully with the juicy filling, providing a satisfying bite that you’ll crave again and again.
Pita with Chicken & Feta Ingredients
For the Filling
• Chicken Mince – A lean, tender source of protein that makes this pita with chicken & feta hearty. Substitute with ground turkey for a variation.
• Feta Cheese – Creamy and tangy, it adds richness to the filling; goat cheese can be used for a different flavor profile.
• Red Onion – Finely chopped for sweetness and crunch; yellow onion works in a pinch for a milder taste.
• Garlic – Minced to enhance flavor depth; fresh garlic is recommended for the best results.
• Lemon Juice – Brightens the dish and balances flavors; lime juice can serve as a tasty alternative.
• Lemon Zest – Infuses concentrated citrus flavor; omit if unavailable, though it enhances the overall brightness.
• Fresh Mint – Provides a refreshing note; basil offers a sweet twist if you’d like a change.
• Fresh Parsley – Adds a mildly peppery flavor; substitute with cilantro if desired.
For Frying
• Olive Oil – Adds richness while frying the pitas; avocado oil can be a great substitute for a higher smoke point.
For the Pockets
• Pita Bread – The perfect pocket for your filling; whole wheat pita offers a healthier option.
Feel free to customize with any extras you love, making this dish uniquely yours!
Step‑by‑Step Instructions for Crispy Pita with Chicken & Feta
Step 1: Prep the Filling
In a large mixing bowl, combine chicken mince, crumbled feta, chopped red onion, minced garlic, lemon juice, lemon zest, and finely chopped fresh mint and parsley. Season the mixture generously with salt and pepper. Use your hands or a fork to mix everything thoroughly until well combined, ensuring the flavors meld beautifully. This preparation step will take about 5 minutes.
Step 2: Stuff the Pita
Take your pita bread and carefully slice them in half to create pockets. Using a spoon, fill each half with the chicken and feta mixture, being careful not to overstuff, as this can lead to bursting during cooking. Gently press the edges together to seal them, ensuring the filling stays securely inside. This assembling step should take around 5 minutes.
Step 3: Pan-Fry the Pita
Heat about 2 tablespoons of olive oil in a non-stick skillet over medium heat. Once the oil shimmers, place the stuffed pitas in the skillet, cooking them for 3-4 minutes on one side until they are golden brown and crispy. Carefully flip them over and cook for an additional 3-4 minutes until the other side is equally golden. This frying step brings the crispy pita with chicken & feta to life!
Step 4: Bake for Extra Crispiness (Optional)
For an extra layer of crunch, transfer the fried pitas to a baking sheet lined with parchment paper. Preheat your oven to 180°C (350°F) and place the baking sheet in the oven. Bake the stuffed pitas for 10-15 minutes, which will not only enhance their crispiness but also warm them through completely. Keep an eye on them to achieve the perfect golden color.
Step 5: Serve & Enjoy
Once baked to your preferred crispness, remove the pitas from the oven and let them cool for a minute. Serve them warm alongside a refreshing tzatziki sauce for dipping. These crispy pita pockets filled with chicken and feta are perfect for sharing or enjoying on your own as a delicious meal ready in under 30 minutes!
Pita with Chicken & Feta Variations
Feel free to let your creativity shine as you explore these delicious twists to make this recipe uniquely your own!
-
Vegetarian Option: Replace chicken with roasted mushrooms or lentils for a satisfying meatless choice that’s just as tasty.
-
Spicy Kick: Stir in chopped jalapeños or a dash of harissa to the filling for a flavorful heat that elevates each bite. Your taste buds will love the extra zing!
-
Herb Swap: Substitute fresh mint with basil for a subtle sweetness that adds a delightful aromatic touch to the filling. It’s a simple swap that changes the whole flavor profile!
-
Baked Version: For a healthier alternative, bake the stuffed pitas directly instead of frying. Just pop them in the oven until golden and crispy for a guilt-free option.
-
Cheesy Twist: Add cheese such as shredded mozzarella or a sprinkle of Parmesan into the mixture for an indulgent twist. Melty cheese takes this dish to the next level!
-
Whole Wheat Pita: Opt for whole wheat pita bread for added fiber that retains the deliciousness. It’s a small swap that packs in a little extra nutrition.
-
Zesty Citrus: Mix in lime juice along with the lemon juice for an exciting citrus flavor that can brighten your pitas. A splash of zest can transform the taste!
-
Fresh Veggies: Toss in some finely chopped bell peppers or spinach for a colorful, nutrient-rich filling that complements the chicken beautifully. It’s a wonderful way to sneak in some veggies!
If you’re interested in other delightful recipes, consider trying Cajun Chicken Garlic or Ginger Scallion Chicken. These dishes can inspire even more delicious meals for your family!
Expert Tips for Crispy Pita with Chicken & Feta
-
Perfectly Hot Oil: Always ensure the oil is hot enough before frying to achieve that desirable crispy texture. A cold skillet will result in soggy pitas.
-
Avoid Overstuffing: It’s tempting to fill those pita pockets to the brim, but overstuffing can lead to messy bursts during cooking. Keep it moderate for best results!
-
Flavor Boost: For a deeper flavor, sauté the garlic and onion in olive oil before mixing into the chicken. This step enhances the taste of your crispy pita with chicken & feta.
-
Check Doneness: Use a thermometer; your filling should reach at least 165°F (75°C) to ensure the chicken is fully cooked and safe to eat.
-
Rest Before Serving: Let the pitas rest for a minute after cooking. This brief cooling time helps the filling settle and makes it easier to enjoy without burning your mouth!
Make Ahead Options
These Crispy Pita with Chicken & Feta are a game-changer for busy weeknights! You can prepare the filling—combining the chicken mince, feta, onion, garlic, lemon juice, zest, and herbs—up to 24 hours in advance and store it in the refrigerator. This not only saves you time but also allows the flavors to meld beautifully. When you’re ready to enjoy your pitas, simply stuff the mixture into the pita pockets and pan-fry them for 3-4 minutes on each side until golden. For optimal quality, make sure to refrigerate the filling in an airtight container and take it out just before cooking. You’ll have homemade deliciousness on the table with minimal effort!
What to Serve with Crispy Pita with Chicken & Feta
Pairing your delightful crispy pitas with the right sides transforms them into a memorable meal, perfect for any occasion.
- Tzatziki Sauce: This cool, creamy dip complements the warm, savory pitas, enhancing their flavors with a refreshing cucumber and garlic twist.
- Greek Salad: Fresh tomatoes, cucumbers, and olives add a crunchy brightness that balances the richness of the feta and chicken. Tossing it with a zesty vinaigrette elevates the meal even further.
- Roasted Vegetables: Caramelized vegetables bring a sweet, earthy element to the table, creating a delicious contrast to the crispy pitas. Try bell peppers, zucchini, and eggplant for an easy, colorful side.
- Hummus: Silky and rich, hummus makes for another great dip. Serve with pita chips or veggies for guests to graze alongside your main dish.
- Chickpea Salad: A hearty, protein-packed salad with chickpeas, bell peppers, and herbs can serve as a perfect side, adding texture and flavor.
- Wine Pairing: Consider a crisp white wine, like a Sauvignon Blanc, which enhances the Mediterranean flavors while refreshing the palate.
- Dessert: For a sweet ending, pair with baklava, a pastry that provides delightful crunch and honeyed sweetness, rounding out your Mediterranean-inspired meal.
- Lemonade: This zesty beverage, fresh and invigorating, complements the savory elements while providing a lovely balance to your flavors.
Storage Tips for Pita with Chicken & Feta
-
Room Temperature: Enjoy your crispy pita with chicken & feta within 2 hours of cooking for optimal freshness. Beyond that, store in the fridge.
-
Fridge: Keep any leftovers in an airtight container for up to 3 days. This helps maintain the flavors and allows you to savor them later.
-
Freezer: For longer storage, freeze the stuffed pitas individually wrapped in plastic wrap and then in aluminum foil for up to 2 months.
-
Reheating: Reheat in the oven at 180°C (350°F) for about 10-15 minutes to restore that desirable crispiness. Microwave reheating is quick, but may result in a softer texture.
Crispy Pita with Chicken & Feta Recipe FAQs
What type of chicken mince is best for this recipe?
Absolutely! A lean chicken mince works great as it keeps each pita filling light and moist. I recommend using ground chicken for the best flavor and texture, but you can also opt for ground turkey if you’re looking for a subtler taste. Just ensure it’s fresh and has a nice, bright color!
How long can I store leftovers, and what’s the best way?
You can store leftover crispy pitas in an airtight container in the refrigerator for up to 3 days. If you want them to maintain their taste and texture, consider reheating them in the oven for about 10-15 minutes at 180°C (350°F) instead of the microwave. This method will help restore their crispy exterior.
Can I freeze the stuffed pitas, and how should I do it?
Of course! Freezing is a great option if you’ve made more than you can eat. To freeze, wrap each stuffed pita individually in plastic wrap and then place them in a freezer-safe bag. They can last up to 3 months. When you’re ready to enjoy them, bake straight from the freezer at 180°C (350°F) for 15-20 minutes or until heated through.
What if the pitas burst while frying?
Very common! If your pitas burst, it might be that they were overstuffed, or the oil wasn’t hot enough. To avoid this, ensure you only fill them moderately and that the oil is hot before frying. If they do burst, don’t worry—just tuck the filling back in and keep frying; they’ll still be delicious!
Are there any dietary considerations for this recipe?
Absolutely! For those with dairy allergies, substituting feta with a dairy-free cheese or omitting cheese entirely can work well. Additionally, if you want a vegetarian option, consider swapping chicken with a combination of beans and spices or roasted veggies. Just make sure to check for any allergens based on your guests’ dietary needs!
What tools do I need for this recipe?
To make your crispy pita with chicken & feta, you’ll need a large mixing bowl for the filling, a skillet for frying, and optionally, an oven-safe baking sheet if you choose to bake them for extra crispiness. A sharp knife is needed for slicing the pita, and don’t forget a spoon for stuffing those delicious pitas!
Crispy Pita with Chicken & Feta: A Flavorful Weeknight Winner
Ingredients
Equipment
Method
- In a large mixing bowl, combine chicken mince, crumbled feta, chopped red onion, minced garlic, lemon juice, lemon zest, and finely chopped fresh mint and parsley. Season with salt and pepper and mix thoroughly.
- Take the pita bread and slice them in half to create pockets. Fill each half with the chicken and feta mixture, pressing the edges to seal.
- Heat olive oil in a non-stick skillet over medium heat. Fry the stuffed pitas for 3-4 minutes on each side until golden and crispy.
- For extra crispiness, transfer the pitas to a baking sheet and bake at 180°C (350°F) for 10-15 minutes.
- Serve warm with tzatziki sauce for dipping and enjoy your crispy pita with chicken and feta.
Leave a Reply