
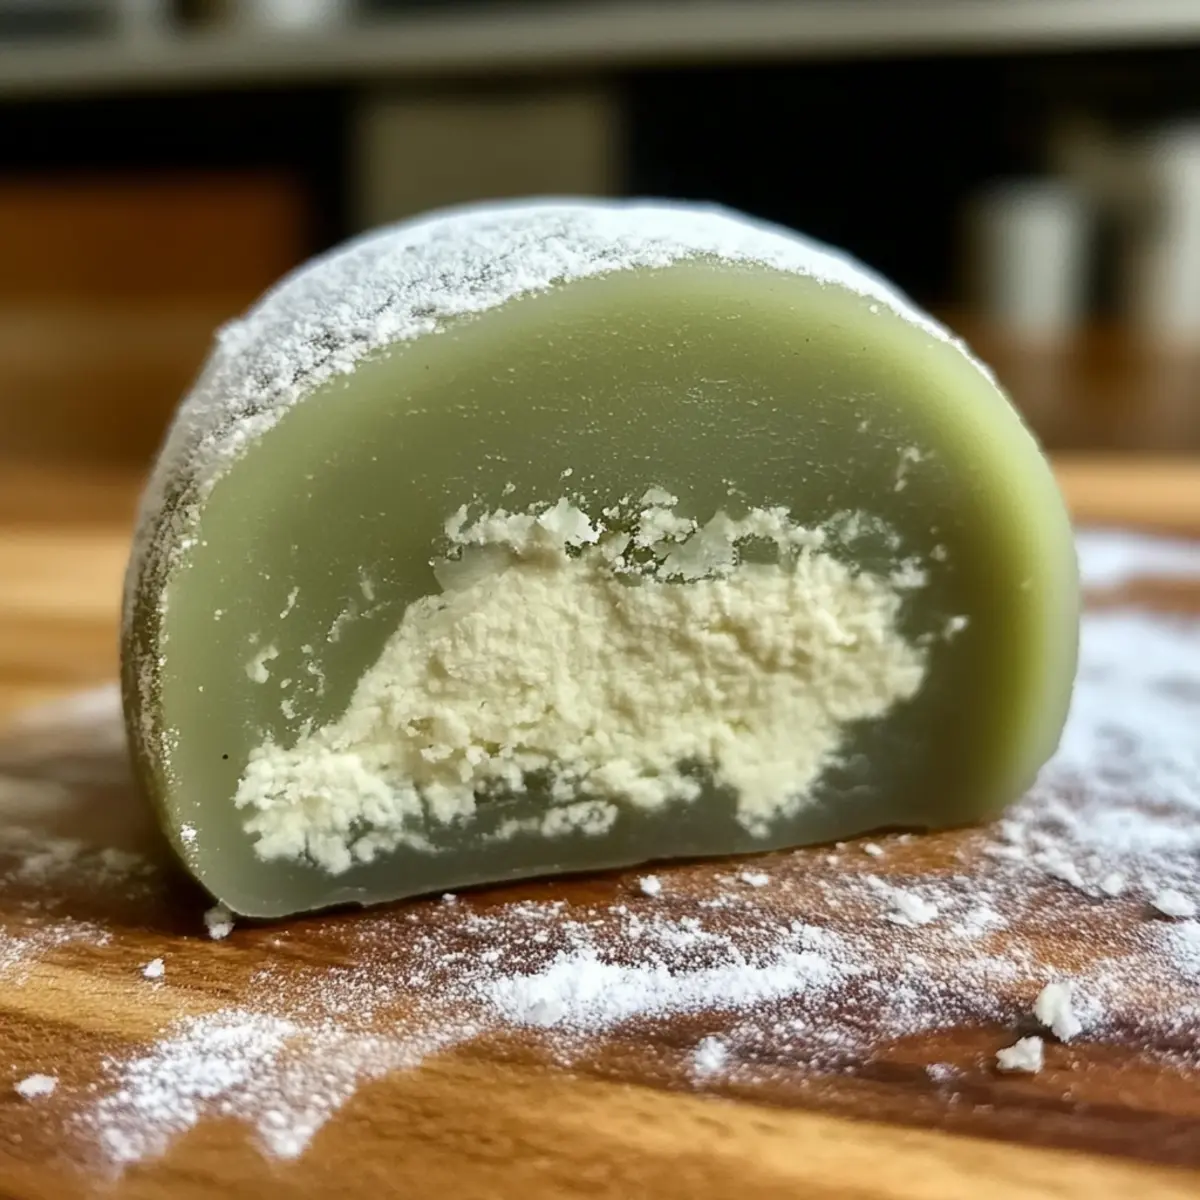
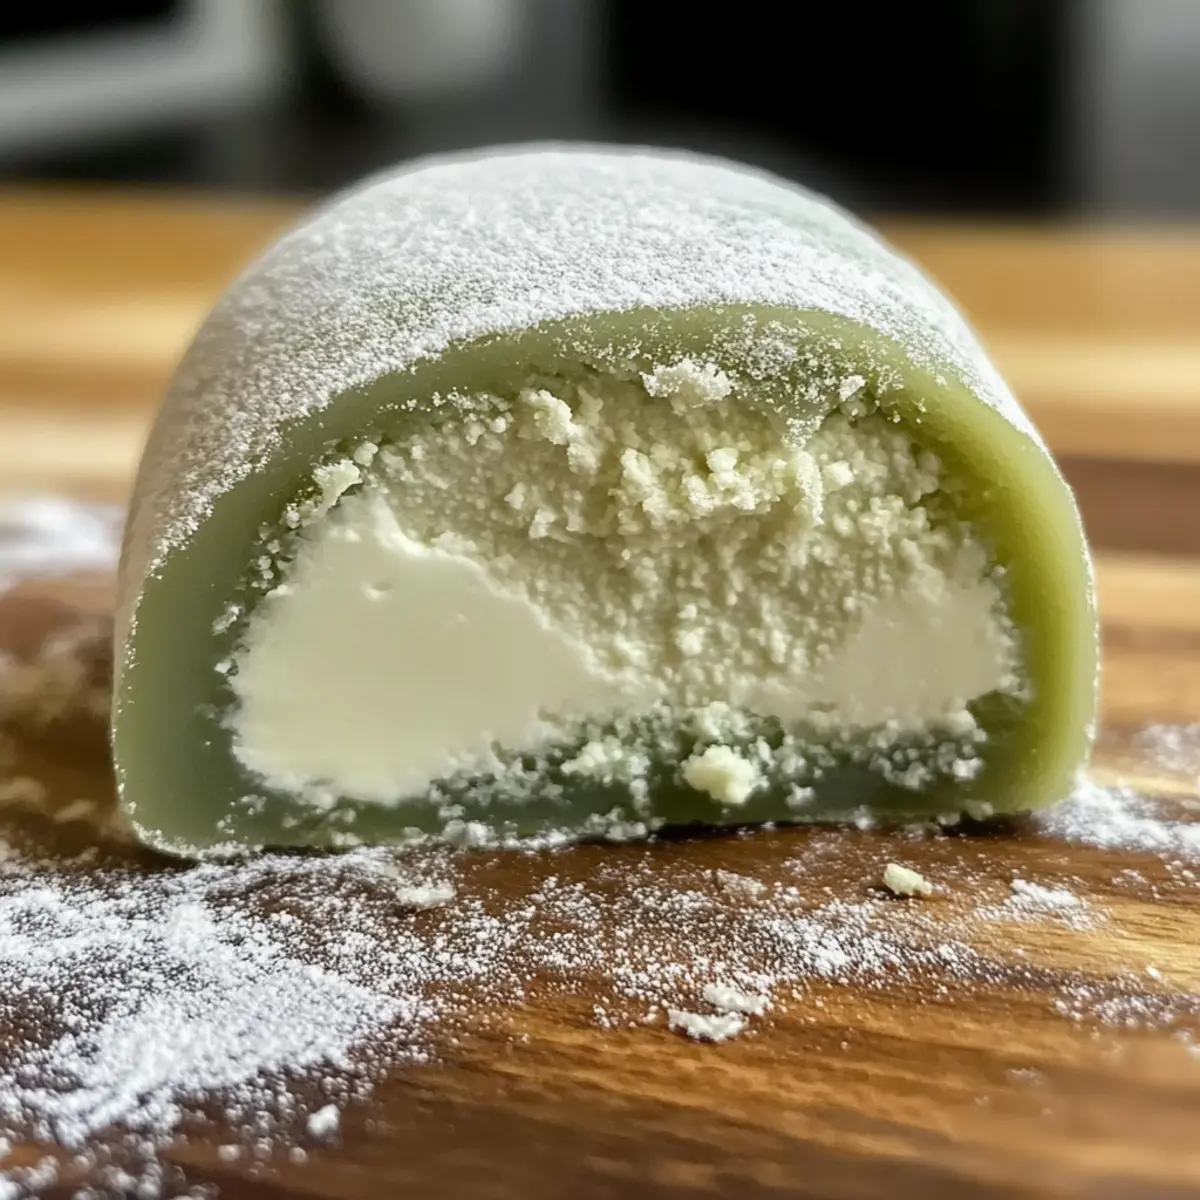
As I unwrapped a delicate, green-hued mochi, I was transported to a quaint tea house in Japan, where the air is infused with the rich aroma of matcha and sweet delights. This Homemade Matcha Cheesecake Daifuku combines a soft, chewy exterior with a creamy cheesecake center that feels like a warm hug on a chilly day. Why opt for a mundane dessert when you can whip up this gluten-free treasure? Not only is it surprisingly easy to make, but it’s also a surefire crowd-pleaser for gatherings or a special indulgence just for you. With each bite, you’ll discover the earthiness of matcha harmonizing beautifully with velvety cheesecake—creating a unique dessert that’s sure to amaze. Curious about how to create this delightful fusion of flavors? Let’s dive into the magic of making Matcha Cheesecake Daifuku!
Why Is This Recipe Unique?
Uniqueness shines through in every bite of this Matcha Cheesecake Daifuku. Gluten-Free and guilt-free, it fits into various dietary needs without sacrificing flavor. Easy to Make yet impressive enough for guests, this dessert is perfect for any occasion. Each chewy mochi shell envelops a rich cheesecake filling, offering a delightful contrast in textures. Plus, don’t miss the chance to explore fun variations, like a Chocolate Twist or a fruity fusion to cater to your taste buds. Enjoy a dessert that’s not just a treat but an experience!
Matcha Cheesecake Daifuku Ingredients
For the Cheesecake Center
• Cream Cheese – Adds richness and creaminess; full-fat is recommended for the best flavor.
• Sugar – Provides sweetness; feel free to use alternative sweeteners for a different twist.
• Matcha Powder – Infuses earthy flavor and vibrant color; opt for high-quality, ceremonial-grade matcha for the best results.
• Heavy Cream – Helps create a smooth and thick filling; chill for optimal whipping.
For the Mochi Dough
• Glutinous Rice Flour – Forms the mochi dough; do not substitute with regular rice flour as it won’t yield the same texture.
• Cornstarch – Ensures a smooth batter for the mochi, making it easier to work with.
• Whole Milk – Adds moisture to the dough for the perfect chewy texture.
• Unsalted Butter – Enriches the dough during kneading; melted butter works best.
For Dusting & Final Touches
• Cooked Glutinous Rice Flour – Used for dusting to prevent the mochi from sticking; keep extra on hand while shaping.
• Additional Matcha Powder – Optional for dusting, enhancing both flavor and aesthetics.
Dive into creating your own Matcha Cheesecake Daifuku and impress yourself and others with this unique dessert!
Step‑by‑Step Instructions for Matcha Cheesecake Daifuku
Step 1: Prepare the Cheesecake Filling
Begin by blending 8 ounces of cream cheese and 3/4 cup of sugar in a mixing bowl until smooth and creamy. Gradually mix in 1 tablespoon of matcha powder for that delightful earthy flavor. Next, whisk in 1 cup of heavy cream until thickened. Pour this luscious mixture into silicone molds and freeze for at least 2 hours, allowing the cheesecake centers to solidify.
Step 2: Make the Mochi Dough
In a separate bowl, whisk together 1 cup of glutinous rice flour, 1 tablespoon of cornstarch, and 2 tablespoons of sugar until well combined. Slowly stir in 3/4 cup of whole milk to create a smooth batter. Transfer this to a heatproof dish and steam over boiling water for 20 minutes, stirring occasionally, until the dough becomes translucent and sticky.
Step 3: Knead the Dough
Once the mochi dough is cooked, let it cool slightly, ensuring it remains warm to the touch. Dust your work surface with cooked glutinous rice flour, then knead the dough for 5-7 minutes until it becomes smooth and elastic. This step is crucial for achieving the perfect texture for your Matcha Cheesecake Daifuku.
Step 4: Form Mochi Balls
Divide the kneaded dough into equal portions using a sharp knife or dough scraper. Roll each piece into a ball and then flatten it into a disc, ensuring the center is slightly thicker to hold the filling. Prepare a dusting area with more rice flour to prevent sticking as you work.
Step 5: Fill the Mochi
Carefully remove the frozen cheesecake centers from the molds. Place one on top of each flattened mochi disc, then fold the edges up and pinch them together to seal the filling inside. Work quickly but gently to maintain the integrity of the mochi. Dust the finished daifuku with additional rice flour to prevent sticking.
Step 6: Final Touches
For the finishing touch, sift a light dusting of matcha powder over the tops of your Matcha Cheesecake Daifuku for added flavor and visual appeal. Refrigerate the assembled treats for at least 30 minutes to set before serving, allowing the flavors to meld beautifully.
What to Serve with Matcha Cheesecake Daifuku
Indulging in the ethereal layers of chewy mochi and creamy cheesecake is a sensory delight that can be enhanced by thoughtful pairings.
-
Matcha Latte: A warm, frothy cup brings out the earthy matcha flavor, creating a harmonious balance with your daifuku.
-
Fresh Berries: The tartness of berries like strawberries or raspberries complements the sweet richness of the cheesecake, adding a burst of freshness.
-
Vanilla Ice Cream: A scoop of creamy vanilla ice cream creates a delightful contrast in temperature and texture, making every bite even more indulgent.
-
Green Tea: Sipping on unsweetened green tea enhances the matcha experience, offering a light and soothing palate cleanser.
-
Almond Cookies: The crunchy texture and nutty flavor of almond cookies serve as a delightful contrast to the soft chewy daifuku, perfect for a snack pairing.
-
Yuzu Sorbet: A refreshing, citrusy sorbet cleanses the palate between bites and adds an exotic twist to the dessert experience.
-
Chocolate Dip: For a unique chocolatey treat, lightly dip each daifuku in dark chocolate; the combination of flavors and textures is sure to impress.
-
Chilled Sake: A glass of chilled sake creates a delicate pairing, balancing the sweetness of the daifuku with its smooth and slightly dry profile.
-
Lavender Tea: The floral notes of lavender tea invite a calming finish to the meal, enhancing the sensory experience surrounding your matcha delight.
How to Store and Freeze Matcha Cheesecake Daifuku
• Room Temperature: Enjoy freshly made Matcha Cheesecake Daifuku at room temperature for the best texture, but consume within a few hours to maintain freshness.
• Fridge: Store in an airtight container in the refrigerator for up to 2 days. Make sure they are well-dusted with rice flour to prevent sticking.
• Freezer: For longer storage, freeze the daifuku in an airtight container for up to one month. When ready to enjoy, let them thaw in the fridge overnight for optimal texture.
• Reheating: If you prefer a warm dessert, place the frozen daifuku in the microwave for about 10-15 seconds. This will slightly soften the mochi while keeping the cheesecake filling cool.
Make Ahead Options
These Matcha Cheesecake Daifuku are perfect for busy home cooks looking to save time! You can prepare the cheesecake filling up to 3 days in advance; simply blend the ingredients and freeze the mixture in silicone molds. The mochi dough can be made 24 hours ahead—just steam and knead it, then store it in an airtight container at room temperature to maintain its elasticity. When you’re ready to serve, fill the mochi with the frozen cheesecake centers and shape them as instructed. This way, you’ll have a delightful dessert ready to impress your guests with minimal effort and just as delicious!
Matcha Cheesecake Daifuku Variations
Feel free to let your creativity shine with these delightful adaptations that will elevate your Matcha Cheesecake Daifuku to new heights!
-
Chocolate Twist: Swap out matcha powder for cocoa to create a rich chocolate version that pleases any chocolate lover’s palate. It’s a sweet twist that maintains the daifuku’s chewy texture!
-
Fruity Fusion: Incorporate fruity fillings like strawberry or raspberry puree for a burst of flavor. This variation not only adds sweetness but also a vibrant color that looks gorgeous on your dessert table.
-
Yogurt Filling: Substitute the cheesecake filling with a yogurt-based mix for a lighter treat. The tangy flavor will surprise your taste buds while still offering a creamy center.
-
Nutty Delight: Mix in crushed nuts or almond paste into the filling or add as a crunchy topping. This variation introduces a satisfying crunch that contrasts beautifully with the smooth cheesecake.
-
Spicy Kick: Embellish the flavor with a hint of chili powder mixed into the mochi dough or filling. This surprising contrast can add an exciting layer to your dessert experience!
-
Mini Mochi: Create bite-sized versions for sharing at parties or gatherings. This way, guests can indulge in multiple flavors without any guilt!
-
Decorative Touches: Enhance the visual appeal and flavor profile by topping with edible gold or vibrant fruits. This elevates the entire dessert experience and makes it perfect for special occasions.
Consider diving into other delicious recipes like the Red Velvet Cheesecake for more delightful twists and turns in your dessert adventures! There’s always something new to discover in your kitchen!
Expert Tips for Matcha Cheesecake Daifuku
• Keep It Warm: Ensure the mochi dough stays warm while handling to maintain elasticity—this prevents tearing and makes shaping easier.
• Quality Matters: Choose high-quality matcha powder for vibrant color and deeper flavor in your Matcha Cheesecake Daifuku. Your choice can make a significant difference!
• Dust Generously: Use ample cooked glutinous rice flour on your hands and surfaces to prevent sticking during the assembly process. This will keep your daifuku intact.
• Frozen Filling: Make sure the cheesecake filling is completely frozen before wrapping it in mochi. This prevents the filling from melting and ensures a delightful creamy center.
• Experiment with Variations: Don’t hesitate to try variations! Simple swaps like chocolate or fruit purees can offer exciting new twists to your Matcha Cheesecake Daifuku.
Matcha Cheesecake Daifuku Recipe FAQs
What type of matcha powder should I use?
Choosing high-quality, ceremonial-grade matcha is key to achieving the vibrant color and rich flavor in your Matcha Cheesecake Daifuku. Lower grades may result in a dull taste and a less appealing appearance.
How should I store the Matcha Cheesecake Daifuku?
Store the daifuku in an airtight container in the refrigerator for up to 2 days. If you have leftovers or made a batch ahead of time, you can freeze them for up to one month. Just ensure they’re dusted with rice flour to prevent sticking!
Can I freeze the cheesecake filling before making the daifuku?
Absolutely! In fact, it’s recommended to freeze the cheesecake filling in silicone molds for at least 2 hours before wrapping them in mochi. This helps maintain the filling’s integrity and prevents it from melting into the mochi during assembly.
What’s the best way to handle the mochi dough?
Keep the mochi dough warm while handling it to ensure it stays elastic and does not tear. Dust your hands and work surfaces generously with cooked glutinous rice flour to prevent sticking, making the shaping process much smoother.
Is this dessert suitable for people with gluten allergies?
Yes! This Matcha Cheesecake Daifuku is gluten-free, as it uses glutinous rice flour instead of traditional wheat flour. Always be sure to check labels on your ingredients to ensure they are certified gluten-free if allergies are a concern.
Perfect Matcha Cheesecake Daifuku - A Delightfully Chewy Treat
Ingredients
Equipment
Method
- Blend the cream cheese and sugar until smooth, mix in the matcha powder, then whisk in the heavy cream until thickened. Freeze for at least 2 hours.
- Whisk glutinous rice flour, cornstarch, and sugar. Slowly stir in whole milk to create a batter. Steam for 20 minutes until translucent.
- Let the mochi dough cool slightly and knead for 5-7 minutes until smooth and elastic.
- Divide the dough and roll into balls. Flatten each ball and make the center slightly thicker.
- Place frozen cheesecake centers in each flattened mochi disc and pinch to seal.
- Dust the tops with matcha powder and refrigerate for 30 minutes before serving.
Leave a Reply