
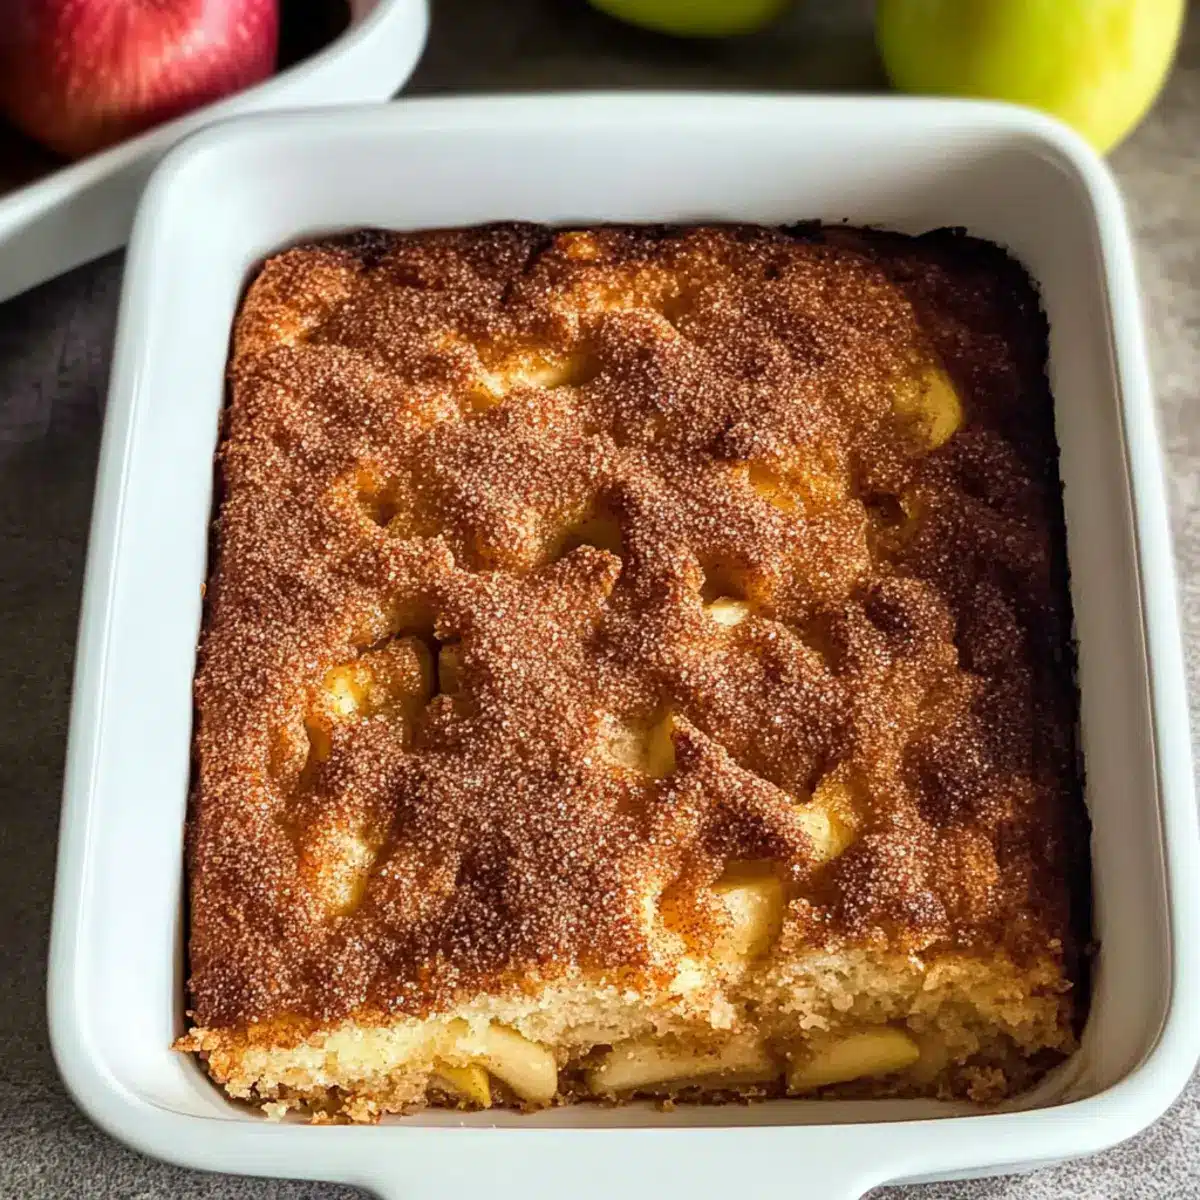
As the leaves begin to turn and the air grows crisp, there’s nothing quite like the aroma of freshly baked goods wafting through the house. This Easy Apple Cake is my go-to when I want to create that cozy atmosphere without the fuss of complicated recipes. With its moist, tender crumb and sweet-tart apple slices nestled within, this cake captures the essence of fall in every bite. Not only is it a breeze to whip up, but it’s also a showstopper that can turn any gathering into a heartwarming experience. Imagine serving this delightful treat with a dollop of whipped cream or a scoop of vanilla ice cream—pure bliss! Ready to bake something that’ll bring smiles and satisfy cravings? Let’s dive in!
What Makes This Apple Cake Special?
Simplicity at Its Best: This Easy Apple Cake requires minimal baking expertise, making it perfect for novice bakers and seasoned chefs alike.
Bursting with Flavor: With the perfect balance of sweet-tart apples and warm cinnamon sugar, each slice is an absolute delight.
Versatile Options: Feel free to customize with nuts or different apple varieties for a unique twist, just like in my Sprout Kale Apple salad!
Ideal for Gatherings: It’s not just a cake; it’s a centerpiece for any gathering, from family dinners to festive celebrations.
A Cozy Treat: Enjoy it warm or at room temperature, perhaps with a scoop of ice cream or a drizzle of caramel—just imagine pairing it with my Coconut Loaf Cake for a delicious dessert spread!
Easy Apple Cake Ingredients
• Get ready to bake a classic!
For the Cake Batter
- Butter – ½ cup, salted, room temperature; adds richness and a tender crumb. Use unsalted if preferred for more control over saltiness.
- Eggs – 2, room temperature; they bind ingredients and contribute to the cake’s structure. Ensure they’re at room temperature for even mixing.
- Red Apples – 2 cups, peeled & sliced; provide the signature flavor and moisture. A mix of Granny Smith and Red Gala gives the best sweet-tart contrast.
- Whole Milk – 1 cup, 3.25%, room temperature; adds moisture and richness. Substitute with dairy-free milk if desired.
- Vanilla – 2 tsp; enhances the flavor with warm undertones that complement the apples nicely.
- All-Purpose Flour – 2 cups; gives structure to the cake for that perfect slice.
- Granulated Sugar – 1½ cups; sweetens the batter and caramelizes during baking, creating a lovely crust.
- Baking Soda – 1 tsp; acts as a leavening agent helping the cake rise beautifully.
- Baking Powder – 2 tsp; works alongside baking soda to boost fluffiness and ensure a tender crumb.
For the Topping
- Brown Sugar – 3 tbsp; adds a wonderful sweetness and molasses flavor when sprinkled on top.
- Cinnamon – 1 tsp; provides a warm, cozy spice note that perfectly complements the apples in this Easy Apple Cake.
Let the baking begin, and get ready to enjoy a slice of nostalgia!
Step‑by‑Step Instructions for Easy Apple Cake
Step 1: Preheat the Oven and Prepare the Pan
Begin by preheating your oven to 350°F (175°C). While it warms up, grab a 9×13 inch deep baking pan and generously grease it with butter or non-stick spray. Ensuring your pan is properly greased will help your Easy Apple Cake release effortlessly once baked, so don’t skip this important step!
Step 2: Prepare the Apples
Next, take your two cups of red apples and begin peeling, coring, and slicing them into thin pieces. Aim for even slices about 1/4 inch thick, as this will ensure they soften beautifully while baking. Set the apple slices aside in a bowl, ready to be incorporated into the cake later.
Step 3: Cream Butter and Sugar
In a large mixing bowl or a stand mixer, add the softened butter and granulated sugar. Beat them together on medium speed until the mixture is light and fluffy, about 2-3 minutes. The texture should be creamy with a pale color, indicating that air has been incorporated, which is essential for a fluffy Easy Apple Cake.
Step 4: Add the Eggs
Now, it’s time to add the eggs, one at a time, to the creamed butter and sugar mixture. Make sure to beat well after each addition until fully incorporated. This step not only binds the ingredients but also helps in creating a stable structure for the cake once baked.
Step 5: Combine Dry Ingredients and Vanilla
In a separate bowl, mix the baking soda, baking powder, and vanilla extract into the main batter. Stir until just combined; you’ll notice the mixture will begin to froth slightly. This reaction helps to add air and rise to your Easy Apple Cake, making it light and airy.
Step 6: Incorporate the Milk
Gradually pour in the whole milk, continuing to mix on low speed until the batter is smooth and creamy. Don’t worry if it seems a bit separate at first—it will come together. The milk adds moisture and richness, vital for a tender crumb in your cake.
Step 7: Fold in the Flour
Slowly add the all-purpose flour to the batter, folding it in gently using a spatula or wooden spoon. Be careful not to overmix; just work it until the flour is incorporated and the batter is thick yet spreadable. It should feel velvety and luscious, perfect for your Easy Apple Cake.
Step 8: Layer the Cake Batter and Apples
Pour half of the batter into your prepared pan, spreading it evenly across the bottom. Next, arrange the apple slices atop the batter, creating a beautiful layer that will infuse the cake with sweet flavor. Finally, spoon the remaining batter over the apples, ensuring they are covered well.
Step 9: Prepare the Topping
In a small bowl, mix the brown sugar and cinnamon together; then sprinkle this delightful mixture evenly over the top of the cake. This topping will caramelize beautifully during baking, creating a crunchy, sweet crust that is a signature feature of this Easy Apple Cake.
Step 10: Bake the Cake
Insert the cake into the preheated oven and bake for 35-45 minutes. Keep an eye on it, and check for doneness by inserting a toothpick into the center; if it comes out clean or with a few moist crumbs, your Easy Apple Cake is ready to come out. The top should be golden brown and slightly puffed.
Step 11: Cool and Serve
Once baked, remove the cake from the oven and allow it to cool in the pan for at least 15 minutes before slicing. This cooling time helps the cake set and makes it easier to cut into perfect squares. Serve warm or at room temperature, and watch as smiles light up around your gathering!
Make Ahead Options
These Easy Apple Cake preparations make your baking in advance a breeze, perfect for busy home cooks! You can slice and prep the apples (combine with a bit of lemon juice to prevent browning) up to 24 hours ahead, storing them in an airtight container in the refrigerator. Additionally, you can mix the dry ingredients (flour, baking soda, baking powder, sugar, and cinnamon) and keep them sealed for up to 3 days. When you’re ready to bake, simply combine the wet ingredients with the prepped dry mix, fold in the apples, and bake to perfection. This way, you’ll enjoy that freshly baked feel without the last-minute rush—your Easy Apple Cake will be just as delicious!
Expert Tips for Easy Apple Cake
-
Use Room Temperature Ingredients: Ensure your eggs, butter, and milk are at room temperature for a smoother batter that blends easily, leading to a tender Easy Apple Cake.
-
Choose the Right Apples: Opt for a mix of sweet and tart apples, like Granny Smith and Red Gala, for balanced flavor and moisture throughout the cake.
-
Don’t Overmix the Batter: Gently fold in the flour to prevent a tough texture; overmixing can result in a dense cake rather than the light, fluffy Easy Apple Cake you desire.
-
Perfecting the Topping: Mix the brown sugar and cinnamon well before sprinkling on top; this ensures even caramelization and a delicious crust that ties the flavors together beautifully.
-
Check for Doneness: Always test the cake with a toothpick—look for it to come out clean or with a few moist crumbs, indicating a perfectly baked Easy Apple Cake!
How to Store and Freeze Easy Apple Cake
-
Room Temperature: Keep your Easy Apple Cake in an airtight container at room temperature for up to 3 days. Make sure it’s completely cool before sealing to avoid moisture buildup.
-
Fridge: Storing in the refrigerator can extend its freshness for up to 5 days. Just wrap it tightly or place it in an airtight container to prevent it from absorbing any odors.
-
Freezer: You can freeze the cake, wrapping it tightly in plastic wrap and then aluminum foil, for up to 3 months. Thaw overnight in the fridge before serving for the best texture.
-
Reheating: When ready to enjoy, reheat slices in the microwave for about 15-20 seconds or warm them in a 350°F oven for 10 minutes for a freshly baked feel!
Easy Apple Cake Variations & Substitutions
Feel free to personalize this Easy Apple Cake with these delightful twists that will make your baked treat even more special!
-
Nutty Delight: Add 1 cup of chopped walnuts or pecans to the batter for a crunchy texture and nutty flavor that pairs perfectly with apples.
-
Gluten-Free Option: Swap half of the all-purpose flour for a gluten-free flour blend for a delicious alternative that everyone can enjoy.
-
Dairy-Free Twist: Use coconut milk or almond milk in place of whole milk for a dairy-free version without sacrificing moisture or flavor.
-
Spice It Up: Add a teaspoon of nutmeg or ginger for an additional layer of warmth that complements the cozy essence of the cake beautifully.
-
Fruity Addition: Mix in a cup of fresh blueberries or cranberries for a vibrant burst of flavor that adds a colorful twist!
-
Caramel Drizzle: Drizzle warm caramel sauce on top after baking for an indulgently sweet finish that adds a decadent flair.
-
Apple Variety Mix: Use a mix of apples like Honeycrisp and Braeburn to explore different flavor profiles while keeping it traditional.
-
Zesty Surprise: Incorporate the zest of one lemon or orange to brighten the flavors and add a refreshing touch to each bite.
No matter how you choose to adapt this Easy Apple Cake, it’s sure to be a warm, welcoming centerpiece at your gatherings! And for more delicious ideas, check out my Sticky Apple Cider recipe for a lovely savory option or this delightful Banana Cake Moist treat for dessert inspiration!
What to Serve with Easy Apple Cake
Imagine a warm slice of this delightful apple cake paired with comforting sides that elevate your dessert experience.
-
Vanilla Ice Cream: A classic topping that brings creaminess and a delightful contrast to the warm cake; it’s a match made in heaven.
-
Caramel Sauce: Drizzling caramel over the cake adds a luxurious touch and enhances the sweet-tart flavor of the apples beautifully.
-
Whipped Cream: Light and airy, a dollop of fresh whipped cream adds a luscious finish that complements each bite of cake perfectly.
-
Coffee: A steaming cup of coffee balances the sweetness of the cake, creating a cozy atmosphere for an afternoon treat.
-
Sliced Almonds: Toasted almond slices provide a delightful crunch, adding an elegant texture that contrasts well with the tender cake.
-
Cinnamon-Spiced Tea: A warm cup of tea infused with cinnamon beautifully mirrors the spices in the cake, creating a comforting pairing that’s perfect for chilly days.
-
Maple Glazed Roasted Vegetables: For a savory side, the earthy sweetness of roasted carrots and Brussels sprouts adds a flavorful contrast during a festive gathering.

Easy Apple Cake Recipe FAQs
How do I choose the right apples for the cake?
Absolutely! For the best flavor, select a mix of sweet and tart apples, such as Granny Smith and Red Gala. This combination offers a delightful balance, ensuring that every bite of your Easy Apple Cake is bursting with delicious apple flavor. Make sure the apples are firm and free of dark spots or bruises for optimal freshness.
What’s the best way to store my Easy Apple Cake?
To keep your Easy Apple Cake fresh, store it in an airtight container at room temperature for up to 3 days. If you want it to last a bit longer, it can be refrigerated for up to 5 days. Just remember to allow it to cool completely before sealing to avoid any moisture buildup.
Can I freeze the Easy Apple Cake?
Yes, you can! To freeze your Easy Apple Cake, fully cool it first, then wrap it tightly in plastic wrap and aluminum foil to avoid freezer burn. It can be stored for up to 3 months. When you’re ready to enjoy it, simply thaw the cake overnight in the fridge and reheat as desired, ensuring it retains that lovely texture.
What if my cake doesn’t rise properly?
If you find that your cake didn’t rise as much as expected, ensure you used fresh baking powder and baking soda, as these are crucial leavening agents. Also, be careful not to overmix the batter, as this can create a dense texture. If you spring a leak, mix your ingredients just until combined. Lastly, check that your oven is fully preheated to 350°F before baking.
Are there any dietary considerations for this recipe?
Definitely! You can make this Easy Apple Cake gluten-free by substituting the all-purpose flour with a gluten-free baking blend. If you’re catering to dairy sensitivities, feel free to use dairy-free milk and butter alternatives, ensuring everyone can enjoy a slice!
How should I serve my Easy Apple Cake?
For a delightful experience, serve your Easy Apple Cake warm, perhaps with a scoop of vanilla ice cream or a drizzle of caramel sauce. It’s the perfect treat for gatherings, offering a comforting blend of flavors that everyone will love!
Moist Easy Apple Cake that Everyone Will Love
Ingredients
Equipment
Method
- Preheat your oven to 350°F (175°C) and grease a 9x13 inch baking pan.
- Peel, core, and slice the apples into thin pieces.
- In a bowl, beat together the softened butter and granulated sugar until light and fluffy.
- Add the eggs one at a time, beating well after each addition.
- Mix baking soda, baking powder, and vanilla into the batter until just combined.
- Gradually pour in the milk, mixing until smooth and creamy.
- Fold in the flour gently until incorporated.
- Pour half of the batter into the prepared pan, layer apples, and then cover with remaining batter.
- Mix brown sugar and cinnamon, then sprinkle over the cake batter.
- Bake for 35-45 minutes, checking for doneness with a toothpick.
- Allow to cool for at least 15 minutes before slicing and serving.
Leave a Reply