
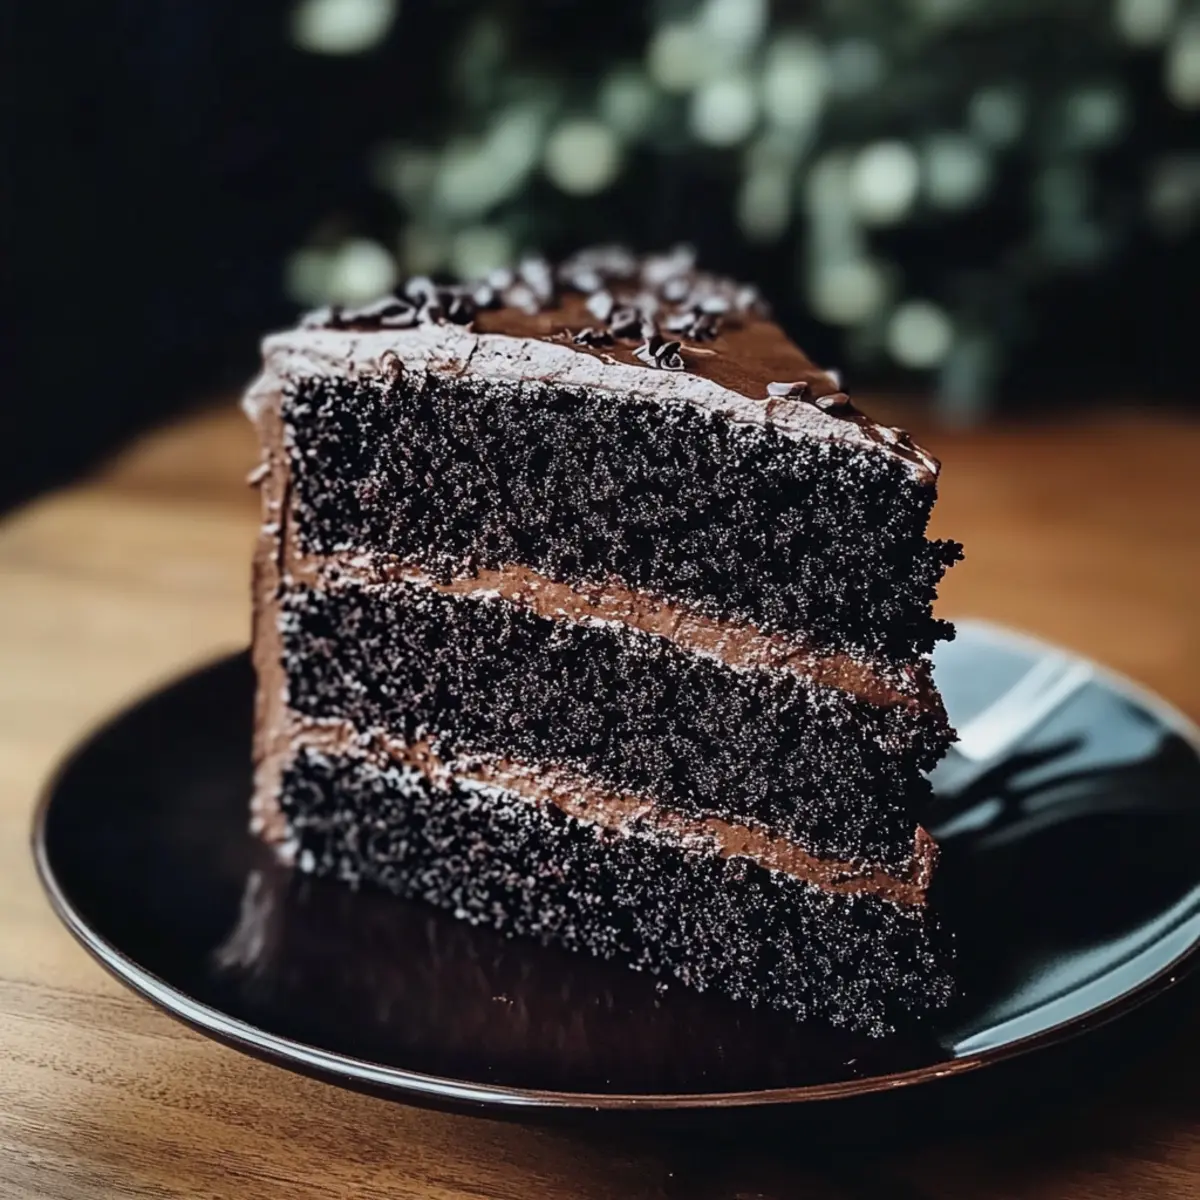
The moment I first tasted Black Velvet Cake, I discovered that true delight can come from a single slice. This stunning dessert combines the richness of chocolate with an irresistibly soft texture, creating a celebration-worthy cake that’s perfect for birthdays, or any occasion that calls for a sweet lift. With its smooth cream cheese frosting enhancing the cake’s deep allure, this recipe is a breeze to whip up, making it ideal for both planned celebrations and last-minute desserts. Plus, it is sure to impress your guests with its elegant appearance and decadent taste. Ready to elevate your baking skills? Let’s dive into making this unforgettable Black Velvet Cake together!
Why is Black Velvet Cake So Irresistible?
Decadent Delight: This cake offers an indulgence that’s hard to resist, combining rich chocolate flavor with a luxurious texture that simply melts in your mouth.
Showstopper Appearance: Its striking black hue makes it a stunning centerpiece for any celebration, from birthdays to dinner parties.
Easy to Make: No need to be a baking expert! The straightforward steps make this cake accessible for everyone.
Versatile Pairing: Pair it with a light vanilla ice cream or fresh berries to balance the sweetness and elevate your dessert experience, just like our Coconut Loaf Cake does.
Crowd Pleaser: Impress your family and friends with this elegant treat; it’s bound to be a hit at any gathering!
Enjoy discovering the magic of this Black Velvet Cake recipe; it might just become your new favorite!
Black Velvet Cake Ingredients
For the Cake
• All-Purpose Flour – Provides the structure needed for a tender crumb; substitute with a gluten-free flour mix if desired.
• Granulated Sugar – Adds sweetness; try brown sugar for a more robust flavor profile.
• Unsweetened Cocoa Powder – Infuses the cake with deep chocolate flavor and color; swap for Dutch-process cocoa for a smoother taste.
• Baking Soda – Acts as a leavening agent; do not substitute with baking powder as they are not the same.
• Salt – Enhances all the flavors in the cake.
• Vegetable Oil – Keeps the cake moist and rich; melted butter works as a flavorful alternative.
• Buttermilk – Ensures moisture and tenderness; mix milk with vinegar or lemon juice (1 cup milk + 1 tbsp vinegar) as a substitute.
• Large Eggs – Essential for binding and adding moisture to the batter.
• Vanilla Extract – Adds fragrant flavor; opt for pure vanilla for the best results.
• Boiling Water – Activates cocoa and maintains moisture; a key step in achieving the perfect texture.
For the Frosting
• Cream Cheese – Provides a tangy richness; full-fat cream cheese is recommended for a creamy consistency.
• Powdered Sugar – Sweetens the frosting while achieving a smooth texture; adjust to taste.
• Vanilla Extract – Incorporates rich flavor into the frosting; ensure to use high-quality vanilla.
• Heavy Cream – Adds fluffiness and lightness; for a thicker frosting, reduce the amount used.
Embrace the joy of creating this fabulous Black Velvet Cake, perfect for celebrating life’s sweetest moments!
Step‑by‑Step Instructions for Black Velvet Cake
Step 1: Preheat the Oven
Begin by preheating your oven to 350°F (175°C). While it heats up, grab two 9-inch round cake pans and grease them with butter or cooking spray, then lightly dust them with flour. Alternatively, you can line the bottoms with parchment paper to ensure a smooth cake release later on.
Step 2: Mix Dry Ingredients
In a large mixing bowl, sift together the all-purpose flour, granulated sugar, unsweetened cocoa powder, baking soda, and salt. Whisk them until well combined, creating a uniform, dry mixture. This will ensure that your Black Velvet Cake has a consistent texture throughout and enhances the chocolate flavor.
Step 3: Add Wet Ingredients
Now, add the vegetable oil, buttermilk, large eggs, and vanilla extract to the dry mix. Using a hand mixer or a whisk, beat the mixture on medium speed until it just comes together. Aim for a smooth batter with no visible lumps, but avoid overmixing to maintain the cake’s tender crumb.
Step 4: Stir in Boiling Water
Carefully stir in the boiling water into the batter. This step is crucial as it activates the cocoa powder, giving your Black Velvet Cake its rich texture and moisture. The batter will be thin at this point, but that’s exactly what you want for a perfectly moist cake.
Step 5: Bake the Cakes
Pour the batter evenly into your prepared cake pans. Slide them into the preheated oven and bake for 30 to 35 minutes. To check for doneness, insert a toothpick into the center of the cakes; if it comes out clean or with a few moist crumbs, they are ready to come out of the oven.
Step 6: Cool the Cakes
Once baked, remove the pans from the oven and let them cool in the pans for about 10 minutes. This allows the cakes to set and makes them easier to handle. After that, gently transfer the cakes onto a wire rack to cool completely before frosting, ensuring they are perfect for your delicious cream cheese frosting.
Step 7: Frost the Cake
After the cakes have cooled completely, it’s time to frost your decadent Black Velvet Cake. Prepare the cream cheese frosting, then spread an even layer on top of one cake layer. Place the second layer on top and frost the top and sides. You can use a spatula or a piping bag for a professional finish.
Step 8: Serve and Enjoy
Now that your Black Velvet Cake is beautifully frosted, it’s ready to be served. Consider adding decorative touches like chocolate shavings or fresh berries. Once sliced, the rich, moist layers will captivate everyone with their delightful flavor and stunning appearance. Enjoy this treat at your next celebration!
Storage Tips for Black Velvet Cake
Fridge: Store the frosted Black Velvet Cake in the fridge for up to 5 days to maintain its moistness and freshness. Keep it covered with a cake dome or wrap it in plastic wrap to prevent drying.
Freezer: Unfrosted layers can be wrapped tightly in plastic wrap and aluminum foil, then frozen for up to 3 months. Thaw them in the fridge overnight before frosting.
Reheating: If you prefer warm cake, microwave a slice for about 10-15 seconds. This will revive the cake’s moist texture without compromising its delicious flavor.
Room Temperature: If the cake is uncut, it can sit at room temperature for up to 2 days, but be sure to cover it to keep it fresh.
Make Ahead Options
These Black Velvet Cake preparations are perfect for busy home cooks looking to save time! You can prepare the cake layers up to 3 days in advance; simply bake them according to the recipe and allow to cool completely. Once cooled, wrap each layer tightly in plastic wrap and refrigerate to maintain their moist texture. Additionally, you can make the cream cheese frosting up to 2 days ahead, storing it in an airtight container in the refrigerator. When you’re ready to serve, simply frost the chilled cake layers and let it sit for about 30 minutes at room temperature before serving, ensuring that the cake tastes just as delicious as if it were freshly made. Enjoy the ease of meal prep with this stunning Black Velvet Cake!
What to Serve with Decadent Black Velvet Cake
Indulge in a delightful dining experience by pairing this rich chocolate creation with complementary sides that elevate your dessert game.
- Vanilla Ice Cream: Creamy and cool, this classic pairing softens the cake’s richness, creating a marvelous balance of flavors. A scoop on the side makes for an irresistible combination.
- Fresh Berries: Raspberries or strawberries add a touch of vibrant color and a tartness that perfectly contrasts the sweet, velvety cake, enhancing its overall appeal.
- Chocolate Ganache Drizzle: For the true chocolate lovers, a warm, glossy ganache poured over the top amplifies the decadence of the cake, making each bite an unforgettable experience.
- Coconut Whipped Cream: This light and fluffy topping adds a tropical twist, giving a refreshing contrast to the rich flavors of the cake while adding an exotic flair.
- Espresso: A strong cup of espresso can enhance the chocolate notes of the cake, creating a beautiful harmony that complements its flavors remarkably.
- Red Wine: A glass of Pinot Noir or Merlot provides a sophisticated touch, harmonizing with the cake’s deep chocolate notes for a delightful pairing experience.
- Chocolate Lava Cake: For the ultimate chocolate experience, serve alongside mini lava cakes for a truly indulgent feast that will captivate your guests’ taste buds.
- Caramel Sauce: Drizzling some caramel over your slice adds an extra layer of sweetness while contrasting beautifully with the cake’s dense texture.
- Pecan Pie: This nutty dessert doubles the indulgence; the crunchy pecans offer a delightful texture that balances the smoothness of the Black Velvet Cake.
Expert Tips for Black Velvet Cake
Mix Gradually: Stir boiling water slowly into the batter: This prevents splattering and ensures a smooth mixture for the Black Velvet Cake.
Cool Completely: Allow cakes to cool fully before frosting: This avoids melting the cream cheese frosting and helps retain the cake’s shape.
Use a Scale: Weigh batter for even layers: Ensuring both cake layers are uniform in size makes for a stunning presentation and even baking.
Check Doneness: Test with a toothpick: Insert it in the center of the cake; it should come out clean or with a few moist crumbs for perfect doneness.
Perfect Pills: Use full-fat cream cheese for frosting: It creates a richer, creamier texture that complements the cake beautifully.
Black Velvet Cake Variations & Substitutions
Feel free to get creative with this recipe and make it your own! The possibilities for delightful twists are endless.
-
Gluten-Free: Substitute all-purpose flour with a gluten-free flour blend for a cake everyone can enjoy.
-
Dairy-Free: Use almond milk mixed with lemon juice instead of buttermilk and replace cream cheese with a dairy-free alternative for a vegan version.
-
Mocha Boost: Add 2 tablespoons of espresso powder to the batter for a rich mocha flavor that pairs beautifully with chocolate.
-
Chocolate Ganache: Swap the cream cheese frosting for a luscious whipped chocolate ganache for an ultra-chocolatey experience.
-
Nutty Flavors: Fold in half a cup of chopped walnuts or pecans into the batter for added texture and nuttiness.
-
Zesty Twist: Add the zest of one orange or lemon to the batter for a bright burst of citrus that cuts through the richness.
-
More Moisture: Replace half the vegetable oil with unsweetened applesauce for a healthier, moist cake without sacrificing flavor.
-
Rich Caramel Layer: Drizzle caramel sauce between cake layers or on top for an added touch of decadence that will enchant every palate.
Experimenting with these variations can lead you on a delightful culinary adventure, much like our Lemon Zucchini Bundt Cake or Moist Chocolate Cake. Happy baking!
Black Velvet Cake Recipe FAQs
How do I choose ripe ingredients for Black Velvet Cake?
Absolutely! When selecting your ingredients, particularly the eggs and buttermilk, look for freshness. Eggs should have a clean, uncracked shell, and when checking buttermilk, ensure there are no lumps, indicating spoilage. Fresh produce can make a notable difference in flavor and texture.
How should I store leftover Black Velvet Cake?
Very! After enjoying your cake, cover it with a cake dome or wrap it in plastic wrap to keep it fresh. Ideally, refrigerate your frosted Black Velvet Cake for up to 5 days. If you prefer a longer storage option, wrap the unfrosted layers tightly in plastic wrap and aluminum foil before freezing for up to 3 months.
Can I freeze Black Velvet Cake?
Absolutely! To freeze, ensure your cake layers are completely cooled. Wrap each layer in plastic wrap followed by aluminum foil for extra protection against freezer burn. When ready to enjoy, thaw in the refrigerator overnight and frost once completely defrosted.
What should I do if my Black Velvet Cake is too dense?
If you find your cake is too dense, it could be due to overmixing the batter or an incorrect measurement of ingredients. When incorporating dry and wet ingredients, mix just until combined to avoid developing gluten. For fluffier results, ensure you use fresh baking soda and don’t forget the boiling water!
Is Black Velvet Cake safe for those with allergies?
Keep in mind, this cake contains gluten, dairy, and eggs, so it may not be suitable for those with allergies to these ingredients. If you have gluten sensitivity, consider using a gluten-free flour blend. For egg-free alternatives, you might try using applesauce or a commercial egg replacer. Always check individual ingredient labels for cross-contamination.
How long does Black Velvet Cake last at room temperature?
Once frosted, it’s best to limit the time at room temperature to no more than 2 days. Keep it covered to maintain moisture and prevent any drying out. For optimal taste and texture, refrigerate leftovers after this period.
Indulge in Moist Black Velvet Cake with Creamy Frosting
Ingredients
Equipment
Method
- Preheat your oven to 350°F (175°C). Grease two 9-inch round cake pans with butter or cooking spray and dust with flour, or line the bottoms with parchment paper for easy release.
- In a large mixing bowl, sift together the all-purpose flour, sugar, cocoa powder, baking soda, and salt. Whisk until well combined.
- Add the vegetable oil, buttermilk, eggs, and vanilla extract to the dry mixture. Beat on medium speed until smooth, avoiding overmixing.
- Stir in the boiling water carefully to activate the cocoa powder.
- Pour the batter into the prepared pans and bake for 30 to 35 minutes, checking doneness with a toothpick.
- Allow cakes to cool in the pans for 10 minutes before transferring to a wire rack to cool completely.
- Frost with cream cheese frosting once cooled, layering and decorating as desired.
- Serve and enjoy your decadent Black Velvet Cake!
Leave a Reply