
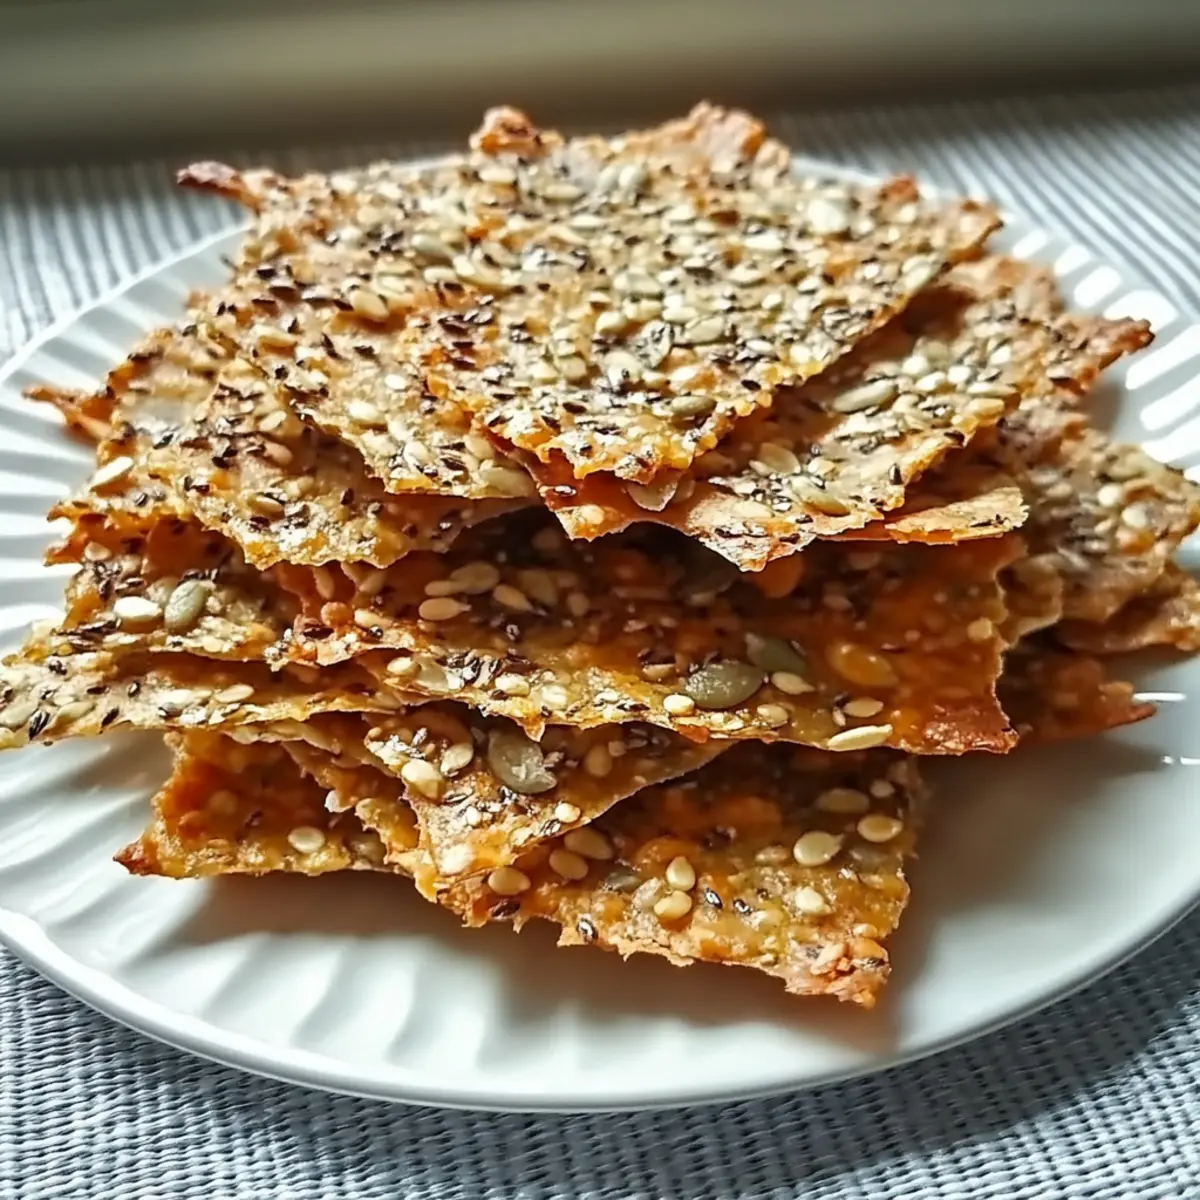
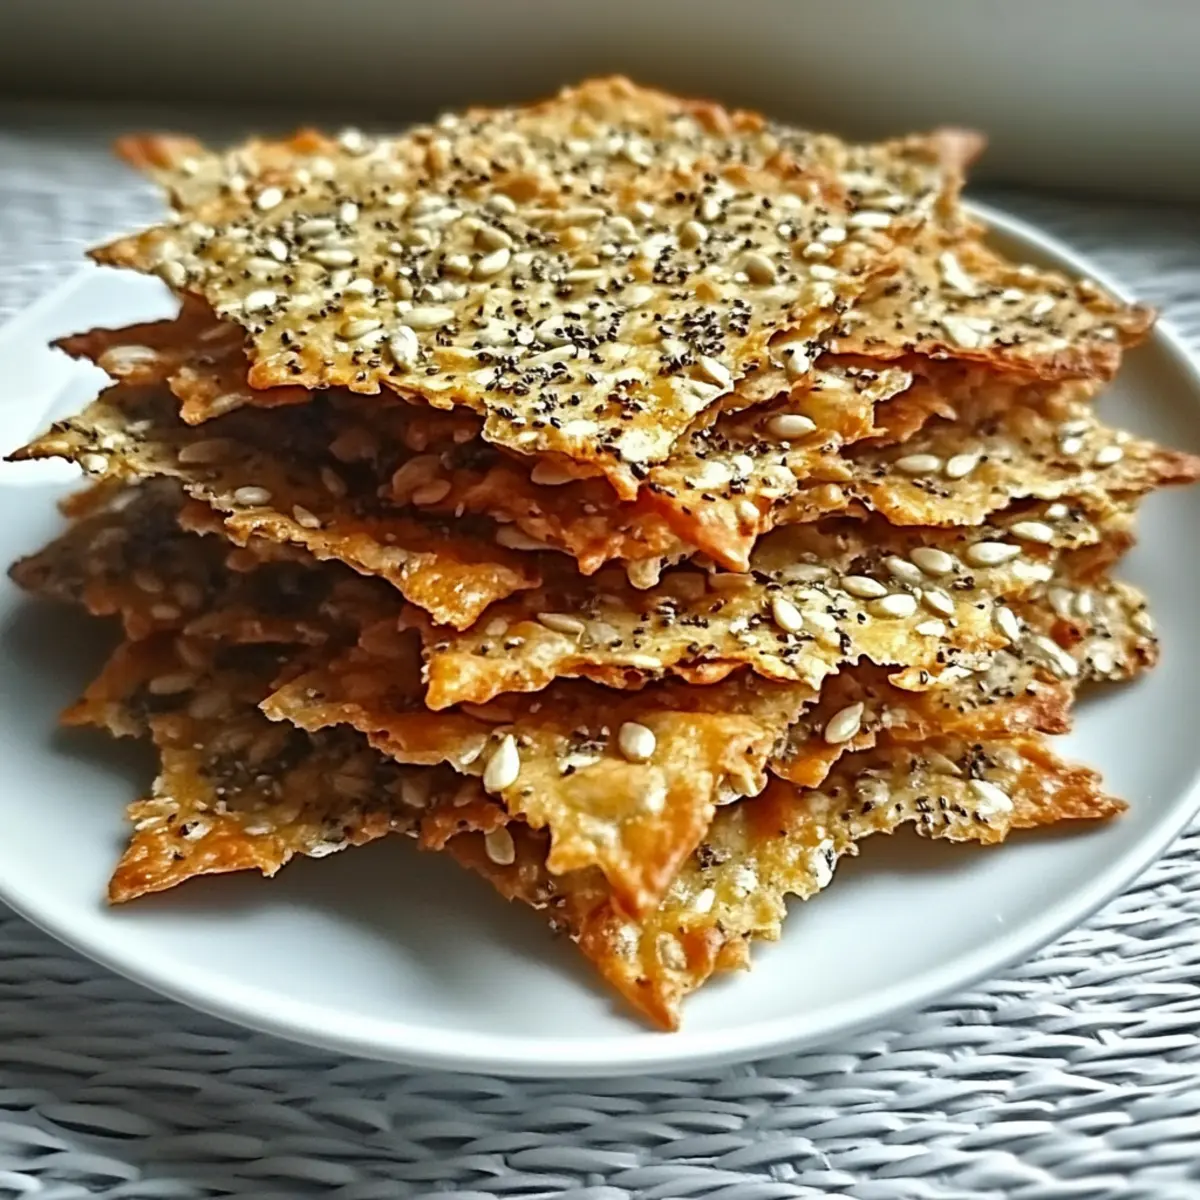
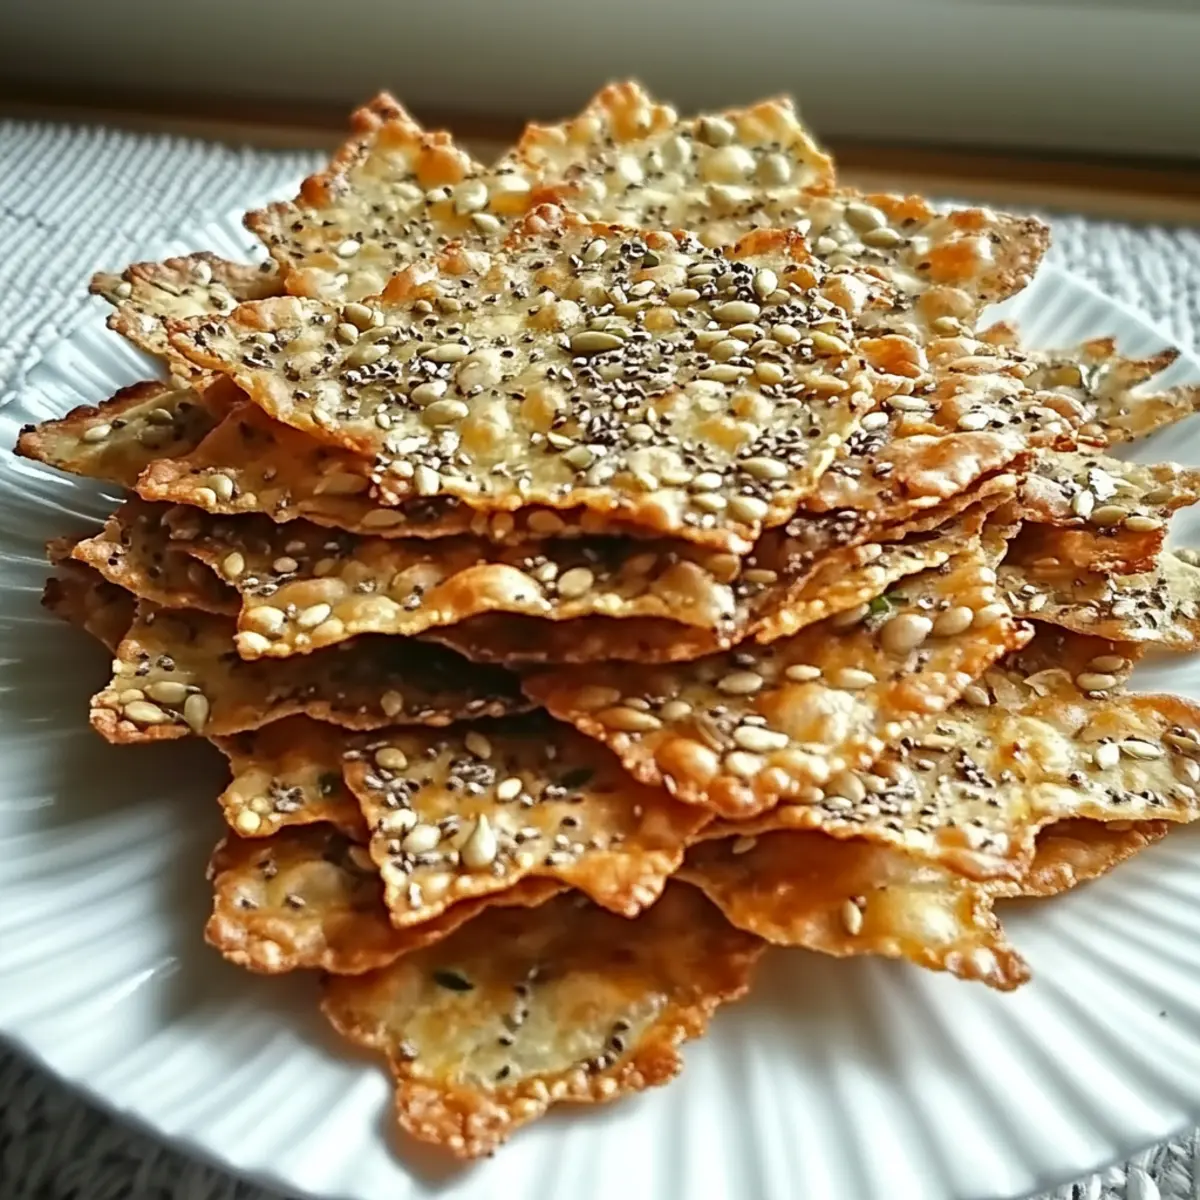
As I rummaged through the pantry one afternoon, the urge for a crunchy snack felt like an unstoppable force. That’s when I stumbled upon the delightful world of Cheesy Seed Crisps. These little gems are not just your average snack; they are a satisfying, guilt-free treat that ticks all the right boxes! With their gluten-free and low-carb credentials, they cater to a variety of dietary needs while busting boredom out of your snacking routine. What I love most is how effortlessly customizable they are—switching up the cheese or adding spices can elevate the flavor in unexpected ways. Whether you’re planning a cozy movie night or want a quick bite while working from home, these crispy delights will have your cravings covered. Ready to get your snack game on point? Let’s dive into the recipe!
Why are Cheesy Seed Crisps a must-try?
Irresistible Flavor Combinations: Cheesy Seed Crisps offer an amazing burst of savory goodness that will satisfy both cheese lovers and health-conscious snackers alike.
Customizable Enjoyment: With endless variations, from aged cheddar to smoked gouda, you can tailor the flavors to fit your cravings.
Quick and Easy: Whip them up in under 15 minutes, making them a perfect last-minute snack for unexpected guests.
Guilt-Free Snacking: Low-carb and gluten-free, these crisps let you indulge without the worry, fitting seamlessly into various dietary preferences.
Perfect Party Pleaser: Serve them at gatherings with dips like hummus or guacamole, and watch them disappear faster than you can say “snack time!”
For more delicious ideas, check out these Golden Cheesy Mashed bites or explore ways to make Gordon Ramsay’s Chicken for a fabulous duo to accompany your crispy treats!
Cheesy Seed Crisps Ingredients
- For the Base
- Aged Cheddar or Mozzarella Cheese – Adds rich flavor and acts as the base; use finely shredded for optimal melt and crunchy texture.
- For the Crunch
- Mixed Seeds (Sesame, Pumpkin, Sunflower) – Provide crunch and nutrition; feel free to use just one type if preferred.
- Quinoa (Optional) – Adds texture; omit for a stricter gluten-free option.
- For Flavor Enhancement
- Herbs/Spices (Thyme, Garlic Powder, Red Pepper Flakes) – Enhance flavor profile; experiment with fresh or dried options for variety.
- Honey (Optional) – Introduces a subtle sweetness; maple syrup is a good alternative.
Now that you have everything you need, it’s time to whip up those irresistible Cheesy Seed Crisps!
Step‑by‑Step Instructions for Cheesy Seed Crisps
Step 1: Preheat the Oven
Begin by preheating your oven to 400°F (200°C). This step ensures a perfectly crispy texture for your Cheesy Seed Crisps. While the oven warms up, gather your mixing bowl and other ingredients, so everything is ready to go once the temperature is just right. A well-preheated oven will help the cheese melt beautifully and create that delightful golden finish.
Step 2: Combine Ingredients
In a large mixing bowl, combine your finely shredded aged cheddar or mozzarella cheese with the mixed seeds of your choice, such as sesame, pumpkin, and sunflower. Stir the mixture thoroughly, ensuring all seeds are well-coated with cheese, which will help them bind together during baking. This savory blend is key to achieving the irresistible flavor of your Cheesy Seed Crisps.
Step 3: Add Flavor Enhancements
Next, sprinkle in your preferred herbs and spices, like thyme, garlic powder, or red pepper flakes, to elevate the taste profile of your Cheesy Seed Crisps. Mix well until the herbs are evenly distributed throughout. The addition of these flavor enhancers will transform your simple snack into a delicious crunchy treat that’s sure to impress anyone who tries them.
Step 4: Shape the Crisps
Line a baking sheet with parchment paper to prevent sticking and aid in easy cleanup. Using a spoon, scoop out small mounds of the cheese and seed mixture and place them on the prepared baking sheet, ensuring to leave space between each mound. This spacing allows the Cheesy Seed Crisps to spread out and achieve an even crispiness as they bake.
Step 5: Bake to Perfection
Place the baking sheet in your preheated oven and bake the Cheesy Seed Crisps for 6-8 minutes. Keep an eye on them as they bake, looking for a lovely golden brown hue that indicates they are ready. The aroma of melted cheese and toasted seeds will fill your kitchen, making it hard to resist snacking before they cool.
Step 6: Cool Before Serving
Once they’re beautifully golden, carefully remove the baking sheet from the oven and allow the Cheesy Seed Crisps to cool completely on the sheet. This cooling period is crucial, as it helps them firm up, ensuring a delightful crunch when you finally dig in. Patience will reward you with the most satisfying texture!
Step 7: Enjoy or Store
After cooling, your Cheesy Seed Crisps are ready to be enjoyed! Serve them right away as a tasty snack or portion them into an airtight container for later. If stored properly, they can maintain their crunch for up to a week at room temperature. You can also freeze them for longer storage, giving you a quick snack on hand anytime cravings strike.
What to Serve with Easy Gluten-Free Cheesy Seed Crisps?
Pair your delightful crispy snack with these tasty accompaniments that enhance their crunchy charm.
-
Creamy Guacamole: The rich, creamy texture of guacamole contrasts beautifully with the crispiness, offering a flavorful dip that’s hard to resist.
-
Zesty Salsa: A fresh, tangy salsa brings bright flavors that complement the savory cheesy bites, perfect for adding a refreshing twist to each munch.
-
Savory Hummus: The smoothness of hummus provides a delightful contrast to the crunchy crisps, and the various flavors can complement any cheese choice.
-
Fresh Veggie Platter: Pair with crunchy carrots, cucumbers, or bell peppers for a fresh, healthy contrast that elevates your snacking experience.
-
Cheese Board: Create a charcuterie board with assorted cheeses, meats, and olives, allowing for a variety of textures and flavors alongside your Cheesy Seed Crisps.
-
Light Beer: A crisp, light lager or pale ale enhances the flavors without overwhelming your palate, making it a perfect pairing for these savory bites.
-
Fruit Salad: The sweetness of fresh fruits, like strawberries or apples, adds a refreshing balance that harmonizes beautifully with the cheese’s saltiness.
-
Luxurious White Wine: A chilled glass of Sauvignon Blanc or Pinot Grigio offers a sophisticated touch, enhancing the flavor profile of your cheesy treats while keeping it light and enjoyable.
Cheesy Seed Crisps Variations & Substitutions
Feel free to get creative with your Cheesy Seed Crisps! The possibilities are endless, and each variation offers a unique flavor experience.
- Smoky Gouda: Swap aged cheddar for gouda to introduce a deep, smoky flavor that’s utterly irresistible.
- Seed Mix-Up: Experiment with chia or flaxseeds for added health benefits and a delightful crunch.
- Spice it Up: Add a pinch of cayenne pepper for a spicy twist or a splash of lemon juice for a refreshing zing.
- Zesty Parmesan: Use grated Parmesan cheese for a saltier, sharper flavor profile that’s great for gourmet-style nibbling.
- Herb Party: Mix in fresh herbs like basil or oregano to elevate your crisps with a burst of color and flavor.
- Honey Swap: Substitute honey with agave syrup for a vegan-friendly option that still delivers a touch of sweetness.
- Creamy Cheddar: Opt for a creamy melt like fontina instead of mozzarella for a pleasingly gooey texture.
- Crispy Textures: Incorporate finely chopped nuts or crushed popcorn for an exciting texture twist that complements the seed base.
For more scrumptious ideas to create unforgettable snacks, browse our Golden Cheesy Mashed bites or prepare a satisfying main dish like Gordon Ramsay’s Chicken alongside your crisps!
How to Store and Freeze Cheesy Seed Crisps
Room Temperature: Store in an airtight container for up to 1 week. This helps maintain their delightful crunch while keeping them accessible for snacking.
Fridge: If you’ve made a larger batch, you can keep them in the fridge for extra freshness. Just ensure they are airtight, and consume within 2 weeks for the best quality.
Freezer: For longer storage, freeze your Cheesy Seed Crisps in a single layer on a baking sheet before transferring to an airtight container. They can last for up to 3 months in the freezer.
Reheating: To bring back the crispness, pop them in the oven at 350°F (175°C) for about 5 minutes. Enjoy them warm for that freshly-baked experience!
Make Ahead Options
These Cheesy Seed Crisps are a fantastic choice for meal prep, saving you time and effort during busy weeks! You can prepare the cheese and seed mixture up to 24 hours in advance; simply store it in an airtight container in the refrigerator. When you’re ready to enjoy your crisps, let the mixture sit at room temperature for about 10–15 minutes before shaping and baking. For the crisps you’ve already baked, make sure to allow them to cool completely before storing them in an airtight container, where they can stay crunchy for up to a week. Just pop them back in the oven for a few minutes to regain that delightful crunch when ready to serve!
Expert Tips for Cheesy Seed Crisps
-
Grate Cheese finely: Use a box grater for even melting and a satisfying crunch in your Cheesy Seed Crisps. Larger shreds may not bind well.
-
Watch the Bake Time: Keep a close eye while baking. Over-baking can lead to bitterness; golden brown is the sweet spot for perfect flavor.
-
Space Wisely: Properly space your mounds on the baking sheet. This prevents sticking together and ensures that each crispy bite is uniformly crunchy.
-
Cooling is Key: Let the crisps cool completely before serving to achieve maximum crunch. If not cooled properly, they can turn out soft or chewy.
-
Experiment with Seeds: Don’t hesitate to mix and match different seeds or cheeses. Customizing the flavor of your Cheesy Seed Crisps can lead to delightful new creations!
Cheesy Seed Crisps Recipe FAQs
How do I choose the best cheese for Cheesy Seed Crisps?
Absolutely! For Cheesy Seed Crisps, I recommend using finely shredded aged cheddar or mozzarella for the best melt and crunchy texture. Aged cheddar brings a rich flavor, while mozzarella offers a milder taste. If you’re feeling adventurous, swapping for gouda or pepper jack can introduce a delightful twist!
What’s the best way to store Cheesy Seed Crisps?
To keep your Cheesy Seed Crisps crunchy, store them in an airtight container at room temperature for up to one week. If you’ve made a large batch, feel free to refrigerate for up to two weeks, ensuring they remain sealed. This simple method will help maintain their delightful crunch!
Can I freeze Cheesy Seed Crisps?
Yes, you certainly can! To freeze your Cheesy Seed Crisps, first lay them out in a single layer on a baking sheet and freeze them until solid. Then, transfer them to an airtight container or freezer bag. They can be stored for up to three months. Simply reheat in a 350°F (175°C) oven for about 5 minutes when you’re ready to enjoy them!
What if my Cheesy Seed Crisps didn’t turn out crunchy?
Very often, there are a couple of reasons for this. Make sure your cheese is finely shredded, as larger shreds might not melt and bind effectively. Additionally, ensure there’s enough space between the mounds on the baking sheet while shaping your crisps. If they are too close, they may steam instead of bake. If you’ve followed these steps and they’re still soft, try letting them cool completely before serving!
Are there any dietary considerations for Cheesy Seed Crisps?
Absolutely! These Cheesy Seed Crisps are gluten-free and low-carb, making them perfect for various dietary needs. If you or someone you’re serving has a dairy allergy, you could experiment with dairy-free cheese alternatives. Always check your ingredients to ensure they meet your dietary requirements, especially with mixed seeds and spices used!

Irresistibly Crunchy Cheesy Seed Crisps for Guilt-Free Snacking
Ingredients
Equipment
Method
- Preheat your oven to 400°F (200°C) to ensure a perfectly crispy texture.
- In a large mixing bowl, combine finely shredded cheese with mixed seeds. Stir until well-coated.
- Sprinkle in herbs and spices to elevate flavor. Mix well until evenly distributed.
- Line a baking sheet with parchment paper. Scoop small mounds of the mixture and leave space between each one.
- Bake in the preheated oven for 6-8 minutes until golden brown.
- Remove from the oven and allow to cool completely on the baking sheet.
- Enjoy immediately or store in an airtight container for later.
Leave a Reply