
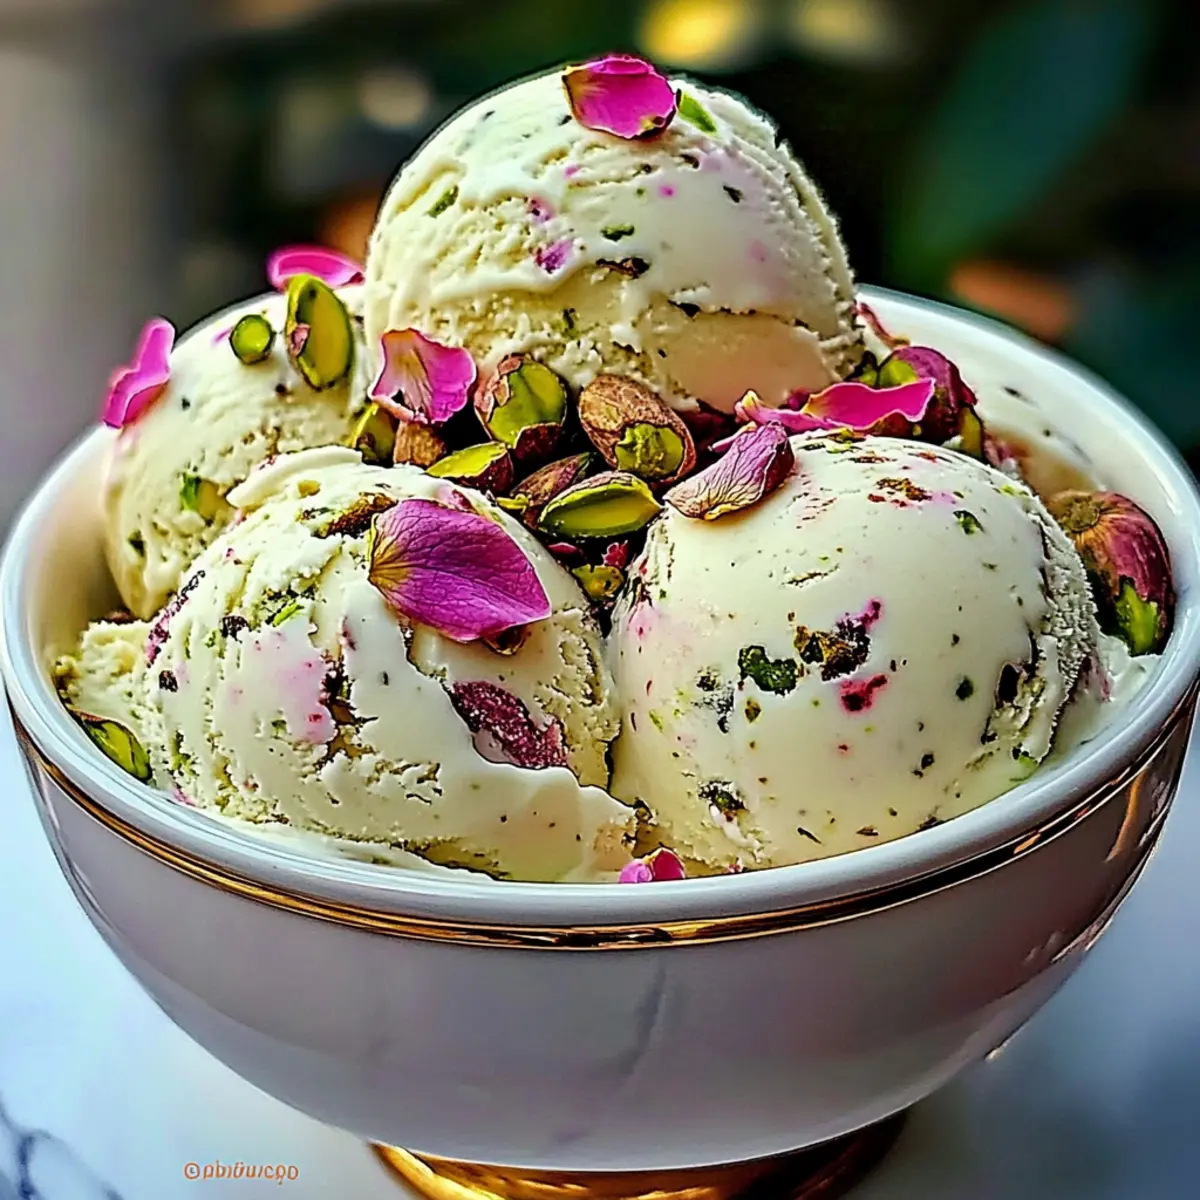
With the sun shining and summer in full swing, I found myself yearning for a refreshing treat that felt both indulgent and elegant. Enter my Rose Pistachio Cheesecake Ice Cream, a delightful blend of creamy cheesecake and the fragrant allure of rosewater. This luxurious dessert not only cools you down on a hot day, but it also transforms any gathering into a special occasion. You’ll love how the crunchy pistachios complement the silky texture, making each scoop a blissful experience. Plus, it’s surprisingly simple to make at home! Are you ready to impress your friends and family with a dessert that’s as beautiful as it is delicious? Let’s dive in!

Why is This Ice Cream So Irresistible?
Luxurious Flavor: The harmonious combination of rose water and pistachios creates a unique taste that’s truly unforgettable.
Creamy Texture: Each scoop delivers a smooth, velvety experience that’s reminiscent of your favorite cheesecake.
Versatile Delight: Perfect for summer days or as a refined dessert for gatherings, it pairs beautifully with cheesecake or a slice of sponge cake.
Easy Homemade Indulgence: Surprisingly simple to whip up, even novice chefs can impress with this elegant treat!
Crowd-Pleaser: Whether you’re serving friends during a backyard BBQ or treating family after dinner, everyone will rave about this delightful ice cream!
Storage-Friendly: And if you have leftovers, store it in an airtight container for up to two weeks for that sweet escape whenever the craving strikes.
Rose Pistachio Cheesecake Ice Cream Ingredients
For the Ice Cream Base
• Cream Cheese – provides a creamy base with tangy flavor; ensure it’s at room temperature for easy mixing.
• Granulated Sugar – sweetens the mixture; substitute with a sugar alternative if necessary.
• Heavy Cream – adds richness and creaminess; can be replaced with coconut cream for a dairy-free option.
• Whole Milk – contributes to a smooth texture; use nut milk as a substitute if desired.
• Sweetened Condensed Milk – enhances sweetness and creaminess; homemade condensed milk is a healthier option.
• Vanilla Extract – adds a warm flavor note; substitute with almond extract for a different profile.
• Rose Water – provides floral aroma and taste; adjust quantity based on your preference.
• Lemon Zest – adds brightness and acidity to balance sweetness; lime zest offers a unique twist.
For the Crunch
• Chopped Pistachios – adds crunch and nuttiness to the ice cream; substitute with any nuts or seeds for different flavors.
For Garnishing
• Edible Rose Petals – brings a sophisticated aesthetic; ensure they are food-grade and pesticide-free.
Step‑by‑Step Instructions for Rose Pistachio Cheesecake Ice Cream
Step 1: Beat Cream Cheese
In a large mixing bowl, use a hand mixer or a whisk to beat the cream cheese until it’s completely smooth and creamy, about 2-3 minutes. Gradually add in the granulated sugar while continuing to mix until well combined, ensuring no lumps remain. This forms the luxurious base for your Rose Pistachio Cheesecake Ice Cream.
Step 2: Add Creamy Ingredients
Next, pour in the heavy cream, whole milk, and sweetened condensed milk into the bowl. Using a spatula, gently fold these ingredients together until fully blended, creating a rich and creamy consistency. The mixture will gain a luscious, velvety texture that’s perfect for your cheesecake ice cream.
Step 3: Incorporate Flavors
Stir in the vanilla extract, rose water, and lemon zest, ensuring each flavor is well integrated into the cream mixture. The rose water will infuse a fragrant aroma while the lemon zest brightens the flavor. Take a moment to appreciate the delightful fragrance as your Rose Pistachio Cheesecake Ice Cream begins to come together.
Step 4: Chill the Mixture
Cover the bowl with plastic wrap or a lid and refrigerate the mixture for 2-3 hours. This cooling step is essential for achieving the ideal texture and flavor depth in your ice cream. You’ll know it’s ready when it’s thoroughly chilled, making the churning process more effective.
Step 5: Churn in Ice Cream Maker
Once chilled, pour the mixture into your ice cream maker, following the manufacturer’s instructions. Churn for approximately 20-25 minutes, or until the ice cream reaches a soft-serve consistency. You’ll see it thicken and turn smooth, preparing it for the delicious additions.
Step 6: Fold in Nuts and Petals
In the last few minutes of churning, gently fold in the chopped pistachios and edible rose petals. This step adds a delightful crunch and a touch of elegance to your Rose Pistachio Cheesecake Ice Cream, enhancing both the texture and visual appeal of the final product.
Step 7: Freeze for Firmness
Transfer the mixture into an airtight container, smoothing the top with a spatula. Cover it tightly and freeze for at least 4-6 hours, or until firm. This deep freeze will solidify your ice cream into a scoopable delight that’s sure to impress everyone.
Step 8: Serve and Garnish
When ready to serve, scoop the Rose Pistachio Cheesecake Ice Cream into bowls or cones, and add a sprinkle of extra pistachios and a few rose petals on top for garnish. This final touch not only elevates the presentation but also adds an enticing hint of fragrance. Enjoy the beautiful dessert!

Rose Pistachio Cheesecake Ice Cream Variations
Feel free to get creative and customize your Rose Pistachio Cheesecake Ice Cream into something that’s uniquely yours!
-
Nutty Swap: Substitute chopped pistachios with hazelnuts or macadamia nuts for a different flavor profile. Each nut brings its own essence that can transform your ice cream delightfully.
-
Dairy-Free Delight: Use coconut cream instead of heavy cream for a decadent dairy-free version. This will lend a subtle tropical taste that pairs beautifully with the floral notes.
-
Citrusy Twist: Replace lemon zest with lime zest for a refreshing zing that complements the rich ice cream. This could be a delightful surprise for dessert lovers!
-
Coconut Essence: Add a splash of coconut extract into the mix for an exotic flair that works wonders with the creamy texture. Pair your ice cream with Pistachio Overnight Oats for a breakfast treat!
-
Flavor Burst: Use orange blossom water in place of rose water for a bright, citrus-infused profile that’s equally captivating and unique.
-
Chocolate Lovers: Drizzle in some melted dark chocolate during the last few minutes of churning. This fusion hits a sweet spot and can elevate your ice cream to new heights.
-
Spicy Kick: Add a pinch of cayenne pepper for those who crave a little heat in their desserts. This unexpected twist will leave a lasting impression for any adventurous eater!
-
Garnish Upgrade: Elevate your presentation by adding a sprinkle of golden edible glitter for a touch of glamour on top. It turns your delicious creation into a showstopper that shines on any dessert table!
With all these incredible variations, the possibilities are endless. Indulge, experiment, and create your signature version while enjoying every delicious scoop!
Make Ahead Options
These Rose Pistachio Cheesecake Ice Cream delights are perfect for meal prep enthusiasts! You can prepare the ice cream base up to 24 hours in advance. Simply beat the cream cheese and combine it with the other creamy ingredients, then refrigerate the mixture for up to 3 days before churning. Ensure you keep it tightly covered to maintain its freshness. When ready to serve, churn the prepped mixture in your ice cream maker, fold in the pistachios and rose petals, and freeze for an additional 4-6 hours until firm. This way, you can effortlessly impress your guests or treat your family with a luxurious dessert on a busy weeknight!
Expert Tips for Rose Pistachio Cheesecake Ice Cream
-
Soften Cream Cheese: Always ensure your cream cheese is at room temperature to avoid lumps in your Rose Pistachio Cheesecake Ice Cream. This ensures a smooth, creamy base.
-
Chill Thoroughly: Don’t skip the chilling step; refrigerating for 2-3 hours enhances the flavors and helps achieve the perfect texture during churning.
-
Monitor Churning Time: Keep an eye on the ice cream while it churns; over-churning can lead to ice crystals. Aim for soft-serve consistency before adding toppings!
-
Quality Ingredients Matter: Use high-quality rose water and fresh ingredients for the best flavor. This will elevate your Rose Pistachio Cheesecake Ice Cream to a luxurious treat.
-
Storage Tips: If you have leftovers, store them in an airtight container. The ice cream is best enjoyed within two weeks for optimal freshness and flavor.
What to Serve with Rose Pistachio Cheesecake Ice Cream?
To elevate your indulgent dessert experience, consider these delightful pairings that will make your Rose Pistachio Cheesecake Ice Cream shine even brighter.
-
Zesty Citrus Salad: A refreshing combination of orange and grapefruit adds brightness, enhancing the floral notes of the ice cream. This light salad cleanses the palate beautifully.
-
Chocolate Ganache: Rich, dark chocolate drizzled on top creates a delightful contrast to the creamy, floral ice cream. It’s a decadent touch everyone will adore!
-
Honey-Drizzled Baklava: This sweet, flaky delight brings a nutty crunch that pairs perfectly with the silky texture of the cheesecake ice cream. An elevated Middle Eastern twist, it’s sure to impress.
-
Rose Water Lemonade: A cool drink with similar floral hints brightens your dessert experience, complementing the ice cream’s flavors without overpowering them.
-
Pistachio Shortbread Cookies: These crunchy, buttery cookies echo the nutty element of the ice cream and make for a delightful snack alongside each scooped serving.
-
Fresh Berries: Serve with a medley of raspberries, strawberries, and blueberries for a bright burst of flavor and freshness. Their tartness contrasts with the creaminess perfectly!
-
Mint Tea: The refreshing notes of mint tea cleanse the palate and complement the luscious ice cream without overshadowing its unique flavors. A lovely accompaniment for summer evenings!
-
Sponge Cake: For a touch of elegance, serve a slice of light sponge cake alongside. It provides delightful texture and enhances the luxurious experience of your dessert.
Storage Tips for Rose Pistachio Cheesecake Ice Cream
Fridge: Store any leftovers in the fridge for up to 3 days if you plan to eat it soon, ensuring it’s tightly covered to maintain flavor.
Freezer: Keep the Rose Pistachio Cheesecake Ice Cream in an airtight container in the freezer for up to 2 weeks for best quality and flavor retention.
Reheating: If you find the ice cream too hard to scoop, let it sit at room temperature for about 5 minutes before serving to achieve the perfect texture for scooping.
Garnishing Storage: Keep any garnishes, like extra pistachios or edible rose petals, separate and add them right before serving to maintain freshness and appearance.

Rose Pistachio Cheesecake Ice Cream Recipe FAQs
What should I look for when selecting cream cheese?
Look for cream cheese that is fresh and has no lumps in the package. It should be close to its expiration date but not expired, and it should feel slightly soft to the touch. Ensuring it’s at room temperature before mixing will result in a smoother texture in your ice cream.
How do I store Rose Pistachio Cheesecake Ice Cream?
For the best quality, store your Rose Pistachio Cheesecake Ice Cream in an airtight container in the freezer, where it can last for up to two weeks. If you have some left over, ensure you cover it tightly to prevent freezer burn, which can alter its flavor and texture.
Can I freeze this ice cream for longer periods?
Absolutely! While it’s best consumed within two weeks for optimal freshness, you can freeze the Rose Pistachio Cheesecake Ice Cream for up to three months. Just make sure it’s stored in a well-sealed, airtight container. When you’re ready to enjoy it again, let it thaw at room temperature for about 10 minutes before scooping.
What should I do if my ice cream turns out icy?
If you find that your Rose Pistachio Cheesecake Ice Cream has turned icy, it could be due to over-churning or not enough sugar. To fix it during preparation, ensure your cream cheese is softened, chill the mixture thoroughly before churning, and do not over-churn the ice cream; 20-25 minutes should suffice for the right consistency.
Is Rose Pistachio Cheesecake Ice Cream safe for my pets?
While the ingredients in this ice cream are safe for humans, it’s best to avoid giving it to pets. The sugar and cream can upset their stomachs, and rose water may not be easily digestible for them. Always consult a veterinarian before treating your pets with human food.
How can I adjust the sweetness of the ice cream?
If you prefer a sweeter Rose Pistachio Cheesecake Ice Cream, you can adjust the granulated sugar and sweetened condensed milk ratios. Taste the mixture after step 3 in the directions and add a little extra sugar as needed. You can also substitute with liquid stevia or another sweetener for a lower-calorie option.
Chill Out with Rose Pistachio Cheesecake Ice Cream Bliss
Ingredients
Equipment
Method
- In a large mixing bowl, use a hand mixer to beat the cream cheese until smooth, about 2-3 minutes. Gradually add granulated sugar and mix until well combined.
- Pour in the heavy cream, whole milk, and sweetened condensed milk. Gently fold together until blended, creating a rich creamy consistency.
- Stir in vanilla extract, rose water, and lemon zest, ensuring well integration.
- Cover the bowl and refrigerate for 2-3 hours until chilled.
- Pour the mixture into the ice cream maker and churn for 20-25 minutes until it reaches a soft-serve consistency.
- In the last minutes of churning, fold in the chopped pistachios and edible rose petals.
- Transfer to an airtight container, smooth the top, and freeze for 4-6 hours until firm.
- When ready to serve, scoop into bowls or cones and garnish with extra pistachios and rose petals.
Leave a Reply