
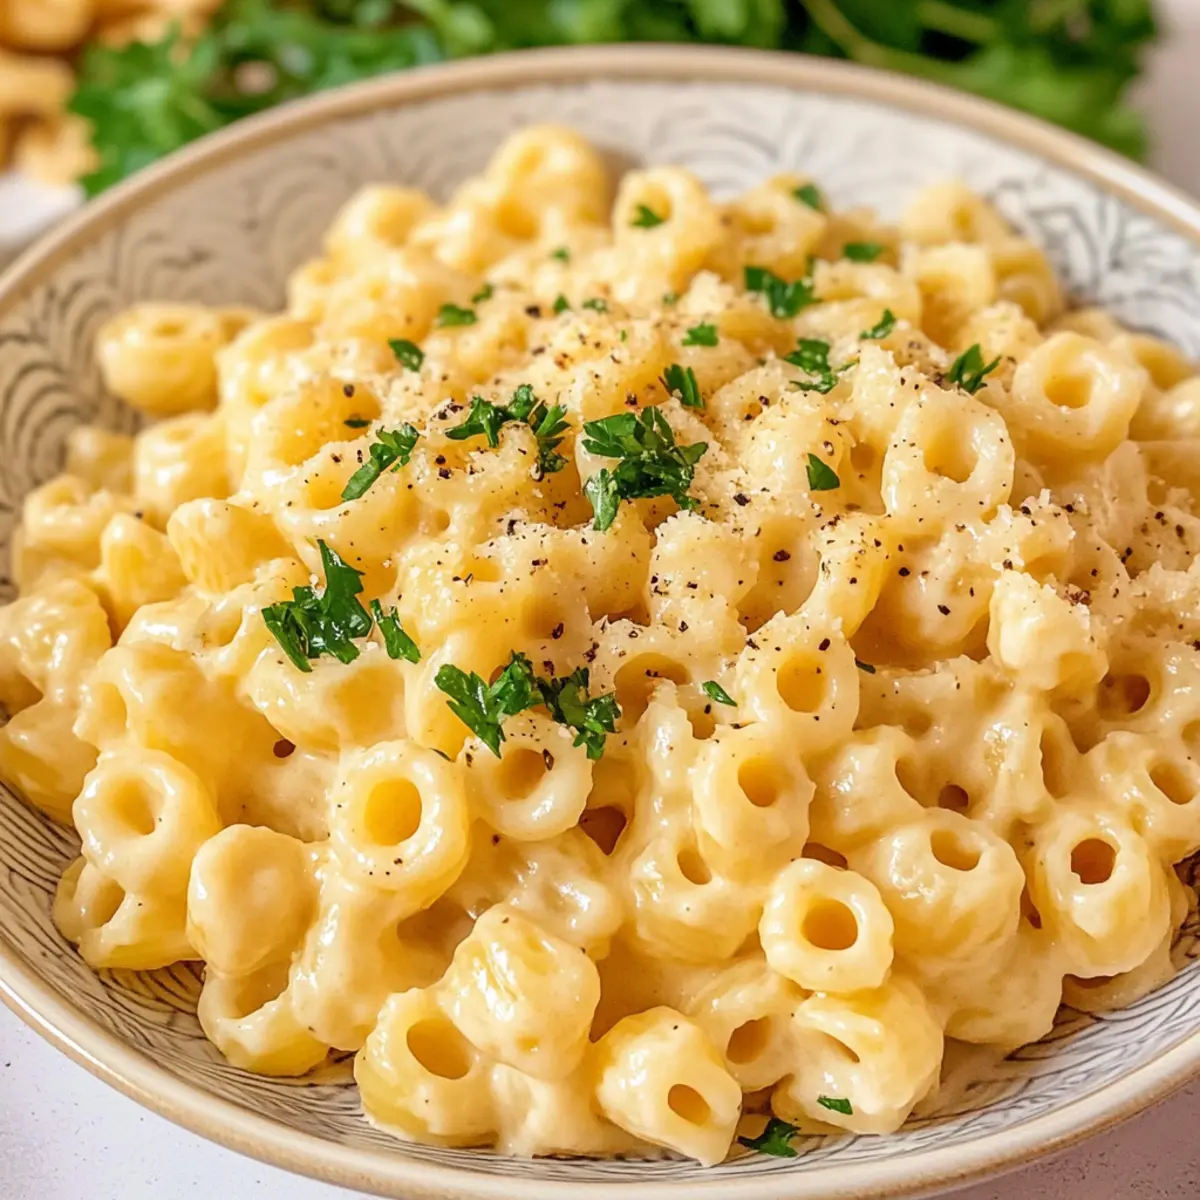
As I ransacked my pantry for a quick dinner option, the little bag of ditalini pasta caught my eye, instantly calling to my already hungry stomach. This 15-Minute Creamy Garlic Butter Ditalini Pasta Recipe is a lifesaver for anyone craving a comforting, delightful dish without spending hours in the kitchen. One pot, minimal prep, and you’ve got a creamy meal rivaling a lighter Alfredo that’ll leave you and your loved ones smiling. Plus, it’s easily customizable with veggies or protein, ensuring you never get bored! So, what secret ingredients will you add to make it your own?
Why Choose Ditalini Pasta for Dinner?
Quick and Easy: This recipe is ready in just 15 minutes, making it a perfect solution for those busy weeknights when time is tight.
Creamy Indulgence: With rich garlic and buttery flavors, each bite is a creamy dream that will have you coming back for more.
Versatile Ingredient: Whether you stick to classic ditalini or choose alternative pasta, you can easily customize your meal. Toss in veggies like spinach or protein like chicken for an extra nutritional boost.
One-Pot Wonder: The convenience of a single pot means less cleanup and more time to enjoy your delicious creation.
Comforting Satisfaction: This dish not only fills you up but also warms your heart, making it an instant family favorite to share over dinner.
For a little inspiration, check out my Butter Chicken Pasta for another easy and delightful one-pot meal!
Ditalini Pasta Ingredients
• Get ready to create something delicious with these simple ingredients!
For the Pasta
- Ditalini Pasta – The heart of this dish, providing a perfect bite and texture. You can substitute with small shells or even orzo if you prefer.
For the Sauce
- Olive Oil – Adds richness and flavor while sautéing. Any neutral oil can work as a substitute.
- Garlic Paste – Delivers a robust garlic flavor. Fresh minced garlic is a great alternative, just adjust to your taste!
- Chicken Broth – The flavorful base for cooking the pasta; vegetable broth works wonderfully for a vegetarian option.
- Salt – Essential for enhancing flavors; adjust according to taste based on the broth’s saltiness.
- Parmesan Cheese – Adds a creamy texture and umami flavor; try Pecorino or nutritional yeast for a vegan twist.
- Heavy Cream – Gives that indulgent creaminess; half-and-half or plant-based cream can also be used as a substitute.
- Salted Butter – Increases the dish’s richness; if using unsalted, adjust the salt accordingly.
- Black Pepper – For seasoning; using freshly cracked pepper enhances flavor and aroma.
For Garnish
- Fresh Parsley – Provides a touch of freshness and vibrant color; substitute with basil or simply omit if you prefer.
Dive into this Ditalini Pasta Recipe and experience a delightful meal that’s as easy as it is satisfying!
Step‑by‑Step Instructions for Creamy Ditalini Pasta Recipe
Step 1: Heat Oil and Garlic
In a large skillet, heat 2 tablespoons of olive oil over medium-high heat. Once the oil shimmers, add 2 tablespoons of garlic paste and sauté for about 1 minute until it becomes fragrant and lightly golden. This step is essential to infuse rich garlic flavor into your Creamy Ditalini Pasta.
Step 2: Add Ditalini Pasta
Stir in 1 cup of ditalini pasta, making sure each piece is coated in the garlicky oil. Let the pasta sauté for about 1–2 minutes, allowing it to absorb some flavor. This initial sautéing process enhances the taste and prepares the pasta for its cooking adventure.
Step 3: Pour in Chicken Broth
Carefully pour in 3 cups of chicken broth, ensuring the pasta is just covered. Add a pinch of salt to season. Stir the mixture occasionally to prevent sticking and bring it to a gentle boil. Cooking the pasta in broth adds depth to the dish, making it even more flavorful.
Step 4: Cook the Pasta
Reduce the heat to medium and let the pasta simmer uncovered for about 8 minutes. Stir occasionally until the majority of the broth is absorbed and the ditalini is al dente. You’ll know it’s ready when the pasta is tender yet still has a slight bite—perfectly cooked for your creamy delight!
Step 5: Create the Creamy Sauce
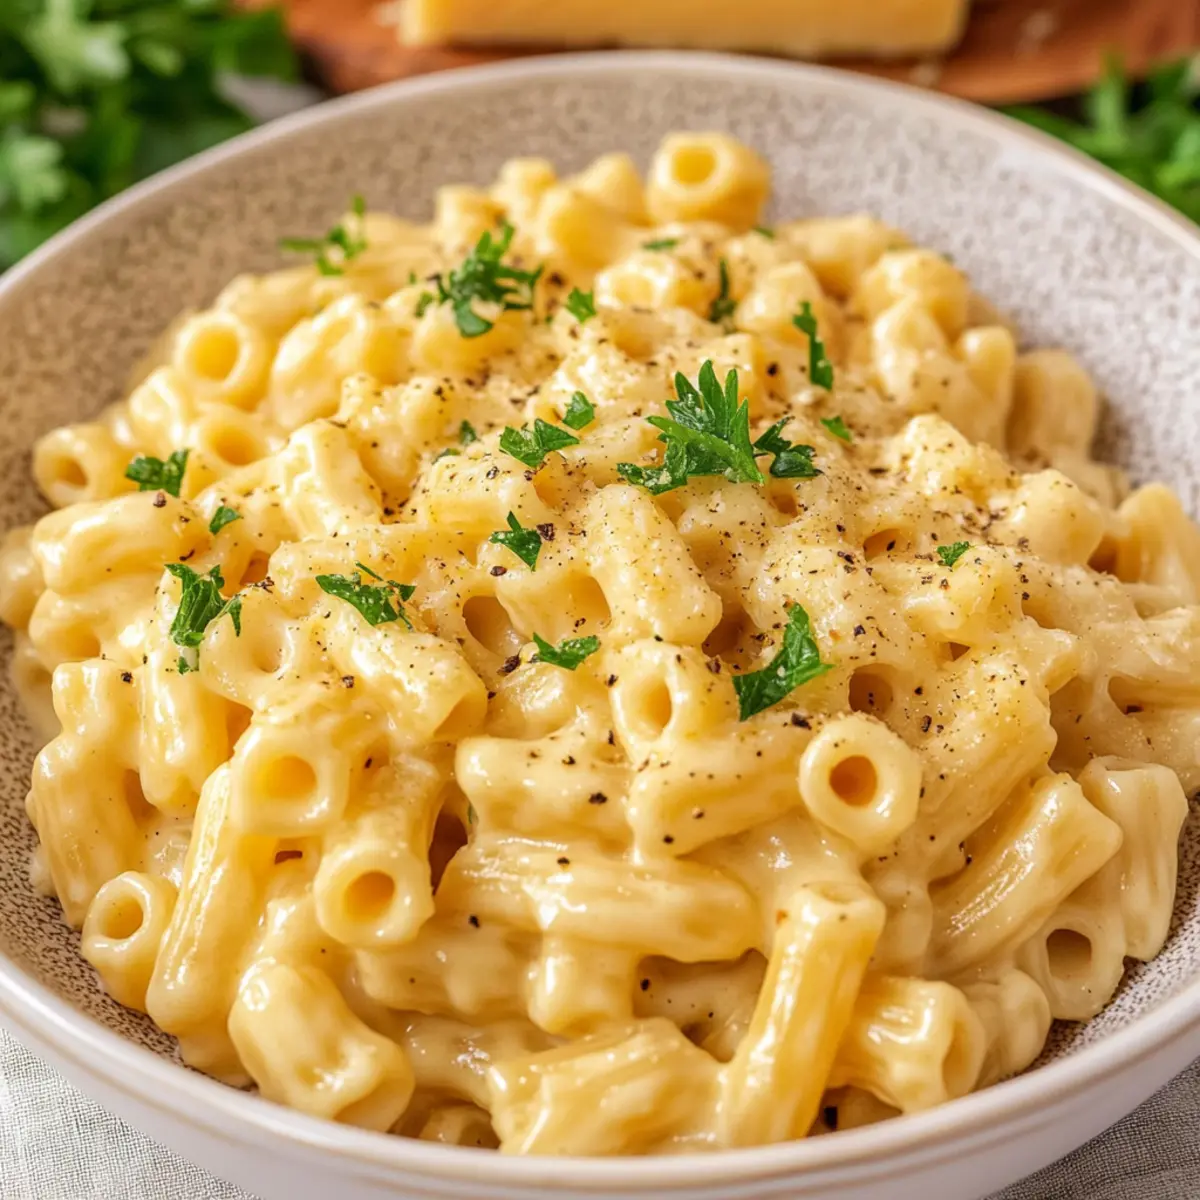
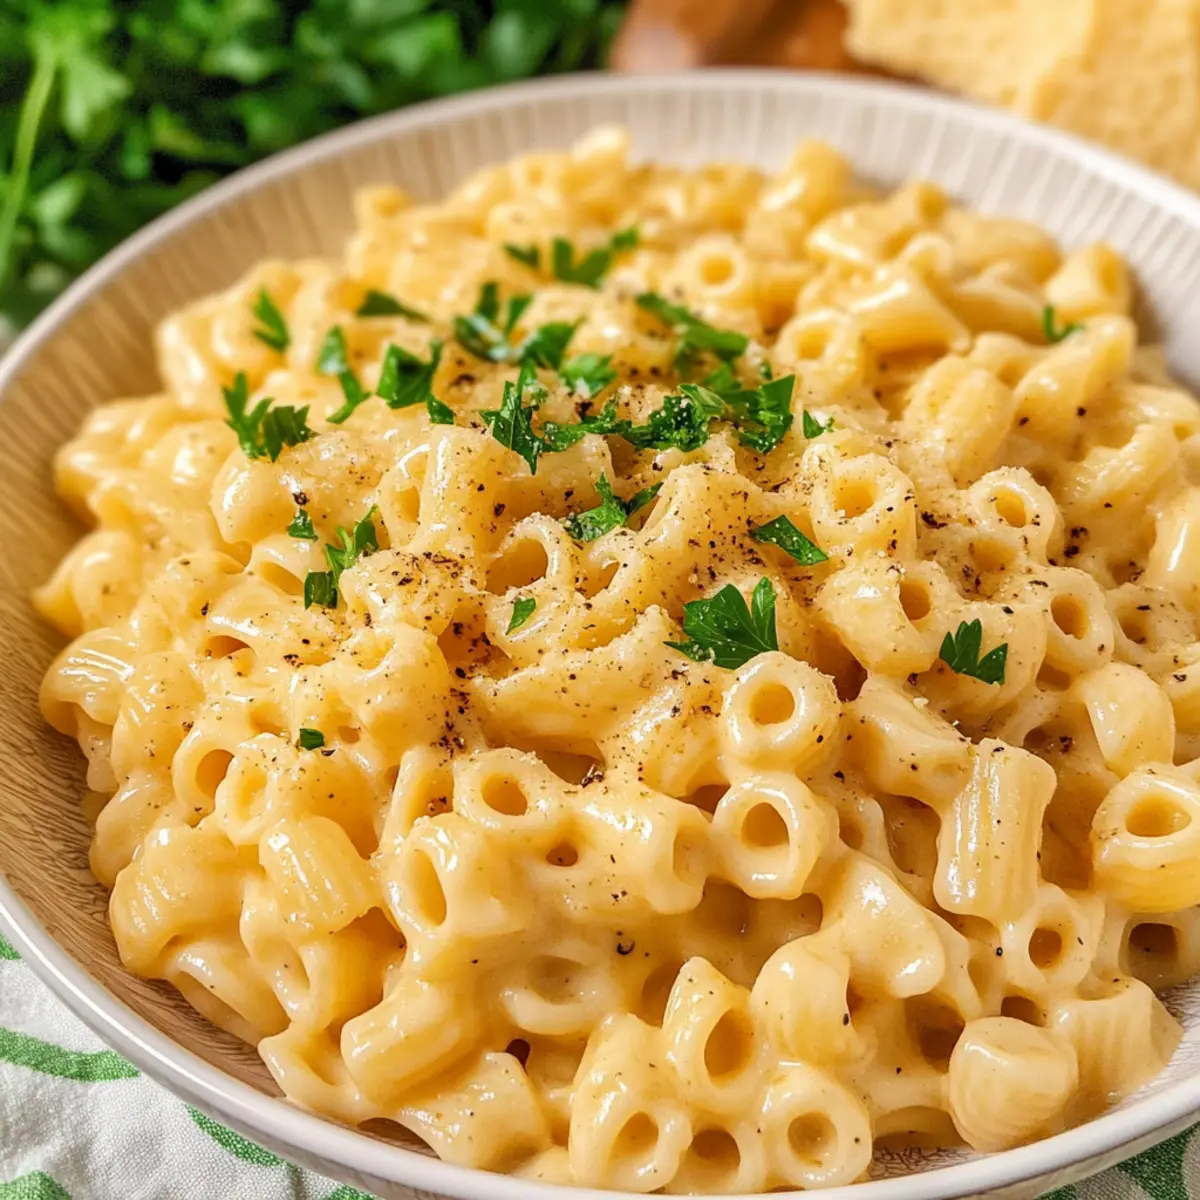
Once the pasta reaches that perfect al dente texture, lower the heat and stir in ½ cup of heavy cream, ½ cup of grated Parmesan cheese, and 2 tablespoons of salted butter. Mix well until the cheese melts completely and the sauce turns creamy and smooth. This is where the magic of your Creamy Ditalini Pasta truly happens!
Step 6: Season and Serve
Taste the dish and adjust the seasoning with additional salt and freshly cracked black pepper as needed. Once seasoned to your liking, garnish with freshly chopped parsley for a burst of color and flavor. Serve immediately to ensure that the sauce remains luscious and creamy throughout!
Expert Tips for the Best Ditalini Pasta
-
Stir Often: Frequent stirring helps prevent the pasta from sticking to the skillet. This keeps your Ditalini Pasta Recipe perfectly creamy and prevents any unwanted burning.
-
Serve Fresh: For the best texture, serve the pasta immediately. Reheating can cause the creamy sauce to break and lose its luscious consistency.
-
Customize Wisely: Feel free to add cooked veggies or proteins, but remember not to overload the dish. Balance is key to maintaining the creamy texture of the Ditalini Pasta.
-
Seasoning Check: Always taste as you go! Adjust salt and pepper according to your broth’s saltiness and personal preference for a perfectly seasoned dish.
-
Heat Adjustment: To add a little kick, consider adding red pepper flakes or chili crisp while cooking. Just be cautious not to overdo it; a little goes a long way!
Make Ahead Options
These Creamy Ditalini Pasta bites are perfect for meal prep enthusiasts! You can sauté the garlic and oil, and even cook the ditalini pasta in the chicken broth up to 24 hours in advance to save precious time during a busy weeknight. Once cooked, allow the pasta to cool, then refrigerate it in an airtight container. To maintain quality, be sure to store the sauce separately if possible, as this will keep it from breaking when reheated. When you’re ready to enjoy your dish, simply reheat the pasta in a skillet, stir in the heavy cream, butter, and Parmesan, and serve hot for a comforting meal that’s just as delicious as when freshly made!
Storage Tips for Ditalini Pasta Recipe
Fridge: Store leftovers in an airtight container in the fridge for up to 2 days. This helps maintain freshness and flavor without drying out the creamy sauce.
Freezer: You can freeze leftovers in a freezer-safe container for up to 2 months. When ready to eat, thaw in the fridge overnight and gently reheat on the stove, adding a touch more cream to restore creaminess.
Reheating: For the best results, reheat on low heat in a saucepan, stirring constantly to prevent the sauce from breaking. Avoid microwaving, as it can lead to uneven heating and separation.
Customization: If you add cooked vegetables or protein, be mindful this could affect the texture upon reheating. Adjust liquid ingredients accordingly when storing to keep the dish creamy.
Ditalini Pasta Recipe Variations
Get ready to make this delightful recipe your own by swapping ingredients or adding new flavors!
-
Vegetable Boost: Add sautéed spinach or broccoli for extra nutrition and a pop of color.
-
Protein Packed: Mix in cooked diced chicken or shrimp for a heartier meal that keeps everyone satisfied.
-
Gluten-Free: Swap ditalini for gluten-free pasta options like brown rice or quinoa pasta to cater to dietary needs.
-
Creamy Spin: Incorporate a dollop of cream cheese for an even creamier sauce that adds a delightful tang.
-
Cheesy Twist: Add a blend of mozzarella and provolone cheese for a gooey, melty texture that’s utterly irresistible.
-
Herb Flavor: Instead of parsley, experiment with fresh basil or thyme for a fragrant herbal twist.
-
Spicy Kick: Toss in some red pepper flakes during cooking to give your dish a flavorful heat without overwhelming it.
-
Italian Style: Stir in sun-dried tomatoes and olives for a Mediterranean flair that transports you right to Italy!
If you’re in the mood for another comforting pasta recipe, the Rotel Pasta with Ground Beef or the delicious Steak Pasta Garlic might catch your fancy too!
What to Serve with 15-Minute Creamy Garlic Butter Ditalini Pasta
Enjoy a cozy meal by pairing your pasta dish with delightful sides that enhance its creamy goodness.
-
Garlic Bread: Crunchy and buttery, garlic bread is perfect for mopping up any leftover sauce, making every bite memorable.
-
Caesar Salad: Crisp romaine with creamy dressing offers a refreshing contrast, balancing the richness of the pasta beautifully.
-
Roasted Vegetables: A medley of seasonal veggies provides color and nutrients, adding a slight char that complements the softness of the pasta.
-
Grilled Chicken: Juicy, seasoned chicken adds protein and a hearty element, making the meal more satisfying without overpowering the pasta’s flavors.
-
Sautéed Spinach: Lightly sautéed spinach brings a peppery bite and vibrant green contrast, enhancing the dish’s nutrition while maintaining simplicity.
-
Sparkling Water with Lemon: Refreshing and light, this drink cleanses the palate between bites, ensuring every mouthful remains delightful and engaging.
These pairings will elevate your ditalini pasta experience into a truly memorable meal, perfect for sharing with family and friends.

Ditalini Pasta Recipe FAQs
How do I choose the right ditalini pasta?
Absolutely! When selecting ditalini pasta, look for a high-quality brand that is firm and has a nice, even color. Ideally, the pasta should be free from any dark spots or cracks to ensure it cooks evenly. If you’re opting for a substitute like mini bow ties or pastina, be sure they are similar in size to maintain the dish’s essence.
What is the best way to store leftovers?
Very good question! Store any leftover creamy ditalini pasta in an airtight container in the fridge for up to 2 days. To keep the sauce from drying out, I recommend adding a splash of chicken broth or cream before sealing the container. This small step helps maintain moisture and flavor when you’re ready to enjoy the pasta again!
Can I freeze ditalini pasta?
Yes, you can! To freeze your ditalini pasta, let it cool completely before transferring it to a freezer-safe container. Make sure to freeze it for no more than 2 months for optimal taste. To reheat, thaw it in the fridge overnight, then warm it gently in a saucepan over low heat, adding a little broth or cream to restore that creamy texture.
What are some common issues I might encounter?
One common challenge is if your sauce becomes too thick while reheating. To remedy this, simply add a splash of chicken broth or water while stirring on low heat. For sticking, ensure you stir often during cooking and watch the heat. If it burns at the bottom, reduce the heat and keep an eye on it, as this will help avoid any unpleasant flavors.
Are there any dietary considerations I should keep in mind?
Absolutely! If you’re cooking for someone with allergies, you can easily make this ditalini pasta recipe dairy-free by substituting heavy cream with plant-based cream and using nutritional yeast instead of Parmesan cheese. Always double-check labels for your ingredients, especially the broth, to ensure they align with dietary needs. If you’re considering adding protein, cooked chicken or shrimp can elevate the dish without compatibility issues.
Creamy Ditalini Pasta Recipe for a Cozy Weeknight Dinner
Ingredients
Equipment
Method
- In a large skillet, heat 2 tablespoons of olive oil over medium-high heat. Once the oil shimmers, add 2 tablespoons of garlic paste and sauté for about 1 minute until it becomes fragrant and lightly golden.
- Stir in 1 cup of ditalini pasta, making sure each piece is coated in the garlicky oil. Let the pasta sauté for about 1–2 minutes.
- Carefully pour in 3 cups of chicken broth and add a pinch of salt. Stir occasionally and bring it to a gentle boil.
- Reduce the heat to medium and let the pasta simmer uncovered for about 8 minutes, stirring occasionally.
- Once the pasta reaches al dente texture, lower the heat and stir in ½ cup of heavy cream, ½ cup of grated Parmesan cheese, and 2 tablespoons of salted butter.
- Taste the dish and adjust the seasoning with additional salt and freshly cracked black pepper. Garnish with freshly chopped parsley.
Leave a Reply