
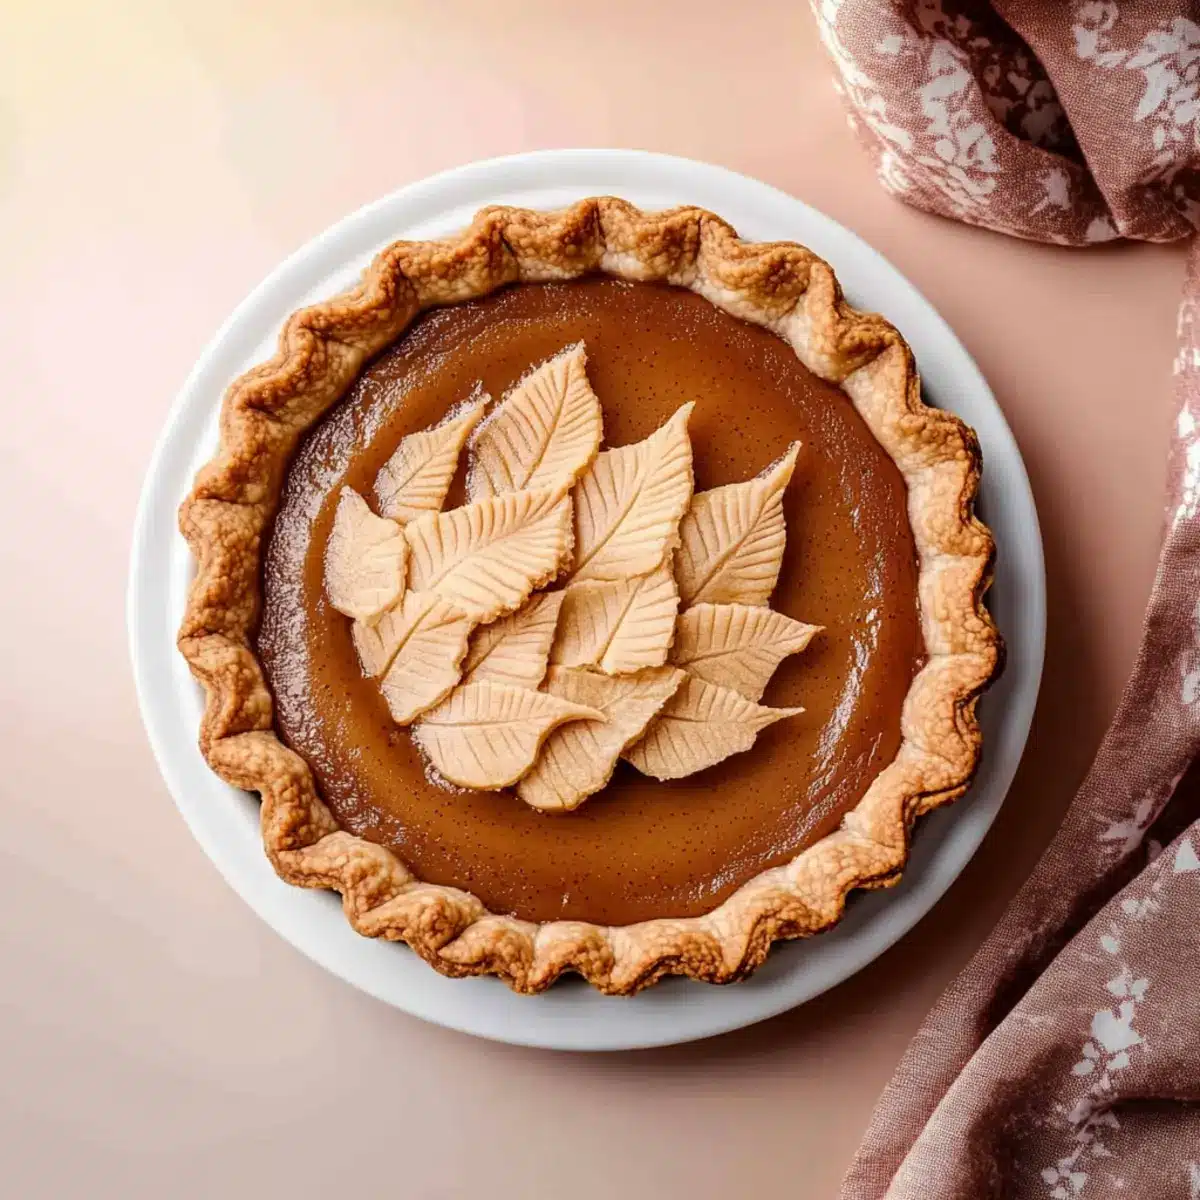
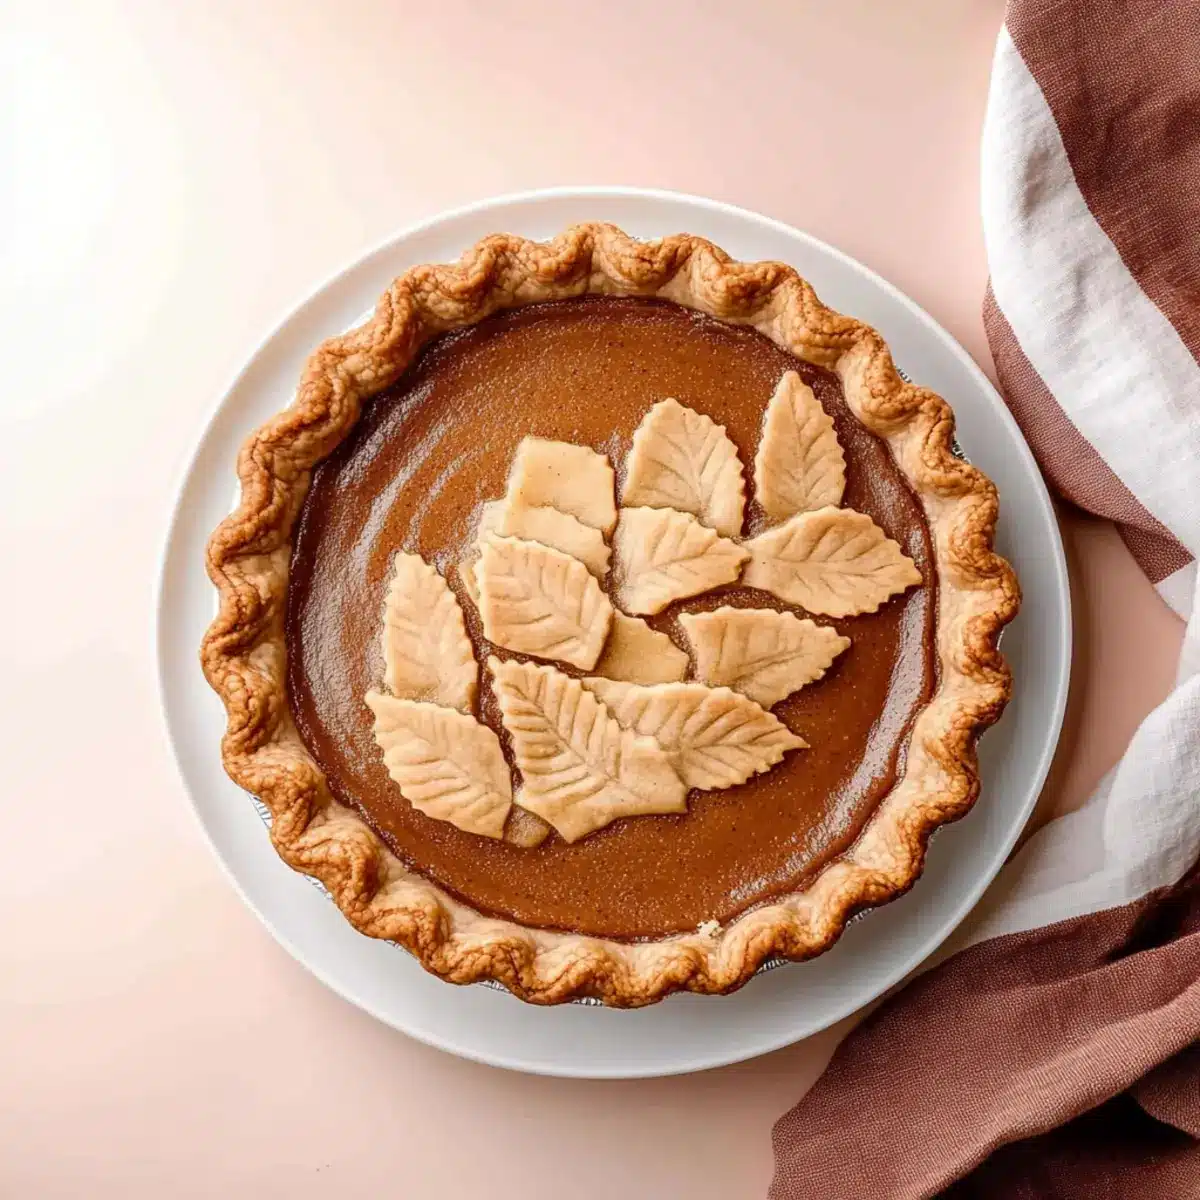
Every autumn, I find myself in a delightful battle with my senses as the cozy scent of spice fills my kitchen. This year, I’m excited to share my Easy & Creamy Apple Butter Pie with Spelt Crust, a sweet homage to the classic fall dessert that effortlessly captures the essence of the season. With its smooth custard-like filling, this pie offers a delicious twist on traditional apple flavors that not only brings a hearty satisfaction but is also incredibly easy to whip up. Perfect for gatherings or a simple family treat, this recipe invites everyone—regardless of baking skill—to create something truly special. Who wouldn’t want to indulge in a slice of warmth and nostalgia? Let’s dive into the recipe and savor the sweetness of fall together!

Why is Apple Butter Pie a must-try?
Comforting Flavor: This pie showcases the rich essence of apple butter, making every bite reminiscent of a warm autumn day.
Easy to Make: Perfect for all skill levels, the straightforward process lets you focus on enjoying the baking experience.
Unique Texture: With a custard-like filling that beautifully balances creaminess and sweetness, it’s a delightful twist on classic pies.
Versatile Options: Feel free to customize with spices or topping swaps—try it with Maple Whipped Cream for an extra touch!
Impressive Presentation: This stunning dessert will not only please the taste buds but also be a showstopper at any gathering. Enjoy it chilled or warm with a scoop of ice cream for a cozy finish!
Apple Butter Pie Ingredients
For the Filling
- Apple Butter – A rich apple-flavored base; using homemade enhances the taste significantly.
- Eggs – Essential for structure; they help set the custard to perfection.
- Cream – Adds a luxurious richness; feel free to substitute with coconut cream for a dairy-free version.
- Spices (Cinnamon, Nutmeg) – Elevate the flavor; opt for fresh spices for a vibrant taste.
For the Crust
- Spelt Flour – Provides a hearty, mildly sweet crust; can be swapped with all-purpose flour for a lighter texture.
- Butter – Ensures flavor and moisture in the crust; use vegan butter as a dairy-free alternative.
- Sugar – Sweetens the crust; brown sugar adds a deeper, more caramel-like flavor.
- Salt – Balances sweetness, enhancing overall flavors.
Step‑by‑Step Instructions for Apple Butter Pie
Step 1: Prepare the Crust
In a large mixing bowl, combine spelt flour, softened butter, sugar, and salt. Use a pastry cutter or your fingers to mix until the mixture resembles coarse crumbs. Firmly press the crumbly mixture into a pie plate, ensuring an even layer. Preheat your oven to 350°F (175°C) and blind bake the crust for 15-20 minutes until lightly golden.
Step 2: Make the Filling
In a separate bowl, whisk together the apple butter, eggs, cream, cinnamon, and nutmeg until smooth and homogenous. Ensure there are no lumps in the mixture as you blend. This silky filling is the heart of your Apple Butter Pie, showcasing rich autumn flavors. Once mixed, pour the filling into the pre-baked spelt crust, smoothing the top with a spatula.
Step 3: Bake the Pie
Lower the oven temperature to 325°F (163°C) and place your filled pie back into the oven. Bake for 35-40 minutes, or until the edges puff slightly but the center remains slightly wobbly. This gentle baking process ensures a custard-like texture, which is crucial for your Apple Butter Pie. Keep an eye on the edges to prevent over-browning.
Step 4: Cool and Set
Once baked to perfection, remove the pie from the oven and let it cool at room temperature for about an hour. This cooling period allows the filling to set properly. Afterward, cover the pie and refrigerate for at least 6 hours, or overnight if you can wait! This chilling will help enhance the flavors and create a delightful texture.
Step 5: Serve
When ready to serve your comforting Apple Butter Pie, take it out of the refrigerator and slice it into wedges. For an extra touch of indulgence, top each slice with a dollop of Maple Whipped Cream. Your guests will adore the cozy flavors and creamy texture, making this dessert a cheerful ending to any autumn gathering.
Make Ahead Options
These Easy & Creamy Apple Butter Pies are perfect for meal prep enthusiasts looking to save time on busy weeknights! You can prepare the spelt crust up to 3 days in advance, simply blind bake it, let it cool, and then store it wrapped in plastic wrap at room temperature. The filling can be whisked together and stored in the refrigerator for up to 24 hours before pouring it into the crust. To maintain quality, make sure the filling is airtight, preventing the spices from losing their potency. When you’re ready to serve, just pour the filling into the pre-baked crust and bake as per the recipe instructions. This way, you’ll enjoy a scrumptious dessert with minimal effort on the day of your gathering!
What to Serve with Easy & Creamy Apple Butter Pie
This delightful dessert is perfect when paired with a variety of complementary dishes and drinks that elevate its comforting flavors.
- Maple Whipped Cream: This sweet topping brings a hint of maple flavor, which enhances the pie’s warm spices beautifully.
- Vanilla Ice Cream: A creamy scoop on the side counters the rich filling, creating a perfect balance with every bite.
- Spiced Apple Cider: Served warm, its comforting spiciness complements the apple butter essence, evoking that perfect autumn atmosphere.
Let’s not forget the delightful crunch from some fresh elements.
- Cinnamon-Glazed Pecans: These crunchy morsels add a delightful texture and nuttiness, contrasting the creamy pie while keeping the fall vibe intact.
- Roasted Brussels Sprouts: Their slightly bitter notes create an unexpected yet pleasing harmony with the dessert’s sweetness, adding depth to your meal.
And for a light finish:
- Elderflower Sparkling Water: This refreshing drink offers floral notes that cleanse the palate and perfectly balance the richness of the pie.
- Chocolate Drizzled Shortbread Cookies: For a cheeky indulgence, these cookies’ slight bitterness pairs nicely with the pie’s sweetness, rounding out your dessert experience.
With these wonderful accompaniments, every slice of your Easy & Creamy Apple Butter Pie transforms into a memorable autumn feast!
Apple Butter Pie Variations & Substitutions
Feel free to get creative with your Apple Butter Pie—these tweaks will help you make a version that excites every palate!
-
Gluten-Free Crust: Swap spelt flour for a gluten-free blend to cater to those with dietary restrictions. There are great options available that mimic the original’s texture.
-
Vegan Delight: Use coconut cream instead of dairy cream and replace eggs with flaxseeds for a heartwarming vegan twist that still feels rich and creamy.
-
Spicy Kick: Enhance the flavor with a teaspoon of ground ginger or allspice for extra warmth. This zesty addition pairs beautifully with apple butter’s natural sweetness.
-
Nutty Flavor: Fold in some finely chopped pecans or walnuts into the crust for a nutty surprise that elevates the texture and flavor profile.
-
Cinnamon-Sugar Topping: Dust the pie with a mixture of brown sugar and cinnamon before baking for a sweet, caramelized topping. It adds a lovely crunch to your creamy filling.
-
Maple Sweetness: Drizzle some pure maple syrup over individual slices before serving to enhance the autumn flavors and add a touch of sweetness. It’s a delightful pairing!
-
Pumpkin Spice: Incorporate a blend of pumpkin pie spices into the apple butter filling for an autumnal fusion that will delight fans of both flavors! Serve it alongside a spoonful of Maple Whipped Cream for a cozy finish.
-
Ice Cream Layer: Serve the pie with a scoop of vanilla or caramel ice cream on top for an indulgent treat. The creaminess will complement the pie and create a luxurious dessert experience.
Enjoy crafting your own version of this heartwarming pie, and don’t hesitate to explore even more delicious recipes like Garlic Butter Sweet for a complete fall feast!
Expert Tips for Apple Butter Pie
- Mind the Wobble: Knowing when to take the pie out is key. A slight wobble in the center indicates it’s done; over-baking will ruin the texture!
- Chill Time: Don’t skimp on refrigeration; cooling for 6 hours allows flavors to intensify and the filling to set properly, making your Apple Butter Pie a success.
- Quality Matters: Using high-quality apple butter significantly boosts flavor. If possible, try making your own for the best results!
- Adjust the Spices: Taste your filling mix before baking. Don’t hesitate to adjust the spices according to your preferences for a more personalized flavor profile.
- Pre-Bake Carefully: Ensure the crust is fully pre-baked until lightly golden, as this helps maintain crispiness against the creamy filling of your Apple Butter Pie.
How to Store and Freeze Apple Butter Pie
Fridge: Keep your Apple Butter Pie in the refrigerator, covered with plastic wrap or in an airtight container, for up to 5 days. This helps maintain its creamy texture and rich flavors.
Freezer: If you wish to enjoy your pie later, freeze it uncut for up to 3 months. Wrap tightly in plastic wrap and then foil to prevent freezer burn.
Thawing: To enjoy, thaw the frozen pie overnight in the fridge, then serve it chilled or at room temperature.
Reheating: If you prefer it warm, reheat slices in the oven at 350°F (175°C) for about 10-15 minutes, ensuring it retains its delightful custard-like texture.

Apple Butter Pie Recipe FAQs
What type of apple butter should I use?
Absolutely! The quality of your apple butter greatly influences the flavor of your pie. Homemade apple butter often has a richer taste and fresher ingredients, but store-bought can be just as good, especially if you choose a brand that features simple, high-quality ingredients. Look for apple butter without added preservatives or unnecessary sugars for the best results.
How long can I store the Apple Butter Pie in the fridge?
You can keep your Apple Butter Pie in the refrigerator for up to 5 days. Just cover it with plastic wrap or place it in an airtight container to maintain its creamy texture and flavor. I often enjoy grabbing a slice for a quick dessert or snack throughout the week!
Can I freeze Apple Butter Pie?
Yes! To freeze your Apple Butter Pie, wrap it tightly in plastic wrap and then in foil to prevent freezer burn. It can be stored in the freezer for up to 3 months. When you’re ready to enjoy it, thaw it overnight in the refrigerator. If you prefer it warm, gently reheat slices in the oven at 350°F (175°C) for about 10-15 minutes before serving.
What should I do if my pie cracks while baking?
Very! If your pie cracks, it’s usually a sign of over-baking. To prevent this, keep a close eye on the pie during the last few minutes of baking. When the edges puff slightly but the center remains slightly wobbly, it’s time to take it out. If your pie has already cracked, don’t worry too much! If you serve it chilled, the cracks won’t be very noticeable, and you can cover them with whipped cream or a sprinkle of cinnamon for a lovely presentation.
Is this pie safe for people with nut allergies?
Great question! This Apple Butter Pie recipe is nut-free as-is, making it a safe choice for individuals with nut allergies. However, always double-check the labels of any ingredients you use, like spices or butter substitutes, to ensure they haven’t come into contact with nuts. If you’re serving it to guests, it’s always good to ask about any other dietary restrictions or allergies!
Can I make this pie dairy-free?
Absolutely! To make the Apple Butter Pie dairy-free, substitute regular cream with coconut cream or any plant-based cream alternative. You can also use vegan butter instead of regular butter for the crust. This modification keeps the pie delicious and ensures everyone can enjoy a slice!
Delightful Apple Butter Pie with Creamy Spelt Crust
Ingredients
Equipment
Method
- In a large mixing bowl, combine spelt flour, softened butter, sugar, and salt. Mix until resembling coarse crumbs.
- Press the mixture into a pie plate and blind bake at 350°F (175°C) for 15-20 minutes until lightly golden.
- Whisk together apple butter, eggs, cream, cinnamon, and nutmeg until smooth. Pour filling into the pre-baked crust.
- Lower oven to 325°F (163°C) and bake for 35-40 minutes until edges puff slightly but the center remains wobbly.
- Allow the pie to cool at room temperature for an hour, then refrigerate for at least 6 hours before serving.
- Serve chilled or warm, optionally topped with Maple Whipped Cream.
Leave a Reply