
The aroma of warm pancakes wafting through the kitchen takes me back to those cherished weekend mornings. If you’re like me, and love the joy of breakfast, these homemade Pancake Poppers are destined to become a staple in your home. Not only are they delightfully mess-free—perfect for busy families—but they also offer incredible versatility, allowing you to mix and match sweet or savory ingredients. Whether you’re folding in chocolate chips for the kids or adding crispy bacon bits for a heartier meal, these poppers cater to every craving. So, why not elevate your breakfast game with a recipe that’s as fun to make as it is to eat? What delicious mix-ins will you create your first batch with?
Why are Pancake Poppers a must-try?
Versatility, these pancake poppers can be customized with both sweet and savory mix-ins, making them an excellent choice for any palate. Mess-free preparation ensures they are perfect for busy mornings when you want to enjoy a delightful breakfast without the clean-up hassle. Crowd-pleaser, both kids and adults will love these bite-sized treats, whether drizzled with syrup or served with fresh berries. Quick and easy, this recipe requires minimal effort, so you can whip up a delicious breakfast in no time. Explore more variations and ideas to keep every brunch exciting, and don’t forget to check out our tips for perfectly fluffy pancakes!
Pancake Poppers Ingredients
For the Batter
- All-purpose flour – Provides structure and body to the poppers; consider using whole wheat flour for a healthier alternative.
- Granulated sugar – Adds sweetness and enhances browning; can be substituted with coconut sugar for a lower glycemic index.
- Baking powder and baking soda – Essential leavening agents for achieving that fluffy texture; ensure they’re fresh for optimal results.
- Salt – Balances sweetness and enhances overall flavor.
- Buttermilk – Adds moisture and a slight tang; can substitute with regular milk plus 1 tbsp vinegar or lemon juice (let sit for 5 minutes).
- Eggs – Contribute moisture and play a crucial role in texture and leavening.
- Unsalted butter – Adds richness; melted coconut oil serves as a great dairy-free option.
- Vanilla extract – Enhances flavor; use pure vanilla for the best taste.
For Mix-Ins
- Mini chocolate chips – Adds sweetness and makes breakfast more fun.
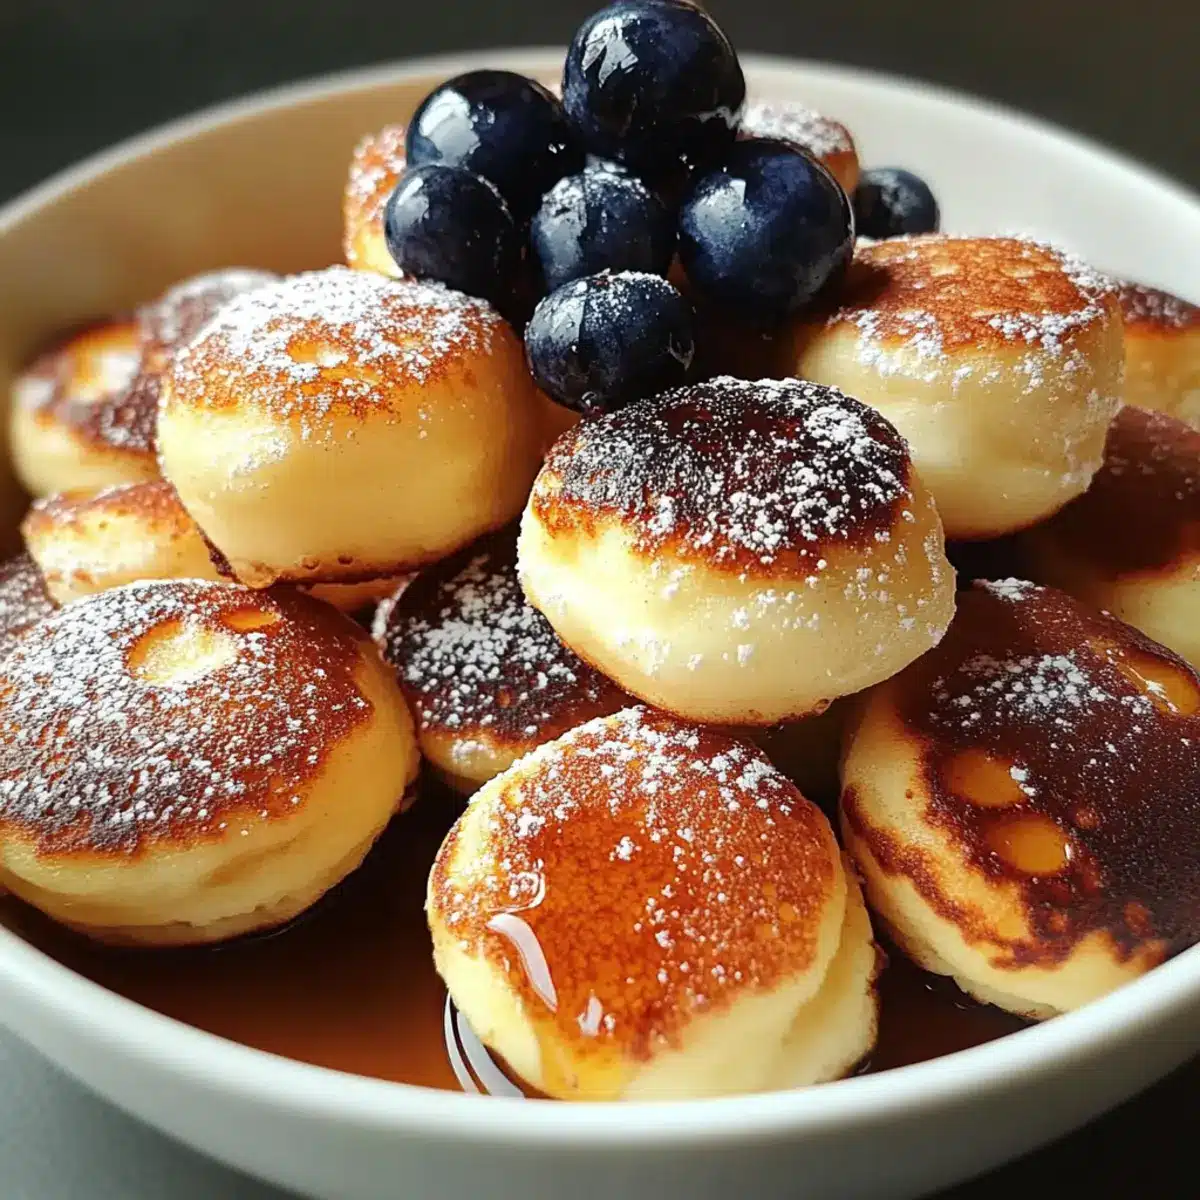
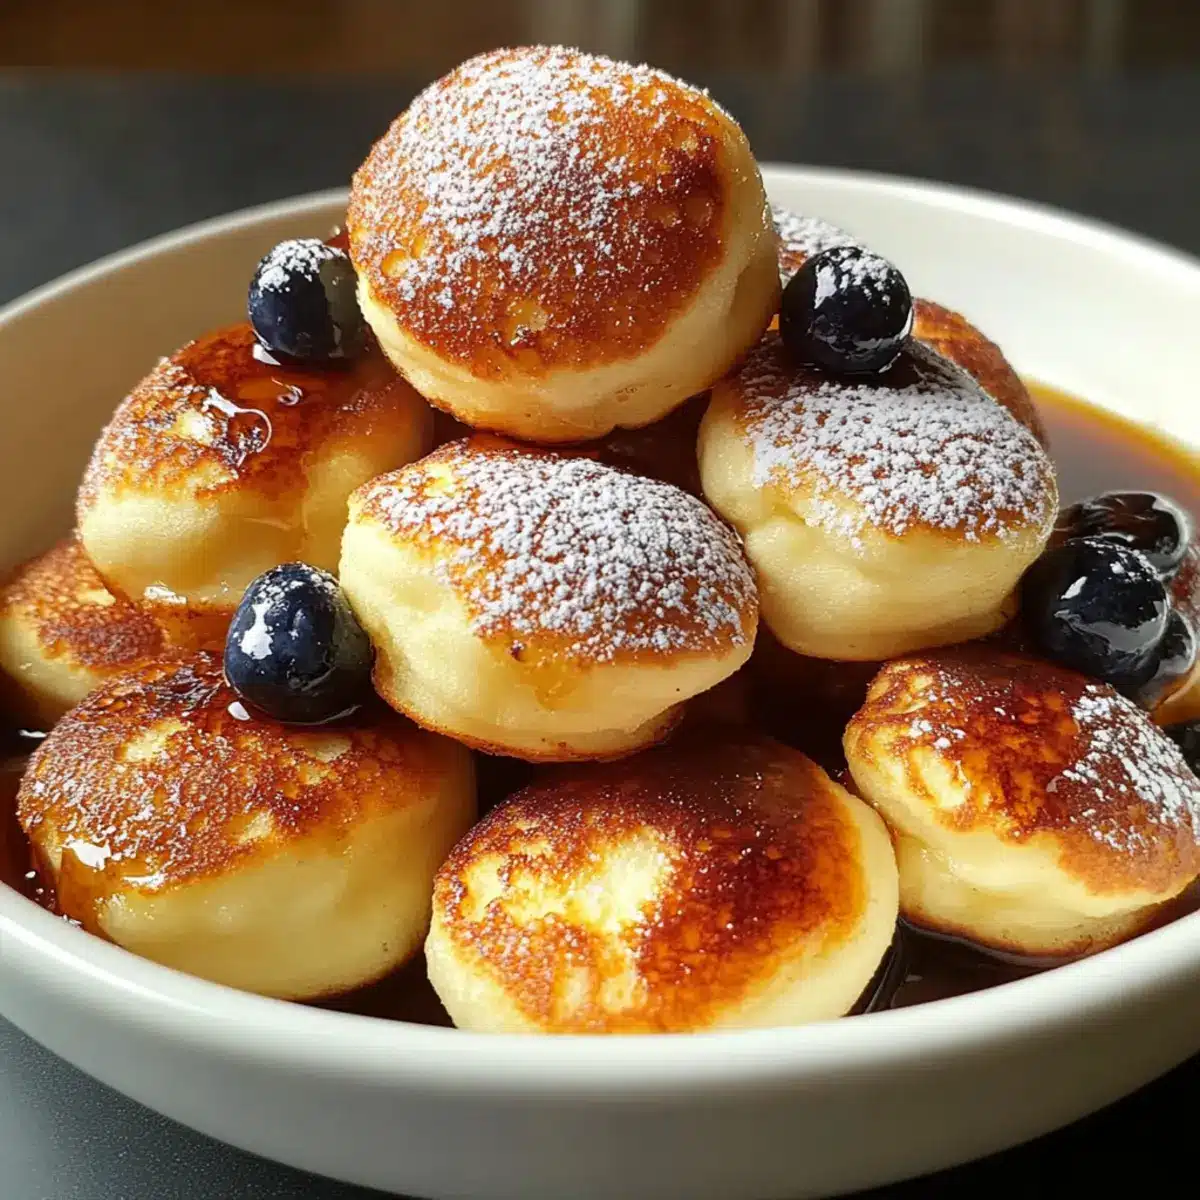
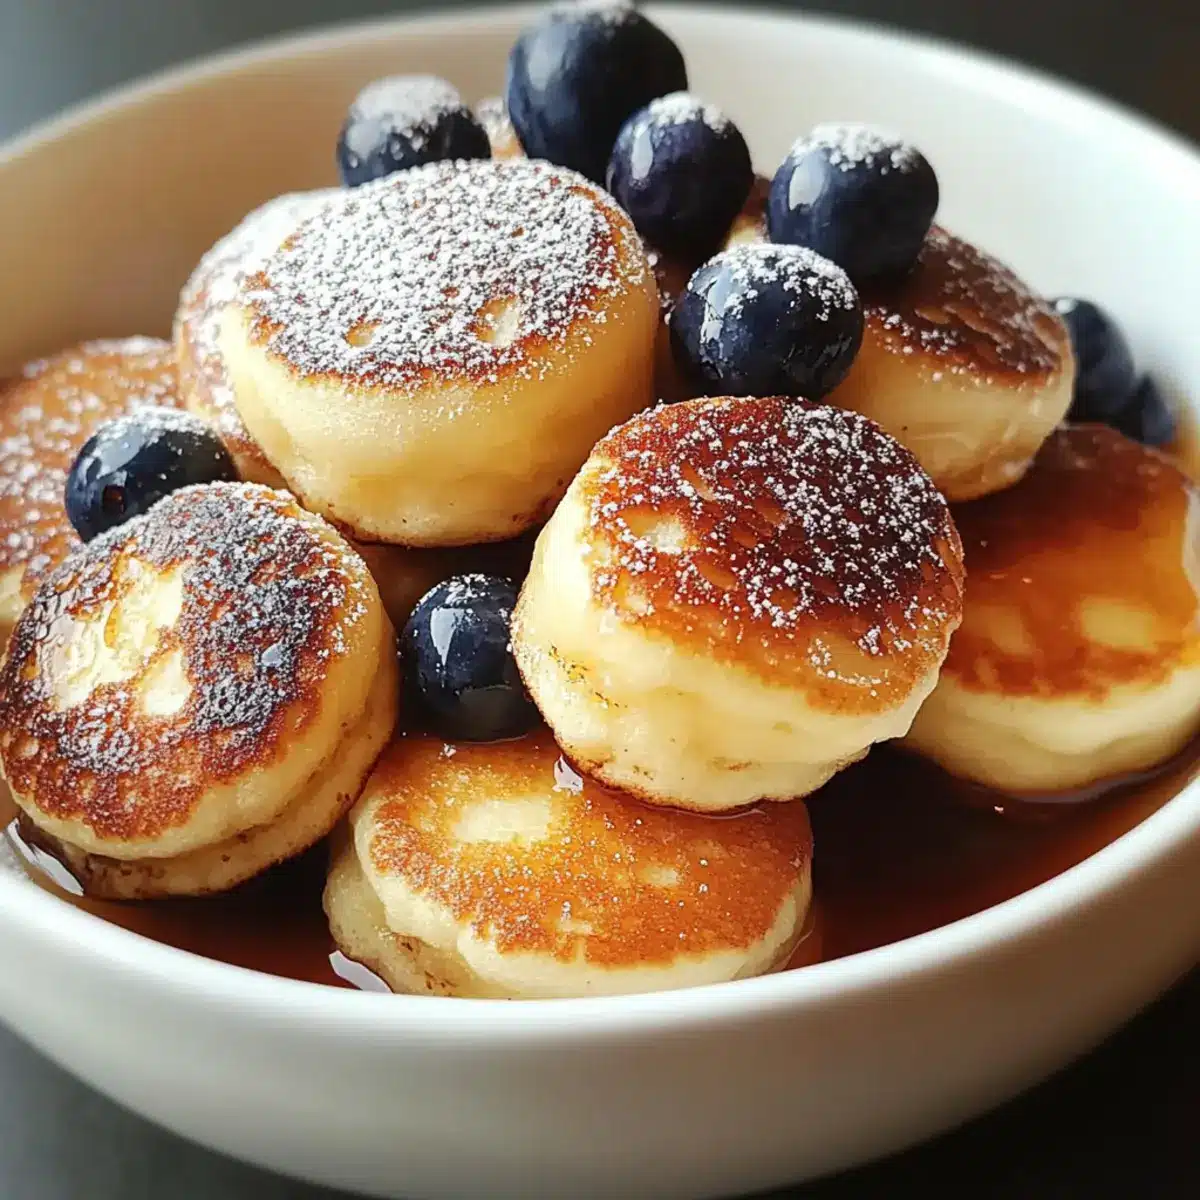
- Fresh blueberries – Brings natural sweetness and an extra burst of flavor to your poppers.
- Cooked beef bacon – Introduces a savory twist perfect for those craving hearty flavors.
- Cooked beef sausage – Offers a robust taste to satisfy those savory breakfast cravings.
For Greasing
- Non-stick cooking spray or butter – Essential for greasing your cooking vessel and ensuring easy release.
For Serving
- Maple syrup – A classic sweet drizzle that’s always a crowd-pleaser.
- Powdered sugar – Adds a touch of elegance for special occasions.
- Whipped cream – Perfect for those indulgent breakfast moments.
- Fresh berries and fruit compote – Elevates flavor and presentation, making your breakfast pop!
With these simple ingredients, your Pancake Poppers journey is just beginning! Get ready to whip up a breakfast that everyone will rave about!
Step‑by‑Step Instructions for Pancake Poppers
Step 1: Prepare Dry Ingredients
In a large mixing bowl, whisk together 1 cup of all-purpose flour, 2 tablespoons of granulated sugar, 1 teaspoon of baking powder, 1/2 teaspoon of baking soda, and a pinch of salt until evenly combined. This mixture creates the base for your pancake poppers, ensuring they rise beautifully and have a fluffy texture.
Step 2: Prepare Wet Ingredients
In a separate bowl, whisk together 1 cup of buttermilk, 2 large eggs, 2 tablespoons of melted unsalted butter, and 1 teaspoon of vanilla extract until combined. This mixture adds moisture and richness to your pancake poppers. Ensure everything is well-blended before combining with the dry ingredients.
Step 3: Combine Mixtures
Gently fold the wet ingredients into the dry mixture until just combined, being careful not to overmix. A few lumps are perfectly fine, as overmixing can lead to tougher pancake poppers. This step unites the flavors while maintaining that fluffy texture we all love in our pancake poppers.
Step 4: Add Optional Mix-Ins
If desired, carefully fold in your choice of mix-ins, such as 1/2 cup mini chocolate chips, 1/2 cup fresh blueberries, or cooked bits of beef bacon or sausage. These add exciting flavors and textures to your pancake poppers, making them even more delicious and customized to your taste.
Step 5: Rest the Batter
Allow the batter to rest for 5-10 minutes. This brief pause helps the baking powder activate and improves the overall texture of your pancake poppers. During this time, the gluten can relax, resulting in a more tender mouthfeel when cooked.
Step 6: Preheat and Grease Cooking Device
Preheat your oven to 375°F (190°C) if using a muffin tin, or follow the specific instructions for your electric pancake popper. Grease the muffin cups or popper cavities with non-stick cooking spray or butter, allowing for easy release when the pancake poppers are done cooking.
Step 7: Fill Cavities
Spoon the batter into the greased muffin cups or popper cavities, filling each about two-thirds full. This ensures they have enough room to rise beautifully without overflowing. Each cavity should be evenly filled to create uniform pancake poppers for your family to enjoy.
Step 8: Cook Pancake Poppers
Bake in the preheated oven for 10-15 minutes or for 3-6 minutes in an electric pancake popper, until they are golden brown and a toothpick inserted in the center comes out clean. This visual cue indicates that your pancake poppers are perfectly cooked and ready to be enjoyed.
Step 9: Remove and Repeat
Once cooked, remove the pancake poppers from the oven or electric appliance. Allow them to cool on a wire rack for a few minutes, then re-grease your cooking device and repeat the process until all the batter is used. This method ensures that each batch is cooked to perfection.
Step 10: Serve Warm with Toppings
Enjoy your warm pancake poppers right away, drizzled with maple syrup, dusted with powdered sugar, or topped with whipped cream and fresh berries. This delightful presentation enhances your meal, making these pancake poppers a fun and tasty breakfast treat for everyone.
Step 11: Storage and Reheating
Store any leftover pancake poppers in an airtight container for up to 2-3 days. For the best texture, briefly reheat them in the microwave or toaster before serving. This step helps revive that fluffy and inviting quality that makes pancake poppers so appealing.

Make Ahead Options
These Pancake Poppers are perfect for meal prep enthusiasts! You can prepare the batter up to 24 hours in advance by following the first steps of the recipe. Just whisk together the dry ingredients and wet ingredients separately, but don’t forget to store the batters in airtight containers in the refrigerator to maintain freshness. When you’re ready to cook, simply combine the batters and proceed with the baking instructions. You can also fill the muffin tins ahead of time and refrigerate them for up to 3 days. Just pop them into the oven when you need a quick breakfast, and you’ll have delicious pancake poppers without the morning rush!
Pancake Poppers: Delicious Variations Await
Feel free to get creative with your pancake poppers and make them your own with delightful mix-ins and toppings!
- Sweet Additions: Fold in mini chocolate chips or fresh blueberries for a burst of sweetness that kids will adore.
- Savory Twist: Add cooked, crumbled bacon or sausage into the batter for a hearty breakfast option, perfect for savory lovers.
- Citrus Zest: Brighten the flavor by incorporating lemon or orange zest for a refreshing twist that’ll awaken your taste buds.
- Spice It Up: A pinch of cinnamon or nutmeg can elevate the flavor profile, bringing warmth to your pancake poppers.
- Dairy-Free Option: Substitute buttermilk with almond milk plus 1 tablespoon of vinegar to create a lighter, dairy-free version.
- Vegetarian Delight: Add shredded cheese and finely chopped herbs to the batter, creating a savory flavor to delight those who prefer meatless.
- Fruit Compote: Serve warm pancake poppers with a homemade berry compote for a fruity and elegant touch to your breakfast spread.
- Topping Bar: Set up a toppings bar with options like maple syrup, whipped cream, and chopped nuts, letting everyone personalize their pancake poppers!
With such flexible options, don’t hesitate to mix and match to find your perfect flavor combo. If you’re looking for more inspiration, check out our ideas for serving with fresh fruit and whipped cream for a delightful finishing touch!
What to Serve with Homemade Pancake Poppers?
Transform your pancake poppers into a delightful breakfast spread that’s visually appealing and palate-pleasing!
-
Creamy Scrambled Eggs: These fluffy eggs add a rich and savory complement to the sweet poppers, making it a balanced meal.
-
Fresh Berries: Strawberries, blueberries, or raspberries offer a vibrant, juicy burst of flavor that perfectly offsets the cozy sweetness of the poppers.
-
Maple Syrup and Whipped Cream: The classic combination of syrup and whipped cream brings an indulgent sweetness, enhancing the deliciousness of everyone’s favorite bite-sized treats.
-
Savory Veggie Salsa: A zesty, fresh salsa adds an unexpected twist. The crunch of veggies and a splash of acidity create a refreshing contrast to the fluffy poppers.
-
Yogurt Parfait: Creamy, tangy yogurt layered with fresh fruit and crunchy granola adds texture and nutrition to your meal, perfect for those who crave a wholesome breakfast.
-
Iced Coffee or Herbal Tea: Pair your poppers with a chilled brew or calming tea to elevate this breakfast moment. The drink choice can balance sweetness with a refreshing twist.
Expand your pancake poppers experience! Each pairing enhances the flavors while contributing unique textures and colors to your breakfast table.
Expert Tips for Pancake Poppers
- Preheat Properly: Ensure your cooking surface is adequately preheated to achieve a golden-brown exterior while keeping the inside fluffy.
- Don’t Overmix: Gently fold wet and dry ingredients together. Overmixing can result in tougher pancake poppers; a few lumps are okay!
- Grease Between Batches: Re-grease your muffin tin or popper maker after each batch for easy removal and consistent cooking results.
- Experiment with Mix-Ins: Get creative! Try various sweet and savory mix-ins for your pancake poppers to keep breakfast exciting for everyone.
- Rest the Batter: Allowing the batter to sit for 5-10 minutes prior to cooking helps improve texture and fluffiness.
- Use Quality Ingredients: Opt for fresh and high-quality ingredients, such as pure vanilla extract and fresh dairy, to elevate the flavor of your pancake poppers.
How to Store and Freeze Pancake Poppers
Fridge: Store leftover pancake poppers in an airtight container for up to 3 days. Keeping them sealed prevents them from drying out and maintains their delicious fluffiness.
Freezer: For longer storage, freeze pancake poppers by placing them in a single layer on a baking sheet until solid, then transfer to a freezer-safe bag for up to 2 months. Ensure they’re well-wrapped to avoid freezer burn.
Reheating: Reheat poppers in the microwave for about 20-30 seconds or in a toaster oven until warmed through, restoring that delightful texture we all love in pancake poppers.
Pancake Poppers Recipe FAQs
What kind of flour should I use for Pancake Poppers?
I recommend using all-purpose flour for the best texture, but you can absolutely swap in whole wheat flour for a healthier twist. Just remember that whole wheat might make them a bit denser, so adjust your expectations for lightness.
How should I store leftover Pancake Poppers?
Store any leftover pancake poppers in an airtight container in the fridge for up to 3 days. This keeps them nice and fluffy. If you want to enjoy them longer, consider freezing instead!
Can I freeze Pancake Poppers?
Yes, absolutely! To freeze pancake poppers, place them in a single layer on a baking sheet until solid. Once frozen, transfer them to a freezer-safe bag or container, and they’ll keep well for up to 2 months. Just ensure they’re wrapped tightly to avoid freezer burn.
I don’t have buttermilk. What can I use instead?
No worries! You can create a quick substitute by mixing 1 cup of regular milk with 1 tablespoon of vinegar or lemon juice. Let it sit for about 5 minutes, and you’ll have a perfect buttermilk replacement for your pancake poppers!
Why are my Pancake Poppers dense instead of fluffy?
Achieving that light, airy texture is all about not overmixing your batter. A few lumps are okay! Additionally, ensure your baking powder and baking soda are fresh, as stale leavening agents can prevent the fluffiness you’re after.
Are Pancake Poppers suitable for kids with allergies?
Keep in mind that this recipe contains gluten and dairy. If you’re making these poppers for someone with allergies, consider using a gluten-free flour blend and a dairy-free milk substitute (like almond milk) to make them more suitable. Always check the ingredient labels to ensure safety!
Pancake Poppers: Fluffy Bites for a Fun Breakfast Twist
Ingredients
Equipment
Method
- In a large mixing bowl, whisk together the dry ingredients.
- In a separate bowl, whisk together the wet ingredients.
- Gently fold the wet ingredients into the dry mixture until just combined.
- If desired, carefully fold in your choice of mix-ins.
- Allow the batter to rest for 5-10 minutes.
- Preheat your cooking device and grease it.
- Spoon the batter into the greased cups or cavities.
- Cook the pancake poppers until golden brown.
- Once cooked, remove and allow to cool, then repeat the process.
- Serve warm with toppings.
- Store leftovers in an airtight container.
Leave a Reply