
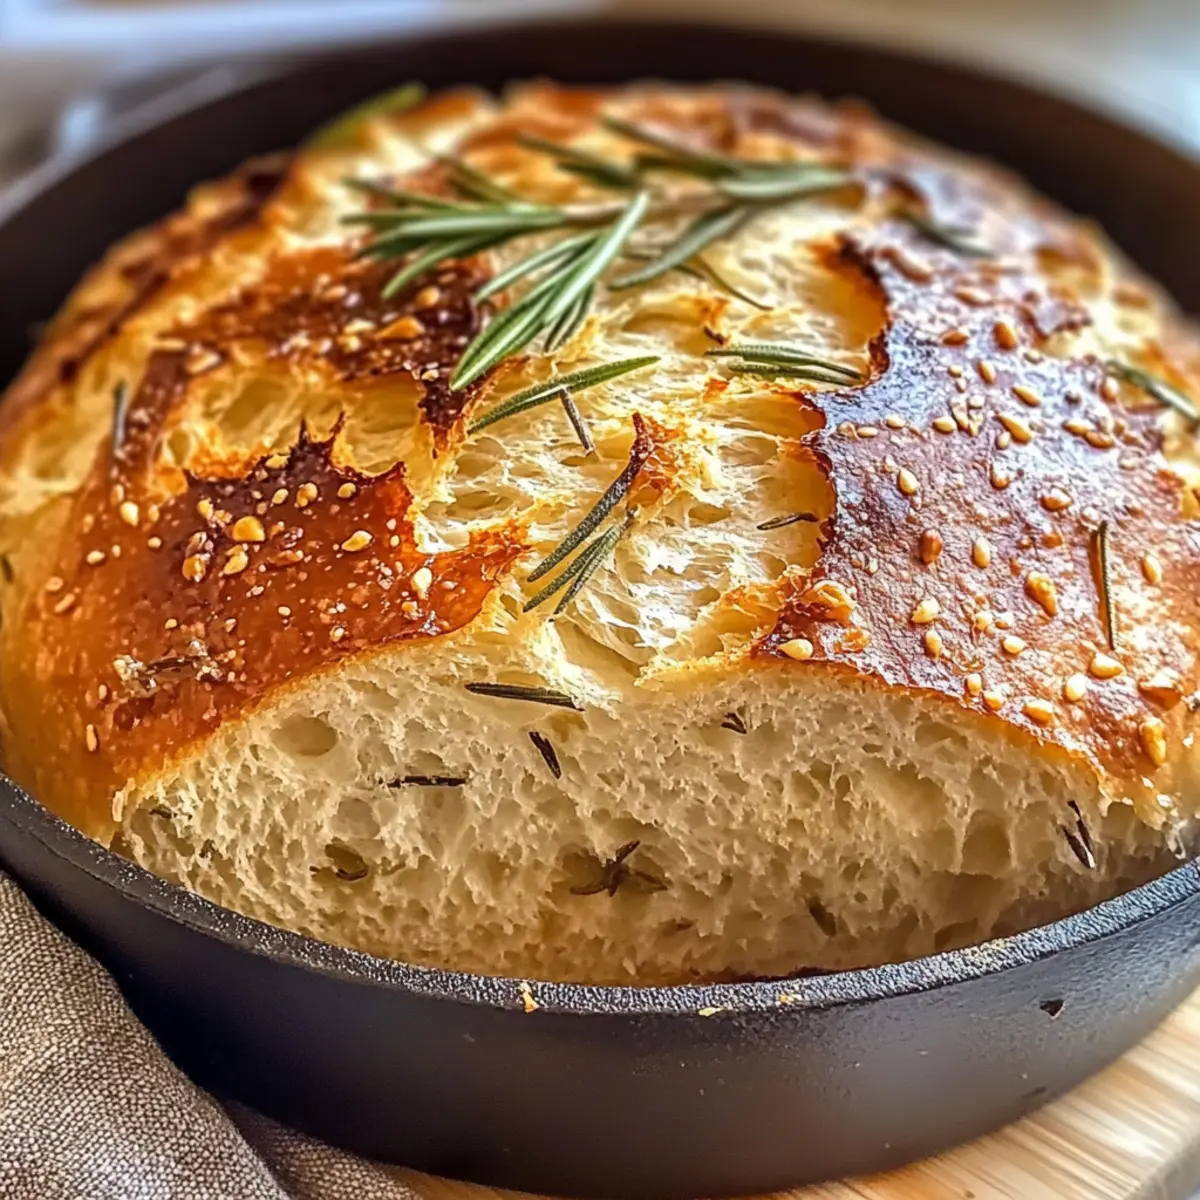
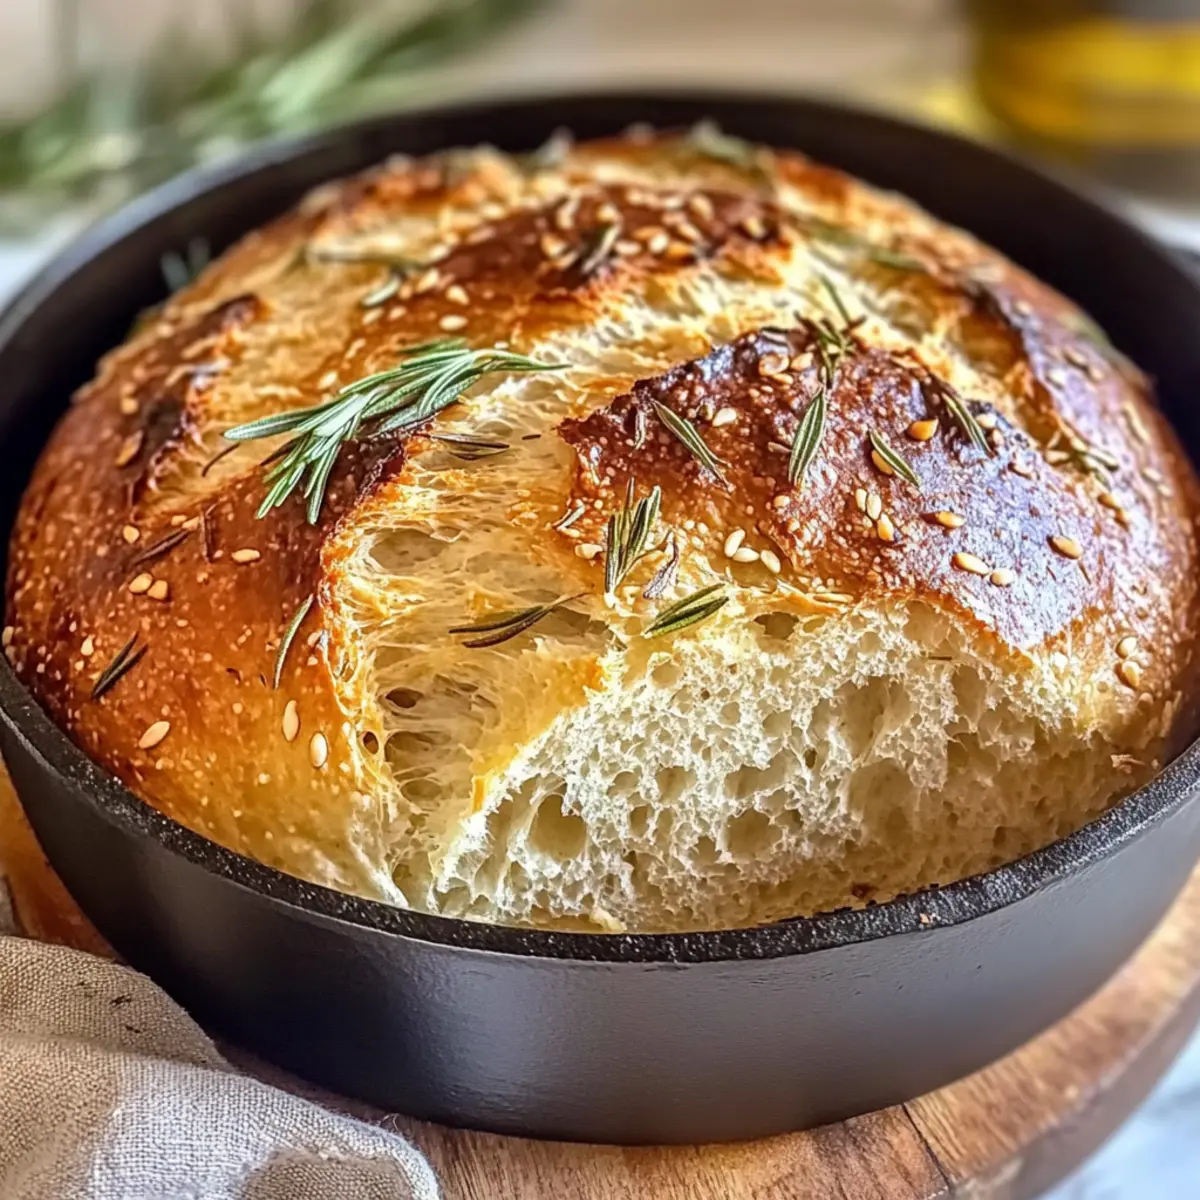
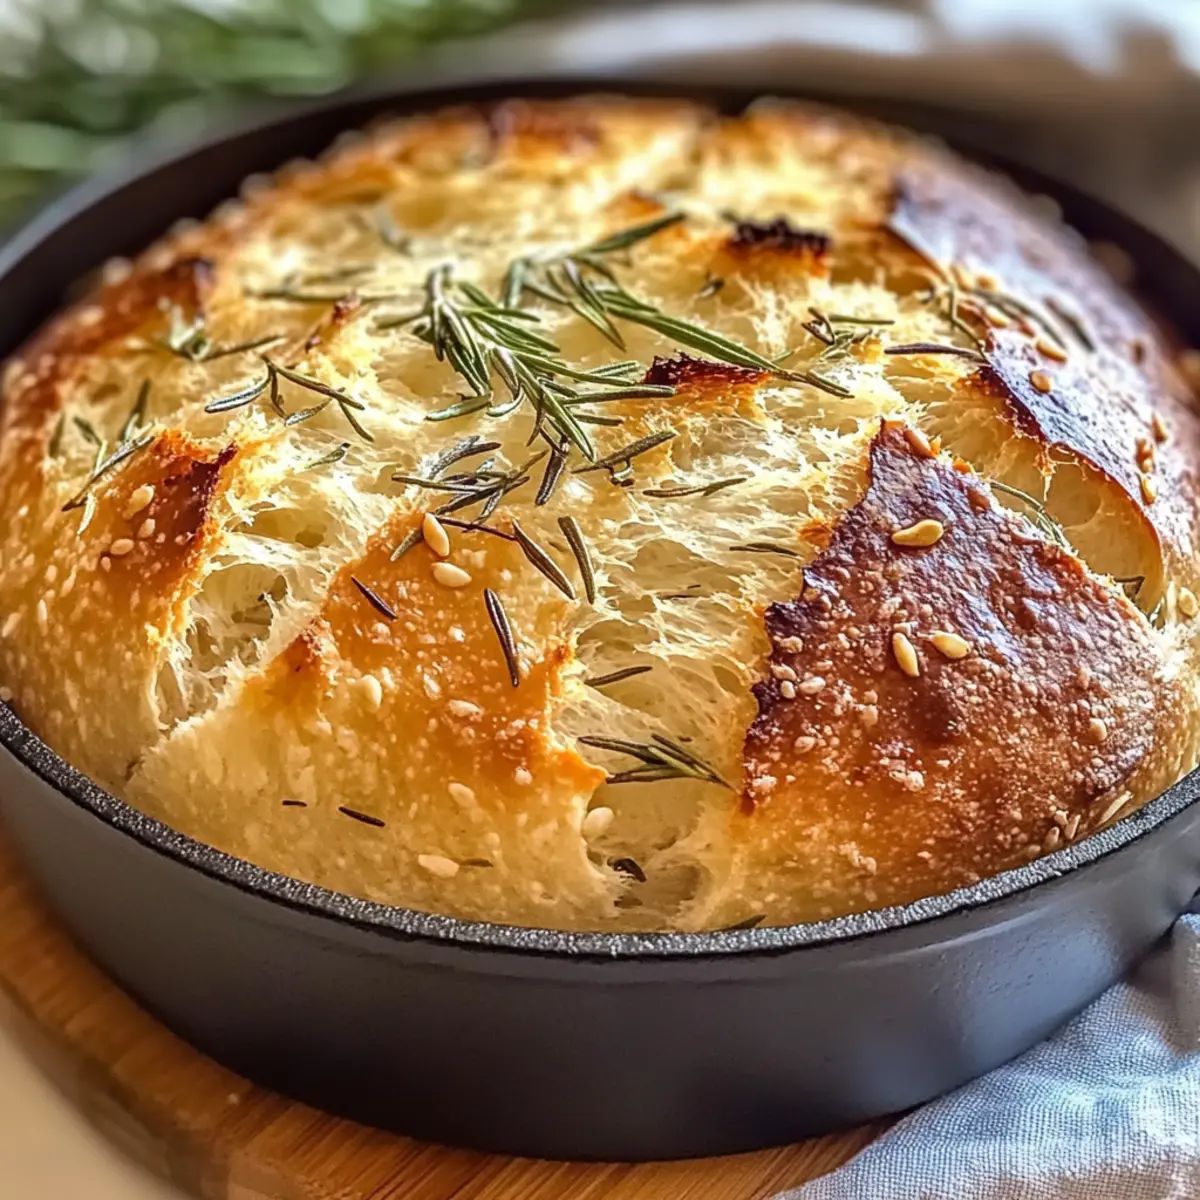
The moment I took my first bite of fresh bread, infused with the fragrant dance of garlic and rosemary, I knew I had discovered something magical. This Easy Dutch Oven Garlic Rosemary Bread isn’t just a recipe; it’s an invitation to bring warmth and comfort into your kitchen. With its beautiful crusty exterior and fluffy, flavorful interior, this bread pairs perfectly with hearty soups or simply slathered with butter for an afternoon snack. What I love most is how easy it is to make, requiring just a few simple ingredients and minimal effort. Whether you’re a baking novice or a seasoned pro, you’ll find joy in the process of creating this comforting homemade delight. Ready to roll up your sleeves and fill your home with irresistible aromas? Let’s dive in and start baking!
Why is This Bread So Special?
Homemade Delight: There’s nothing quite like the satisfaction of pulling a warm, crusty loaf from your own oven. Easy Preparation: With just a few simple ingredients and minimal fuss, this recipe is perfect for both beginner bakers and seasoned chefs alike. Aromatic Flavor: The harmonious combination of garlic and rosemary brings a burst of flavor that elevates any meal, making it truly unforgettable. Versatile Companion: Serve it alongside hearty soups, stews, or just spread with butter for an indulgent snack—this bread is fantastic for any occasion! Crowd-Pleasing Appeal: It’s hard to resist the aroma of fresh bread baking, and this recipe is sure to impress family or guests. Whether paired with a warm bowl of soup like Garlic Butter Steak or enjoyed solo, this bread makes every meal feel special.
Dutch Oven Garlic Rosemary Bread Ingredients
For the Dough
- All Purpose Flour – Provides the main structure of the bread; using bread flour creates a chewier texture if desired.
- Sugar (1 1/2 tsp) – Adds slight sweetness to enhance flavor and activate yeast; can be substituted with honey or maple syrup.
- Salt (2 tsp) – Essential for flavor and yeast control; kosher or sea salt can be used.
- Quick Yeast (2 1/2 tsp) – Also known as instant yeast, it allows for faster rising; active dry yeast is a good alternative but may require proofing.
- Warm Water (1 1/3 cups) – Activates the yeast and hydrates the flour; ensure the water is around 110°F for the best results.
For Flavor
- Fresh Rosemary (2 large sprigs, diced) – Adds aromatic flavor to the bread; dried rosemary can work in a pinch.
- Garlic (3 cloves, diced) – Infuses the bread with savory taste; using fresh garlic is recommended over powder for the best flavor.
This Dutch Oven Garlic Rosemary Bread recipe invites you into the warmth of homemade baking, filling your kitchen with delightful aromas that elevate any meal. Happy baking!
Step‑by‑Step Instructions for Dutch Oven Garlic Rosemary Bread
Step 1: Mixing Dough
In a large mixing bowl, combine 3 cups of all-purpose flour, 1 ½ teaspoons of sugar, 2 teaspoons of salt, and 2 ½ teaspoons of quick yeast. Gradually stir in 1 ⅓ cups of warm water (around 110°F) until a sticky, shaggy dough forms. You want the mixture to be well combined yet slightly moist—this is the foundation for your flavorful Dutch Oven Garlic Rosemary Bread.
Step 2: First Rise
Cover the mixing bowl tightly with plastic wrap or a kitchen towel and place it in a warm area for about 60 minutes. As the dough rises, it should double in size and become puffy. This is crucial for developing the airy structure of the bread. Heartwarming aromas begin to fill your kitchen as the yeast activates—it’s the magic of homemade baking!
Step 3: Shaping
Once the dough has risen adequately, lightly flour your work surface and transfer the dough onto it. Gently shape the dough into a ball, folding the edges toward the center. Place it on a sheet of floured parchment paper and lightly cover with a towel for about 20 minutes. This resting period allows the gluten to relax, making it easier to form the beautiful loaf you desire.
Step 4: Preheat Oven
While your dough rests, preheat your oven to 450°F. To achieve a beautifully crusty exterior, place your empty Dutch oven (with the lid off) inside the oven to heat up for about 30 minutes. This step helps create a steamy environment for baking, mirroring the effects of a traditional bread oven.
Step 5: Transfer to Dutch Oven
After the dough has rested, carefully remove the hot Dutch oven from the oven using oven mitts. Lift the parchment paper gently and transfer the shaped dough into the Dutch oven. Use a sharp knife to score the top of the dough, making shallow cuts—this allows steam to escape while baking and adds a decorative touch.
Step 6: Baking
Cover the Dutch oven with its lid and place it back in the oven. Bake for 30 minutes, allowing the bread to rise and create a crust. After the initial bake, remove the lid and bake for an additional 10 minutes. Keep an eye on the bread; it should become beautifully golden brown and give off a mouthwatering aroma when done.
Step 7: Cooling
Once baked, carefully remove the bread from the Dutch oven using the edges of the parchment paper. Let your freshly baked Dutch Oven Garlic Rosemary Bread cool on a wire rack for at least 30 minutes. This cooling period is essential for setting the texture and preventing a gummy interior, so patience will reward you with a perfect slice!
Make Ahead Options
These Dutch Oven Garlic Rosemary Bread doughs are perfect for meal prep enthusiasts! You can mix your dough and leave it to rise up to 24 hours in advance—just cover it tightly with plastic wrap and refrigerate to maintain its quality. Alternatively, you can shape the dough and let it rest for up to 3 days in the fridge; simply ensure it’s well-covered. When you’re ready to bake, preheat your oven and Dutch oven, then transfer the dough, score it, and bake as directed. This approach saves time and ensures you’ll have delicious, warm bread with minimal effort on busy weeknights!
What to Serve with Easy Dutch Oven Garlic Rosemary Bread?
Imagine the mouthwatering aroma of your homemade bread as it lingers in the air, calling for perfect companions.
-
Hearty Chicken Soup: This comforting dish pairs beautifully, with rich flavors that complement the herbal notes in the bread. The warm broth also soaks into the airy crumb, making each bite a delight.
-
Creamy Tomato Basil Soup: The rich acidity of tomatoes contrasted with the creamy texture creates a delicious balance. Dip your bread into the soup for an exceptional burst of flavor.
-
Mixed Green Salad: A fresh salad loaded with crunchy veggies and a zesty vinaigrette adds a delightful contrast to the warm, garlicky bread. Its freshness brightens the whole meal!
-
Roasted Vegetables: Caramelized, earthy veggies bring a sweet depth that enhances the flavor profile of your bread. Together, they create a wholesome, hearty dinner.
-
Garlic Herb Butter: Spread this on warm slices for a burst of flavor that’ll elevate your snacking experience. The garlic amplifies the essence of your bread, creating a savory treat.
-
Cheddar Cheese Platter: Serve with sharp cheddar for a delightful combination. The creamy texture of the cheese beautifully complements the rustic crust of the bread.
-
Red Wine: A glass of full-bodied red wine pairs wonderfully, enhancing the savory notes of the bread while providing a luxurious touch to your dining experience.
-
Chocolate Chip Cookies: For dessert, treat yourself to warm cookies. Their sweetness contrasts well with the savory bread, giving you a satisfying end to your meal!
Expert Tips for Dutch Oven Garlic Rosemary Bread
Preheat Properly: Ensure your Dutch oven is fully preheated for a crisp crust. An unheated pot will lead to a softer loaf.
Dough Texture: The dough should be sticky and shaggy. If it feels too dry, add a little more warm water to achieve the right consistency.
Don’t Rush Cooling: Allow bread to cool for at least 30 minutes to avoid a gummy interior. Cutting too soon compromises texture and taste.
Scoring Technique: Use sharp scissors or a knife to score the top of the dough; this helps release steam and provides artistic designs.
Experiment with Herbs: While garlic and rosemary are delightful, don’t hesitate to play with flavors! Try thyme, oregano, or add cheese for a twist on this Dutch Oven Garlic Rosemary Bread.
Dutch Oven Garlic Rosemary Bread Variations
Feel free to let your imagination run wild and customize this bread to suit your taste buds!
-
Onion Twist: Substitute the garlic with diced onions for a sweeter, savory flavor blend.
-
Cheesy Delight: Fold in grated cheese, such as cheddar or parmesan, for a deliciously cheesy twist that elevates the taste.
-
Herb Medley: Experiment with dried herbs like thyme, oregano, or even a hint of basil for unique flavor combinations that excite the palate.
-
Nutty Addition: Consider adding chopped nuts, like walnuts or pine nuts. They provide an unexpected crunch and earthy depth.
-
Spiced Variation: Sprinkle in a tablespoon of paprika or chili flakes for a spicy kick that pairs beautifully with the garlic.
-
Honey Infusion: Drizzle honey into the dough to create a subtly sweet and savory braid that’s simply irresistible. It adds a delightful hint of sweetness to each bite.
-
Olive Oil Boost: Use olive oil instead of butter for a Mediterranean flair—it’s a flavor-packed alternative that lends a wonderful richness.
-
Sundried Tomatoes: Stir in chopped sundried tomatoes for an Italian-inspired twist that perfectly complements the rosemary and garlic.
While you’re mixing it up, how about trying this bread alongside a bowl of Garlic Butter Steak? Or enjoy it with a lovely dip, perhaps some creamy artichoke spread. The world of flavor is at your fingertips!
Storage Tips for Dutch Oven Garlic Rosemary Bread
Room Temperature: Store your bread in a bread box or loosely wrapped in a kitchen towel for up to 3 days to maintain its crusty exterior while keeping it fresh.
Fridge: If you live in a particularly warm climate, you may store the bread in an airtight container in the fridge for up to 5 days, but be aware this may soften the crust.
Freezer: Slice the bread and wrap individual pieces tightly in plastic wrap, then place them in a freezer bag; it will stay fresh for up to 3 months. Reheat slices in a toaster for a quick treat!
Reheating: For optimal taste and texture, reheat the bread in a preheated oven at 350°F for about 10-15 minutes, or until warmed through to enjoy your Dutch Oven Garlic Rosemary Bread as if it were freshly baked!
Dutch Oven Garlic Rosemary Bread Recipe FAQs
What type of flour should I use for the best results?
Absolutely! All-purpose flour works well, but if you’re aiming for a chewier texture, consider using bread flour instead. It contains more protein, which helps create that wonderful structure in your Dutch Oven Garlic Rosemary Bread.
How long can I store the bread, and what’s the best method?
Store your freshly baked bread at room temperature in a bread box or loosely wrapped in a kitchen towel. This keeps it fresh for up to 3 days while preserving the crust. If you want to keep it longer, slice the bread and wrap it tightly in plastic wrap, then place it in a freezer bag for up to 3 months.
Can I freeze this bread? If so, how?
Absolutely! To freeze your Dutch Oven Garlic Rosemary Bread, first, slice it into pieces. Wrap each slice tightly in plastic wrap to prevent freezer burn, then place them in a freezer-safe bag. To enjoy later, simply toast the slices directly from the freezer or reheat in a preheated oven at 350°F for about 10-15 minutes.
What should I do if my dough doesn’t rise?
Very! If your dough hasn’t risen, it may be due to inactive yeast. Ensure your warm water is around 110°F and hasn’t been boiling, as hot water can kill the yeast. If you suspect your yeast is expired, a quick test is to mix it with warm water and a little sugar; if it bubbles after 5-10 minutes, it’s good to go. Also, let the dough rise in a warm, draft-free environment for the best results.
Is this recipe suitable for people with gluten allergies?
Indeed! To make this Dutch Oven Garlic Rosemary Bread gluten-free, substitute the all-purpose flour with a gluten-free flour blend. Be sure to also add 1 teaspoon of xanthan gum for better texture. Always check for other allergens like garlic or rosemary if guests may have allergies!
Can I use dry yeast instead of instant yeast?
Absolutely! You can use active dry yeast instead of instant yeast, but you’ll need to proof it first. Mix it with warm water (about 110°F) and a bit of sugar; let it sit for 5-10 minutes until it bubbles before adding it to your flour mixture. Enjoy baking your delicious bread!

Irresistible Dutch Oven Garlic Rosemary Bread Recipe to Savour
Ingredients
Equipment
Method
- In a large mixing bowl, combine 3 cups of all-purpose flour, 1 ½ teaspoons of sugar, 2 teaspoons of salt, and 2 ½ teaspoons of quick yeast. Gradually stir in 1 ⅓ cups of warm water until a sticky dough forms.
- Cover the mixing bowl and place it in a warm area for about 60 minutes, allowing the dough to rise and double in size.
- Transfer the dough onto a lightly floured surface, shape it into a ball, and cover with a towel for about 20 minutes.
- Preheat your oven to 450°F and place your empty Dutch oven inside to heat up for about 30 minutes.
- After resting, carefully transfer the shaped dough into the hot Dutch oven and score the top with a sharp knife.
- Cover with the lid and bake for 30 minutes. Then, remove the lid and bake for an additional 10 minutes until golden brown.
- Once baked, remove the bread from the Dutch oven and let it cool on a wire rack for at least 30 minutes.
Leave a Reply