
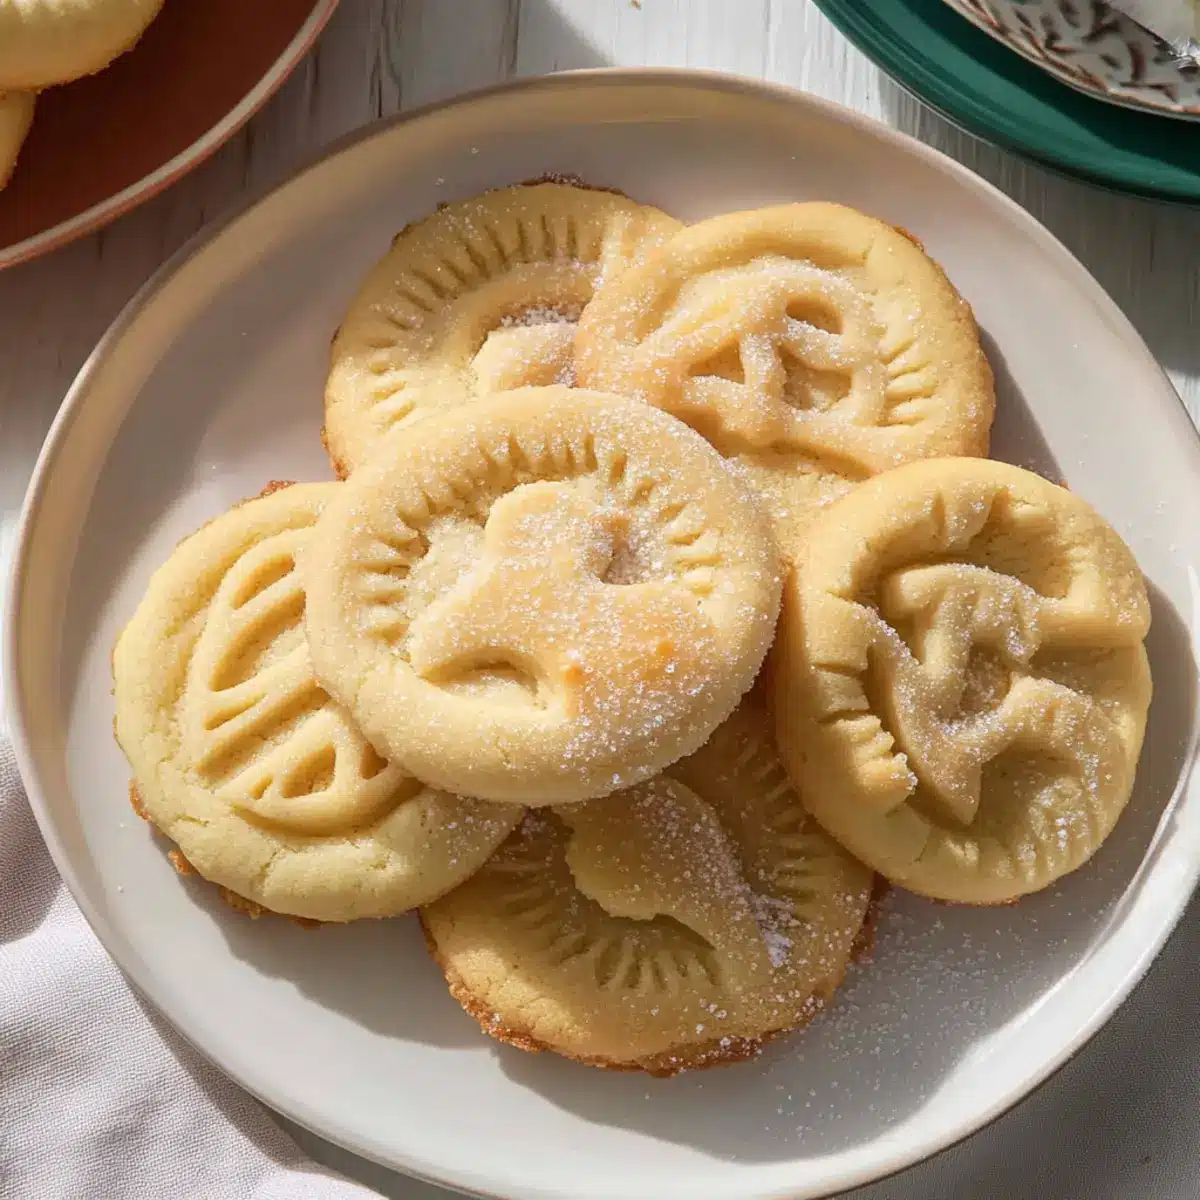
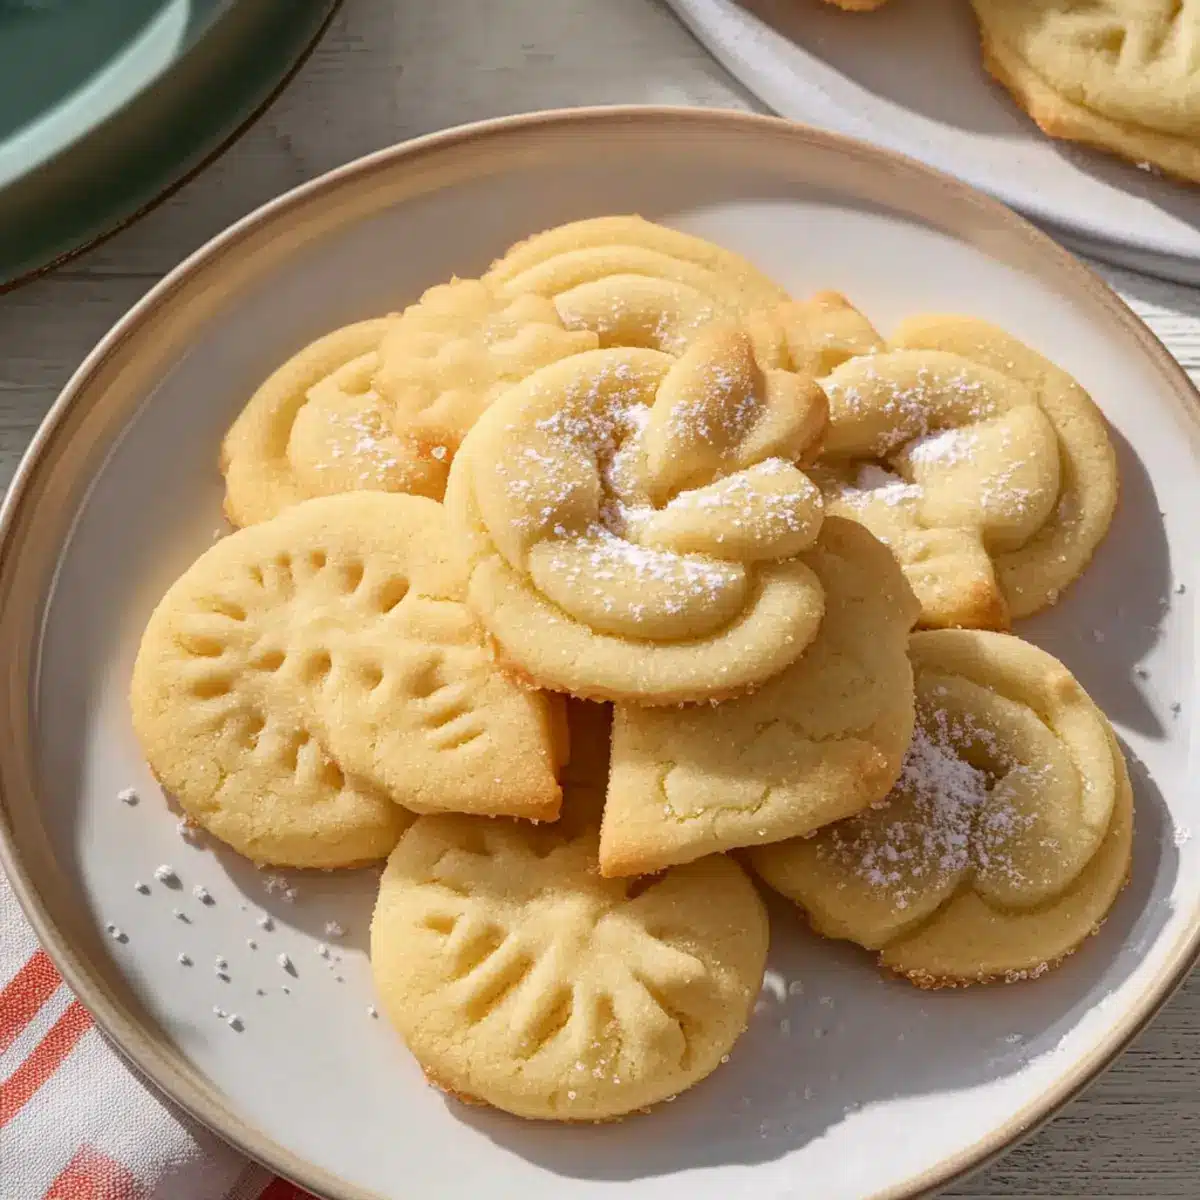
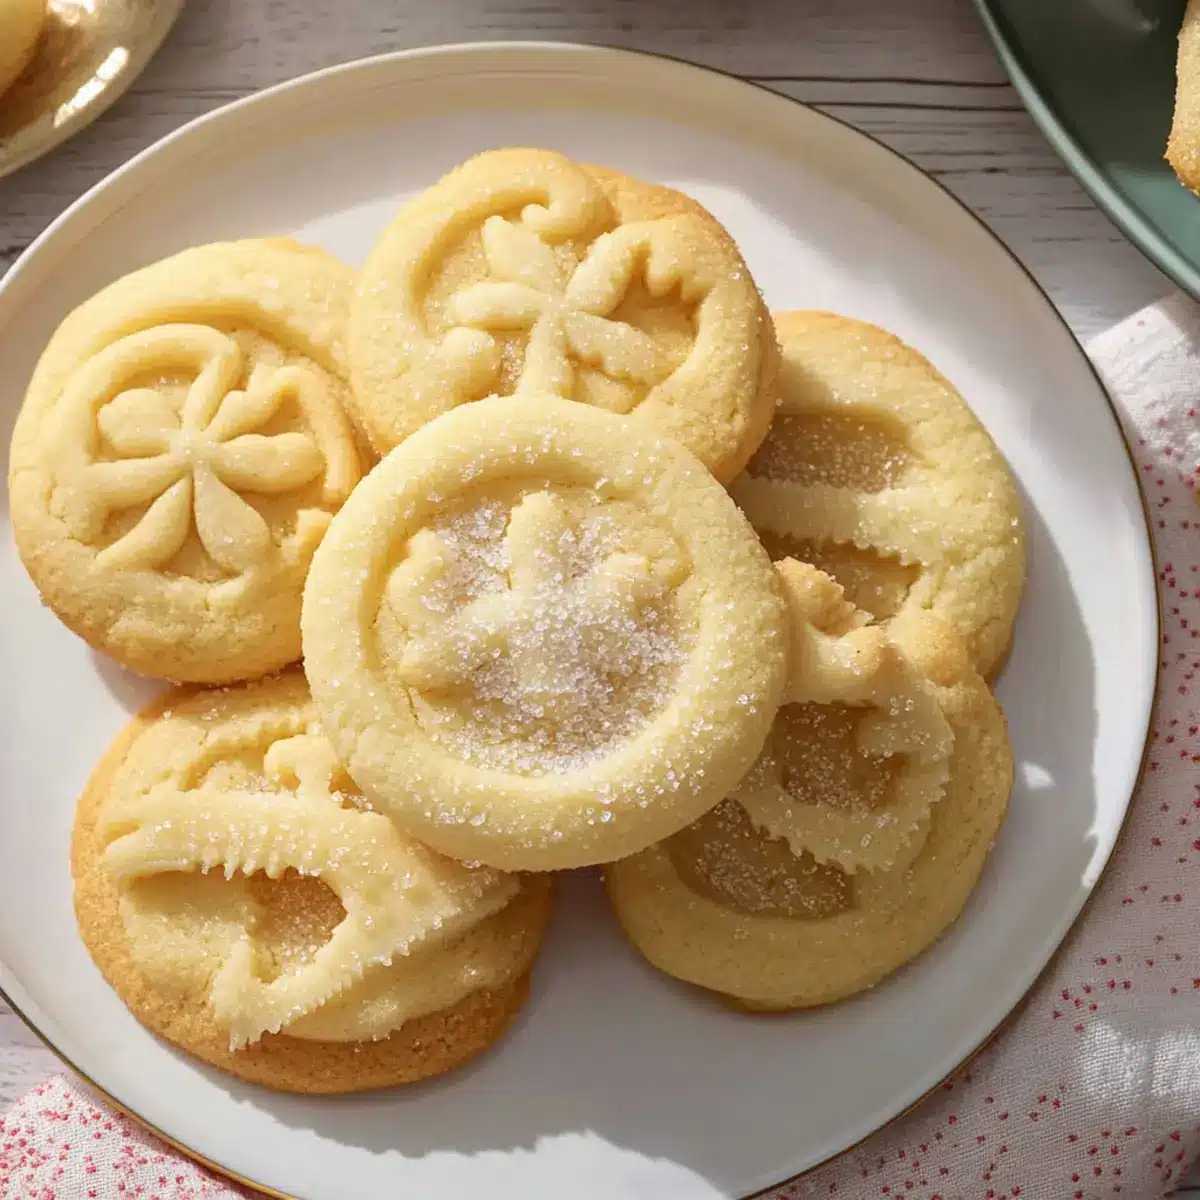
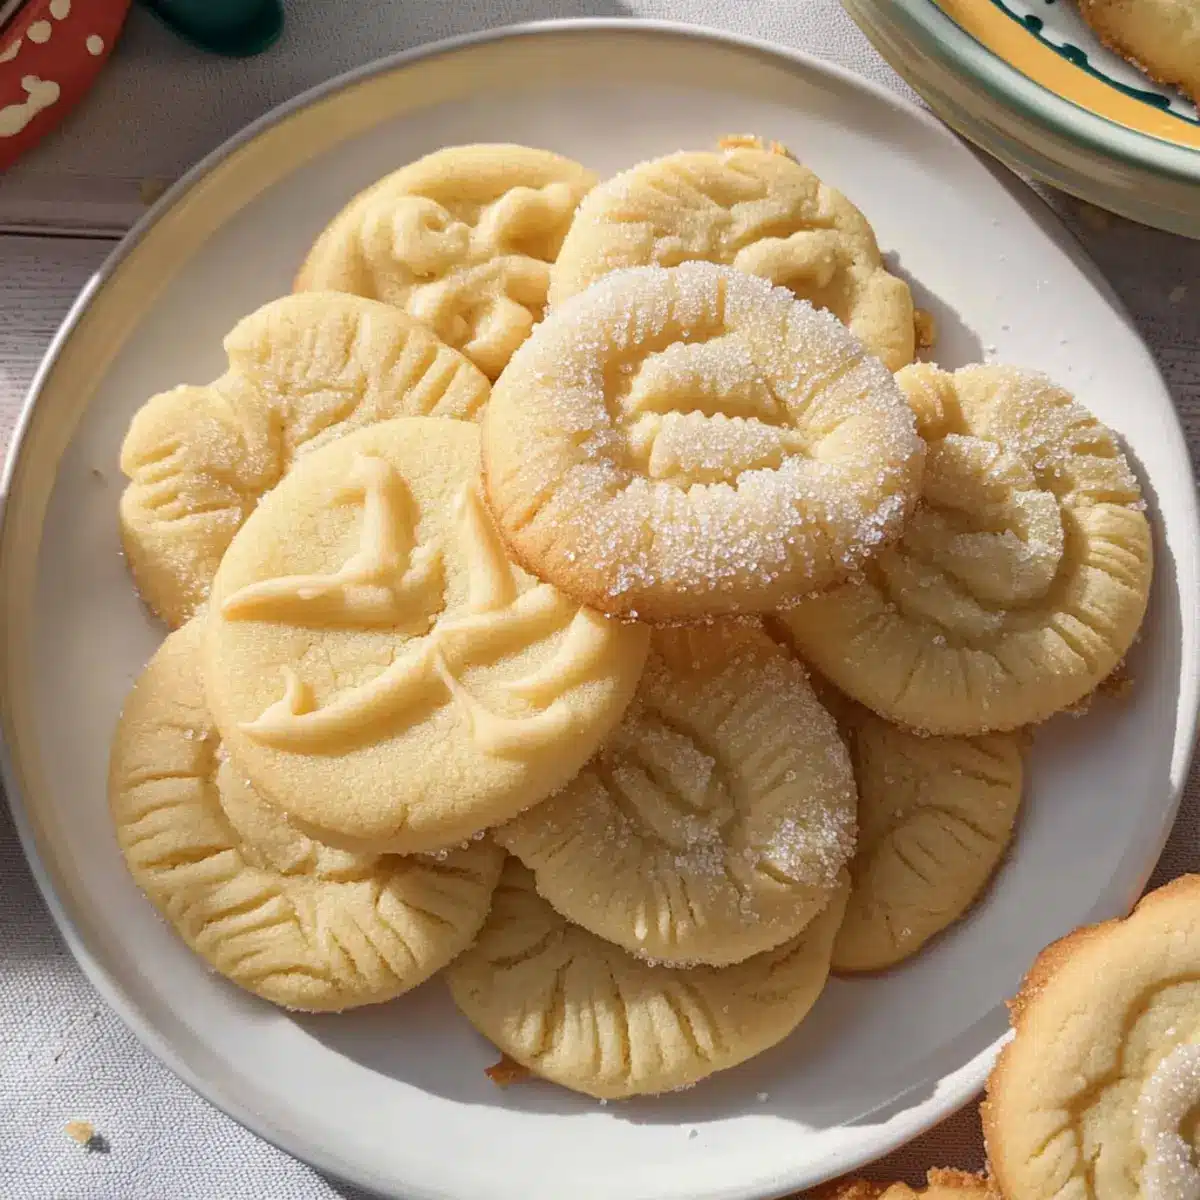
As the scent of butter and vanilla wafted through the kitchen, I couldn’t help but feel like a kid again, anticipating the moment we gathered around the table for holiday treats. These melt-in-your-mouth Danish Butter Cookies are the embodiment of comfort and nostalgia, making them a delightful addition to any festive celebration. With their tender, crumbly texture and a touch of sweetness, they’re a perfect indulgence that also doubles as a thoughtful gift for your loved ones. Not only are they incredibly quick to whip up, but they’re also freezer-friendly, making them a go-to recipe when you need a last-minute surprise for unexpected guests. Are you ready to infuse your holidays with sweet memories and delicious aromas? Let’s get started on these irresistible cookies!
Why Are These Cookies Irresistible?
Unmatched Flakiness: The combination of both all-purpose and cake flour yields a uniquely tender texture that melts in your mouth.
Quick and Easy: With simple, everyday ingredients, you can have a batch ready in no time, perfect for those last-minute baking urges.
Versatile Holiday Treat: Whether enjoyed with a warm cup of tea or gifted to friends, they fit beautifully into any festive scenario.
Freezer-Friendly: Prepare the dough in advance and freeze it for future delights—great for impromptu holiday gatherings!
Always a Crowd-Pleaser: These cookies bring smiles to everyone, making them an instant hit at any celebration, just like our Garlic Butter Sweet Potato Bake that never fails to impress!
Danish Butter Cookies Ingredients
• Get ready for a delightful baking adventure!
For the Cookie Base
- European salted butter – Provides rich flavor and structure; opt for unsalted butter with 1/4 teaspoon of salt for a milder taste.
- Granulated sugar – Balances the sweetness perfectly in these Danish butter cookies.
- Salt – Enhances overall flavor without making them overly salty.
- Egg yolks – Adds moisture and richness for a deliciously soft texture.
- Vanilla extract – Infuses essential aroma and a sweet vanilla flavor that brings warmth to every bite.
- Whole milk – Adjusts the texture for piping; increase if the dough feels too stiff.
For the Flour Mix
- All-purpose flour – Forms the cookie’s base structure; can replace cake flour in equal measure (260 grams).
- Cake flour – Ensures an ultra-tender cookie for that melt-in-your-mouth experience.
For Decoration
- Coarse sugar – Optional for a sparkling finish that adds visual appeal and texture to the cookies.
Now, gather these ingredients and let the magic begin as you bake up some sweet moments with your homemade Danish butter cookies!
Step‑by‑Step Instructions for Melt-in-Your-Mouth Danish Butter Cookies
Step 1: Prep Oven & Pans
Begin by preheating your oven to 350°F (175°C). While the oven warms, line your baking sheets with parchment paper to prevent sticking. This step not only ensures easy cleanup but also provides a perfect base for your melt-in-your-mouth Danish butter cookies.
Step 2: Cream Ingredients
In a stand mixer fitted with a paddle attachment, combine the European salted butter, granulated sugar, and salt. Beat on medium speed until the mixture is light and fluffy, about 3-5 minutes. This aeration process is crucial for achieving a tender texture in your cookies, so take your time and enjoy the creamy moment!
Step 3: Incorporate Wet Ingredients
Add the egg yolks, vanilla extract, and whole milk to your butter-sugar mixture. Mix on low speed until all ingredients are well combined, ensuring there are no visible streaks of egg. The addition of these wet ingredients will enrich the dough and contribute to that delightful melt-in-your-mouth quality of the Danish butter cookies.
Step 4: Combine Dry Ingredients
In a separate bowl, whisk together the all-purpose and cake flour. Gradually incorporate the flour mixture into the wet ingredients, mixing just until no dry flour remains visible. Avoid over-mixing as it can lead to tougher cookies. This careful incorporation is essential for achieving that crumbly texture you desire in your delicious Danish butter cookies.
Step 5: Chill Cookie Shapes
Scoop the cookie dough onto your prepared baking sheets, spacing them about 2 inches apart. Cover the baking sheets with plastic wrap and place them in the refrigerator to chill for 20-30 minutes. Chilling the dough helps maintain its shape during baking, ensuring beautifully formed melt-in-your-mouth cookies with a perfect crumb.
Step 6: Pipe Cookies
Using a piping bag fitted with a star tip, pipe the chilled dough into your desired shapes onto the prepared baking sheets. Make sure to sprinkle each cookie with coarse sugar for added texture and a lovely sparkle. This finishing touch not only enhances appearance but also adds a delightful crunch to each bite of your Danish butter cookies.
Step 7: Bake
Place the baking sheets in the preheated oven and bake for 10-15 minutes. Keep a close eye on the cookies; they’re done when the edges are lightly golden. Once baked, let them cool on the sheets for 5 minutes before transferring them to wire racks. This cooling time allows the cookies to set perfectly, readying them for a deliciously tender indulgence.
How to Store and Freeze Danish Butter Cookies
Room Temperature: Store cookies in an airtight container for up to 5 days to maintain their melt-in-your-mouth texture and prevent them from getting stale.
Freezer: For longer storage, freeze the cookies for up to 3 months. Place them in an airtight container or freeze them between layers of parchment paper to prevent sticking.
Unbaked Dough: You can freeze the unbaked dough for 2-3 months. Shape the cookies, then wrap and freeze. When ready to bake, pop them in the oven straight from the freezer, adding a couple of extra minutes to the baking time.
Reheating: If you’d like them warm, briefly microwave the cookies for 5-10 seconds or warm them in an oven preheated to 300°F (150°C) for a few minutes to restore their delightful texture.
Expert Tips for Danish Butter Cookies
- Room Temperature Ingredients: Ensure your butter and eggs are at room temperature for a smooth and fluffy dough, enhancing the overall texture of your Danish Butter Cookies.
- Avoid Over-Mixing: Mix the dough just until combined to avoid tough cookies; a gentle touch is key to that melt-in-your-mouth quality.
- Chill for Success: Don’t skip chilling the shaped dough! This step prevents overspreading during baking, resulting in beautifully formed cookies.
- Watch Your Baking Time: Keep a close eye on the cookies as they bake. They can vary in color depending on size and shape, so adjust the timing as needed.
- Decorative Sugar: Sprinkle coarse sugar on top before baking for an attractive finish and a delightful crunch, elevating both the look and taste of your Danish Butter Cookies.
Make Ahead Options
These melt-in-your-mouth Danish butter cookies are perfect for meal prep enthusiasts! You can prepare the dough up to 3 days in advance by chilling it in an airtight container in the refrigerator. Alternatively, the unbaked cookie dough can be frozen for up to 2-3 months—just scoop them onto baking sheets, freeze until solid, then store them in a freezer bag. When you’re ready to bake, there’s no need to thaw; simply bake from frozen and add a minute or two to the baking time. For the best results, always allow baked cookies to cool on wire racks to maintain their delicate texture. Enjoy hassle-free festive baking while ensuring these cookies are just as delicious!
What to Serve with Melt-in-Your-Mouth Danish Butter Cookies
As you prepare to enjoy these delightful cookies, consider pairing them with complementary sides and beverages to create a memorable treat experience.
- Hot Chocolate: A rich, creamy cup of hot chocolate elevates the indulgent nature of these cookies, making every bite a cozy delight.
- Coffee or Tea: A warm cup of coffee or herbal tea balances the sweetness perfectly, inviting you to take a relaxing moment.
- Fruit Platter: A refreshing assortment of berries adds a burst of vibrancy, grounding the buttery richness of the cookies and enhancing your palate.
- Cheese Board: A mix of mild cheeses like brie or camembert pairs beautifully, offering a unique texture contrast to the soft, crumbly cookies.
- Chocolate Dipping Sauce: Melted chocolate for dipping encourages a playful twist on the classic cookie experience, adding a touch of decadence.
- Vanilla Ice Cream: Serving a scoop of vanilla ice cream alongside these cookies warms hearts and creates a delightful melting moment.
- Nuts: A handful of toasted almonds or walnuts introduces a satisfying crunch, balancing the cookies’ delicate texture beautifully.
- Spiced Cider: A warm spiced apple cider complements the butteriness with festive flavors, perfect for creating holiday nostalgia.
- Meringue Kisses: Light and airy meringue cookies contrast the butteriness, providing a fun texture and sweetness without overwhelming.
Variations & Substitutions for Danish Butter Cookies
Feel free to explore and customize these delightful cookies, enhancing their flavor and texture to suit your taste buds!
- Gluten-Free: Swap all-purpose flour for a gluten-free blend. Just ensure the blend includes xanthan gum for the best results.
- Citrus Zest: Add a teaspoon of orange or lemon zest to the batter for a bright, fresh flavor that dances on your palate.
- Almond Extract: Replace vanilla extract with almond extract for a nutty twist that’s wonderfully aromatic and adds warmth.
- Chocolate-Dipped: Melt some dark chocolate and dip half of each cookie for a rich and decadent touch that’s simply irresistible!
- Spiced Variation: Incorporate a pinch of cinnamon or nutmeg into the dough for a subtle warmth and a nod to festive flavors.
- Nutty Texture: Fold in finely chopped nuts like pecans or walnuts into the dough for added crunch and depth, creating a delightful mix of textures.
- Decorative Toppings: Instead of coarse sugar, try adding crushed colored sprinkles or edible glitter for a vibrant, festive look.
- Dairy-Free: Use coconut oil or dairy-free butter as a substitute while eliminating the milk to easily accommodate vegan diets.
These variations can make your holiday baking even more exciting! And if you’re in the mood for more delightful recipes, try our crowd-pleasing Garlic Butter Steak or the comforting Cowboy Butter Chicken Pasta for a delicious home-cooked meal.
Danish Butter Cookies Recipe FAQs
How do I choose the right butter for Danish Butter Cookies?
When it comes to butter, I highly recommend using European salted butter for its rich flavor and creamy texture. If you prefer less saltiness, opt for unsalted butter and simply add 1/4 teaspoon of salt to your mixture. This small adjustment still results in a beautifully flavored cookie.
What’s the best way to store Danish Butter Cookies and how long do they last?
Store your Danish Butter Cookies in an airtight container at room temperature for up to 5 days. For longer shelf life, you can also freeze them for up to 3 months. Just make sure they’re well-wrapped to prevent freezer burn!
Can I freeze unbaked Danish Butter Cookie dough?
Absolutely! To freeze your unbaked dough, shape the cookies and place them on a baking sheet lined with parchment paper. Freeze them until solid, then transfer them to a freezer-safe bag or container. They can be frozen for about 2-3 months. When you’re ready to bake, you can bake them directly from the freezer, adding a few extra minutes to the baking time.
Why are my cookies tough instead of tender?
The most likely culprit for toughness is over-mixing the dough. It’s important to mix just until all ingredients are combined. The more you mix, the tougher your cookies can become. Also, always ensure you’re using room temperature butter and eggs, which helps create that light, fluffy texture.
Are these cookies safe for my dog or are there any allergies I should be aware of?
While these cookies are delicious for us humans, they’re not suitable for dogs due to the sugar and butter content. If you have allergies in mind, be cautious with the ingredients. Always ensure that all mix-ins, like vanilla and flours, are safe and suited to avoid cross-contamination, especially for those with gluten or dairy sensitivities.
Can I make variations of Danish Butter Cookies?
Of course! Feel free to experiment with the flavor profile by adding citrus zest for a fresh twist or incorporating almond extract instead of vanilla for a nutty flavor. You can also use a gluten-free flour blend in place of regular flour to accommodate gluten-sensitive bakers. Enjoy the creativity!
Melt-in-Your-Mouth Danish Butter Cookies for Sweet Moments
Ingredients
Equipment
Method
- Preheat your oven to 350°F (175°C) and line baking sheets with parchment paper.
- In a stand mixer, cream together the European salted butter, granulated sugar, and salt until light and fluffy, about 3-5 minutes.
- Add the egg yolks, vanilla extract, and whole milk; mix on low speed until well combined.
- In a separate bowl, whisk together the all-purpose and cake flour. Gradually incorporate into the wet ingredients, mixing just until no dry flour remains.
- Scoop the dough onto prepared baking sheets, spacing them about 2 inches apart. Cover with plastic wrap and chill for 20-30 minutes.
- Pipe the chilled dough into desired shapes and sprinkle with coarse sugar.
- Bake for 10-15 minutes until edges are lightly golden. Cool on sheets for 5 minutes before transferring to wire racks.
Leave a Reply