
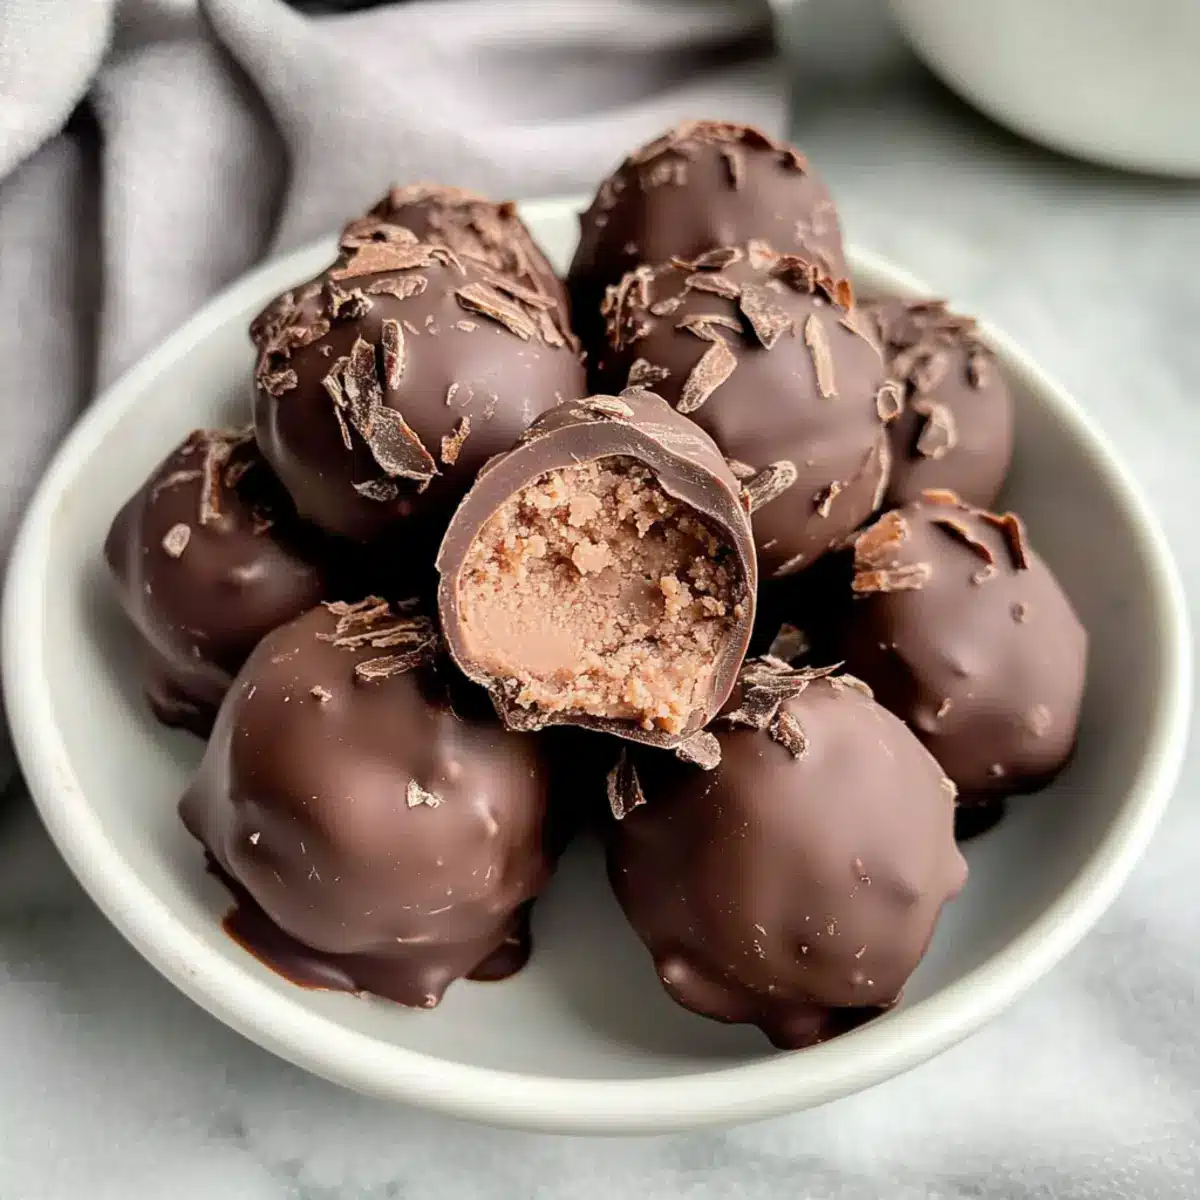
“Just when I thought I had tried every dessert under the sun, I stumbled upon the enchanting world of chickpea truffles! These delightful gems are not only no-bake and incredibly simple to whip up, but they also offer a guilt-free treat for any sweet tooth. With just a handful of ingredients, these Vegan Chickpea Truffles pack a protein punch while being naturally gluten-free. Perfect for curbing those late-night cravings or impressing guests at a gathering, they blend indulgence and health seamlessly. Curious to find out how these creamy, chocolaty delights come together? Let’s dive into the magic of chickpea truffles!”
Why Are Chickpea Truffles So Amazing?
Simplicity: With just a few ingredients, these truffles are perfect for anyone, from novice cooks to experienced chefs.
Rich and Creamy: The blend of chickpeas, nut butter, and dark chocolate creates a decadent treat that melts in your mouth.
Guilt-Free Indulgence: Enjoy a sweet dessert that offers high protein and fiber without sacrificing flavor, making them a great choice for health-conscious eaters.
No-Bake Delight: Quick to prepare and with no need for the oven, you can whip these up in minutes, perfect for last-minute cravings or gatherings.
Versatile Toppings: Customize your truffles with various toppings like cacao nibs or shredded coconut for added texture and fun — an excellent way to get creative!
If you’re a fan of easy, delicious treats, you might also love the delectable Tiramisu Truffles Decadent or the wonderfully sweet Cookie Butter Truffles!
Chickpea Truffles Ingredients
Get ready to whip up these delicious treats!
For the Truffles
• Chickpeas – The star of the show, providing structure and fiber for these creamy bites. Use canned, drained, and rinsed chickpeas for convenience.
• Nut or Seed Butter – Adds richness and flavor; almond or cashew butter works beautifully, but feel free to experiment with sunflower seed butter for a nut-free option.
• Vegan Dark Chocolate Chips – The main flavor contributor; melted chocolate coats the truffles to give them that decadent sweetness. A no-sugar-added variety can also be used if preferred.
• Coconut Oil – Optional but suggested for a smoother melting consistency when coating the truffles.
Optional Toppings
• Cacao nibs – Sprinkle on for a delightful crunch and a hint of chocolate.
• Goji berries – Add a vibrant, superfood touch for a burst of flavor.
• Sprinkles – Fun and festive, perfect for special occasions!
• Shredded coconut – A tropical twist that enhances texture.
• Nuts/Seeds – Chopped nuts or seeds can boost both nutritional value and texture.
• Freeze-dried fruits – A fruity explosion that brings a pop of color and taste to your truffles.
Step‑by‑Step Instructions for Chickpea Truffles
Step 1: Prepare Ingredients
Begin by draining and rinsing one can of chickpeas under cold water to ensure they’re clean and ready to use. While you let the chickpeas dry slightly, melt 1 cup of vegan dark chocolate chips mixed with 1 tablespoon of coconut oil in a microwave-safe bowl. Heat in 20-second intervals, stirring in between until smooth, shiny, and fully melted.
Step 2: Blend Mixture
In a food processor, combine the rinsed chickpeas, ½ cup of your chosen nut or seed butter, and half of the melted chocolate. Blend the mixture on high until smooth and creamy, stopping periodically to scrape down the sides. This rich chickpea truffle mixture should have a thick consistency without any chunks.
Step 3: Scoop and Freeze
Using a cookie scoop, portion out the blended batter onto a parchment-lined baking sheet. Aim for uniform sizes to ensure even cooking later. Once all the batter is scooped, place the baking sheet in the freezer for 15-20 minutes or until the truffles are firm enough to handle without sticking.
Step 4: Form Truffles
After the initial freeze, take the scooped dollops out of the freezer. Roll each portion into smooth, round balls using your hands — the warmth from your palms will help shape them beautifully. Return the rolled truffles to the baking sheet and freeze for another 10 minutes, allowing them to become more robust and easier to coat with chocolate.
Step 5: Coat with Chocolate
Once the truffles are firm, take out the remaining melted chocolate from earlier. Dip each chickpea truffle into the chocolate, ensuring they are evenly coated. Place them back on the parchment-lined baking sheet, leaving space between each for the chocolate to set without sticking together.
Step 6: Final Freeze
After coating all the truffles, place them in the freezer again for about 10 minutes, or until the chocolate coating is completely hardened. For storage, transfer your finished chickpea truffles to an airtight container and keep them in the fridge for up to 7-10 days or freeze for longer enjoyment.
Chickpea Truffles Variations to Delight
Feel free to explore these exciting variations that take your chickpea truffles to a whole new level of deliciousness!
-
Nut-Free: Use sunflower seed butter instead of nut butter to make these truffles safe for nut allergies. The flavor remains rich and delightful!
-
Different Beans: Substitute chickpeas with white or black beans for a new twist on texture and taste. Just remember, flavor profiles may vary slightly!
-
Sweetened Surprise: Add dates or maple syrup for a naturally sweetened edge. This gives your truffles a delightful, caramel-like flavor that’s simply irresistible.
-
Spicy Kick: Mix in a dash of cayenne pepper or chili flakes to incorporate some heat. The spicy background beautifully contrasts with the sweetness of the chocolate.
-
Flavored Chocolate: Experiment with infused dark chocolate like orange or mint for a refreshing change. Each bite will feel like a new adventure!
-
Crunchy Topping: Try topping the truffles with crushed pretzels or nuts for added crunch and a satisfying texture. It’s perfect for those who love contrast.
-
Protein Boost: Blend in a spoonful of protein powder for an extra healthy twist. It makes them perfect for a post-workout snack!
If you’re in love with no-bake desserts, you might also enjoy these delicious Tiramisu Truffles Decadent and the wonderfully sweet Cookie Butter Truffles. Let your creativity run wild!
Make Ahead Options
These Chickpea Truffles are ideal for meal prep, allowing you to satisfy your sweet cravings without spending extra time in the kitchen! You can prepare the truffle mixture up to 24 hours in advance; just store it in an airtight container in the fridge once blended. Additionally, you can roll the truffles into balls and freeze them for up to 3 days before coating with chocolate. This not only helps in maintaining their shape but also ensures they’re just as delicious when you’re ready to enjoy them. When you’re set to serve, simply dip the frozen truffles in melted chocolate, freeze again for about 10 minutes to let them harden, and voila — a delightful dessert with minimal effort!
How to Store and Freeze Chickpea Truffles
Fridge: Keep your chickpea truffles in an airtight container in the refrigerator for up to 7-10 days. This ensures they remain fresh and delicious for daily snacking or after-dinner treats.
Freezer: For longer storage, freeze the truffles for up to 60 days. Place them in a sealed freezer bag or container; just remember to separate layers with parchment paper to prevent sticking.
Reheating: If you’re enjoying them chilled, no need to reheat! But if you prefer a slightly warm treat, let them sit at room temperature for a few minutes before savoring.
Avoiding Freezer Burn: To maintain quality, make sure that your container or bag is well-sealed. This helps preserve the rich texture and flavors of your chickpea truffles.
Expert Tips for Chickpea Truffles
• Drain Well: Make sure to drain and rinse your chickpeas thoroughly. Excess moisture can result in a soupy texture, affecting the truffle’s consistency.
• Smooth Blending: Use a high-powered food processor to achieve a silky mixture. Blend until completely smooth, stopping occasionally to scrape down the sides for an even mix.
• Temperature Matters: If the truffles become too firm to dip in chocolate, let them sit at room temperature for a few minutes. This will soften them slightly for a smoother coating process.
• Topping Timing: Apply any optional toppings before the final freeze. This allows toppings to adhere better to the coating, ensuring they stay beautiful and intact.
• Custom Variations: Feel free to experiment with different nut butters or chocolate types for unique flavors in your chickpea truffles. This allows for a personal touch every time!
What to Serve with Vegan Chickpea Truffles
Indulging in these creamy delights can be elevated by pairing them with the perfect sides and sips.
- Fresh Fruit Salad: A vibrant mix of seasonal fruits adds a refreshing crunch, balancing the richness of the truffles delightfully.
- Nutty Granola: A sprinkle of homemade granola offers a satisfying crunch that contrasts beautifully with the smooth truffles.
- Coconut Whipped Cream: This light, airy topping brings a velvety touch that perfectly complements the chocolate shell of the truffles.
- Herbal Tea: A warm cup of chamomile or peppermint tea enhances relaxation and balances the sweetness of your dessert.
- Coffee or Espresso: The bold flavors of coffee create a perfect pairing, enriching the chocolate and nutty notes in each bite.
- Light Vegan Cheesecake: A slice of vegan cheesecake provides a creamy and slightly tart contrast, making a complete dessert experience.
- Chocolate-Dipped Pretzels: Salty and sweet, these pretzels add a crunchy texture that plays off the soft truffles beautifully.

Chickpea Truffles Recipe FAQs
What type of chickpeas should I use for chickpea truffles?
I recommend using canned chickpeas for convenience. Be sure to drain and rinse them thoroughly to remove any excess sodium and ensure the right texture for your truffles.
How long can I store my chickpea truffles?
You can store your chickpea truffles in an airtight container in the refrigerator for up to 7-10 days. If you want to keep them longer, they can be frozen for up to 60 days; just separate layers with parchment paper to prevent sticking.
Can I freeze chickpea truffles?
Absolutely! To freeze your chickpea truffles, place them in a single layer on a baking sheet until firm, then transfer them to a freezer bag or container, ensuring they’re sealed well. This method helps maintain their delicious texture for up to 60 days.
What should I do if my truffles are too hard to dip in chocolate?
If your chickpea truffles become too firm and difficult to coat, let them sit at room temperature for about 5-10 minutes. This slight warming will make them easier to handle and allow for a smoother chocolate coating.
Are chickpea truffles safe for those with nut allergies?
Yes! You can easily make chickpea truffles nut-free by substituting the nut butter with sunflower seed butter or another safe alternative. Just ensure that all ingredients, especially the chocolate, are free from cross-contamination with nuts.
How can I tell if my chickpeas are ripe and ready for use?
If you’re using dried chickpeas, the best way to check for ripeness is by soaking and cooking them until tender. They should be soft and easy to mash. Canned chickpeas are typically ready to use right out of the can; just rinse them well to ensure they’re clean!
Decadent Chickpea Truffles That Will Delight Your Taste Buds
Ingredients
Equipment
Method
- Begin by draining and rinsing one can of chickpeas under cold water. Melt 1 cup of vegan dark chocolate chips mixed with 1 tablespoon of coconut oil in a microwave-safe bowl.
- In a food processor, combine rinsed chickpeas, ½ cup nut or seed butter, and half of the melted chocolate. Blend until smooth and creamy.
- Using a cookie scoop, portion out the blended batter onto a parchment-lined baking sheet. Freeze for 15-20 minutes until firm.
- Roll each portion into smooth balls and freeze for another 10 minutes.
- Dip each truffle into the remaining melted chocolate, ensuring even coating, and place back on the parchment-lined baking sheet.
- Freeze again for about 10 minutes or until the chocolate coating is hardened. Store in an airtight container.
Leave a Reply