
As I flipped through my favorite cookbook, the enticing aroma of grilled beef wafted from the pages, sparking memories of bustling izakayas in Tokyo. This Japanese dish, Beef Yakiniku, is a love letter to quick, delicious meals that turn any weeknight into a culinary adventure. With just a handful of ingredients and the thrill of high-heat cooking, this crowd-pleaser comes together in no time, transforming thin slices of beef into tender bites, perfectly marinated in a savory-sweet blend. It’s not just about satisfying hunger; it’s about the joy of sharing good food with loved ones. Serve it over fluffy rice and fresh veggies for a balanced, protein-packed meal that rings home–cooked comfort. Are you ready to ignite your taste buds and bring a little of Japan to your dinner table?
Why is Beef Yakiniku so special?
Quick and Easy: This recipe is perfect for busy weeknights; it comes together with minimal effort, making it a go-to for any home cook.
Flavor Explosion: The marinade blends sweet, savory, and spicy elements, ensuring each bite bursts with authentic Japanese flavors that are simply irresistible.
Customizable Delight: Feel free to swap ingredients—try sriracha for extra heat or add your favorite veggies into the mix for a fresh twist!
Healthy Choice: With lean cuts of beef and an array of fresh accompaniments, you’re serving up a hearty yet nutritious meal.
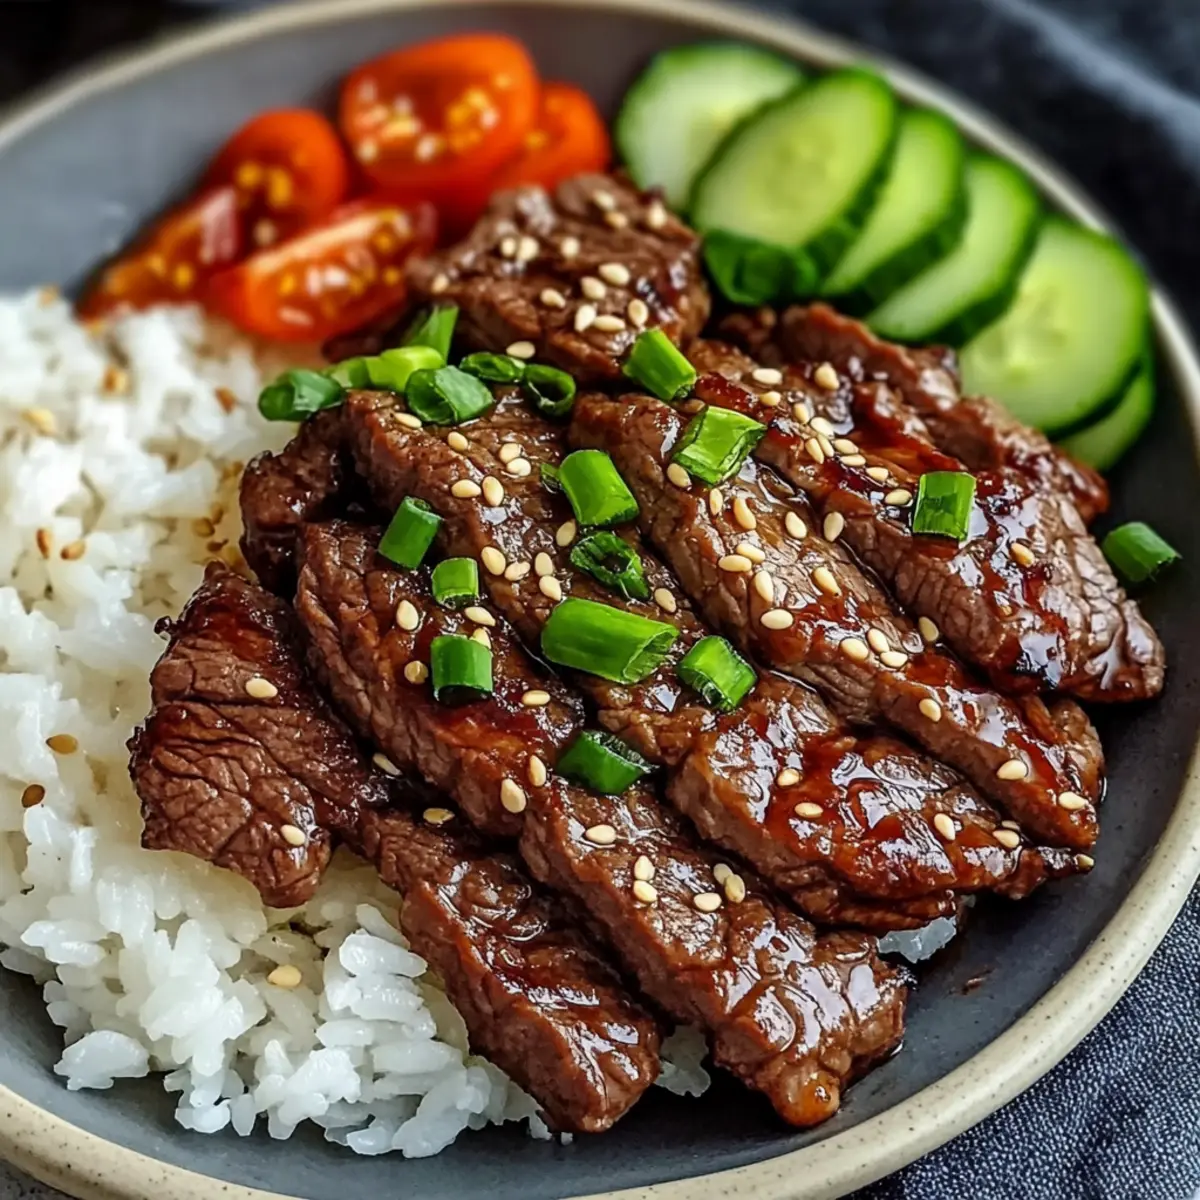
Impressive Presentation: The tender, juicy beef garnished with sesame seeds complements steamed rice beautifully—a dish that pleases the eyes as much as it delights the palate.
Pair it with some Ground Beef Potatoes for a heartier feast, or try a quick side of Korean Ground Beef for a complete dinner experience!
Beef Yakiniku Ingredients
• Unlock the secrets of this savory dish!
For the Beef
- Flank or Skirt Steak – 750 g (1.65 lbs), thinly sliced against the grain for ultimate tenderness.
For the Marinade
- Low-Sodium Light Soy Sauce – 80 ml (⅓ cup) for depth of flavor without the excess sodium.
- Gochujang (Korean Red Chili Paste) – ½ tbsp adds a spicy kick; sriracha works well as a substitute.
- Mirin – 1 tbsp is essential for that authentic sweet note.
- Minced Ginger – 2 tsp enhances the dish with a fragrant zest; fresh is best!
- Garlic Powder or Paste – ½ tsp or 1 tsp for added savory goodness; paste delivers richer flavor.
- Sesame Oil – 1 tbsp, a must-have for its nutty essence in Asian dishes.
For Cooking
- Neutral Oil (e.g., avocado or rapeseed) – 1 tbsp to prevent the beef from sticking while frying.
- Light Brown Sugar – 4 tbsp harmonizes the flavors with sweetness; honey can be used for a twist.
For Garnishing and Serving
- Sesame Seeds – sprinkle for texture and a lovely finish.
- Boiled Rice – serves as a base that absorbs the delicious marinade.
- Chopped Cucumber and Tomato – fresh additions that balance the dish with a refreshing crunch.
Each of these ingredients plays a vital role in creating the delightful experience of Beef Yakiniku that you will cherish and love!
Step‑by‑Step Instructions for Beef Yakiniku
Step 1: Prepare the Marinade
In a large mixing bowl, whisk together 80 ml of low-sodium light soy sauce, ½ tablespoon of gochujang, 1 tablespoon of mirin, 2 teaspoons of minced ginger, ½ teaspoon of garlic powder, 1 tablespoon of sesame oil, 1 tablespoon of neutral oil, and 4 tablespoons of light brown sugar until the mixture is well combined and glossy. This savory-sweet marinade is the heart of your Beef Yakiniku, enhancing the beef’s flavor.
Step 2: Marinate the Steak
Add 750 g of thinly sliced flank or skirt steak to the marinade, ensuring each piece is fully coated. Cover the bowl with plastic wrap and let it marinate in the refrigerator for at least 2 hours. This step is crucial for infusing the beef with the delicious flavors of the marinade, making it tender and flavorful for cooking later.
Step 3: Preheat the Pan
While the beef marinates, preheat a wok over high heat until it begins to smoke lightly. This ensures the perfect caramelization when cooking the Beef Yakiniku. To keep your serving warm, place a bowl in the oven at a low setting. The high heat is key to sealing in the juices and achieving that delightful sear on your beef.
Step 4: Cook the Steak
Remove half of the marinated beef from the refrigerator and add it to the hot wok in a single, even layer. Sear the beef undisturbed for about 3 minutes until a nice browned crust develops. Then, stir and cook for an additional 2-3 minutes until the beef is browned and slightly crispy. Transfer it to the warm bowl and repeat the process with the remaining beef, ensuring each batch cooks evenly.
Step 5: Garnish and Serve
Once all the beef is cooked, sprinkle sesame seeds over the top for added texture and visual appeal. Serve the Beef Yakiniku hot, accompanied by fluffy boiled rice to soak up the flavorful marinade and fresh chopped cucumber and tomato for a refreshing balance. This dish captures the essence of Japanese cuisine and transforms your dinner table into a delightful experience.
Beef Yakiniku Variations & Substitutions
Feel free to get creative and make this Beef Yakiniku dish your own delightful experience!
- Spicy Twist: Swap out gochujang for sriracha to bring more heat and a vibrant flavor boost.
- Different Cuts: Try sirloin or ribeye for a richer taste; both cuts add a unique juiciness to your dish.
- Veggie Boost: Mix in sliced onions, bell peppers, or mushrooms while cooking for added texture and flavor.
- Gluten-Free: Replace soy sauce with tamari or coconut aminos to make this recipe gluten-free without sacrificing taste.
- Sweet Alternative: Substituting the light brown sugar with honey creates a different layer of sweetness, perfect for caramelization!
- Marinade Magic: Let the beef marinate longer—up to 24 hours–for an intense flavor profile that will impress your guests.
- Add Some Crunch: Top with crushed roasted peanuts or chopped green onions for a delightful texture contrast.
- Heat Control: Adjust the gochujang for your spice level; less for mild, more for a fiery kick!
For a broader flavor adventure, why not pair this dish with some delicious Savory Beef Stifado or a light side of Pasta Ground Beef? Let your imagination run wild!
Expert Tips for Beef Yakiniku
-
Slice with Precision: Use a sharp knife to slice the beef thinly against the grain. For ease, consider partially freezing the beef to make slicing easier.
-
Master the Heat: Preheat your wok until it’s smoking hot. This not only helps with caramelization but also prevents the beef from steaming—aim for that perfect sear!
-
Avoid Crowding: Cook the beef in batches to ensure each piece gets that lovely golden brown and crispy texture. Overcrowding can lead to steaming, so give each slice room to breathe.
-
Customize Your Spice: Don’t hesitate to adjust the level of heat according to your taste. Gochujang can be replaced with sriracha for those who prefer a different spice profile while still enjoying Beef Yakiniku.
-
Perfect Your Marinade: Let the beef marinate for at least 2 hours, or up to 24 hours for even deeper flavor. The results will be mouthwatering!
-
Serve Fresh: Present the dish immediately after cooking for the best flavor and texture. Pairing it with fresh vegetables not only enhances taste but also adds a colorful appeal to your plate!
How to Store and Freeze Beef Yakiniku
Fridge: Store leftover Beef Yakiniku in an airtight container for up to 3 days. Ensure the beef has cooled to room temperature before sealing to retain moisture.
Freezer: Freeze Beef Yakiniku for up to 2 months. Place it in a freezer-safe bag or container, removing excess air to prevent freezer burn.
Reheating: Thaw overnight in the refrigerator before reheating. Warm it in a pan over medium heat, adding a splash of water or broth to keep it juicy. Enjoy the full flavor of your Beef Yakiniku!
Make-Ahead Tip: You can marinate the beef up to 24 hours in advance for maximum flavor impact! Just remember to store it in the refrigerator until you’re ready to cook.
Make Ahead Options
These Beef Yakiniku are perfect for meal prep, allowing you to enjoy a delicious dinner with minimal fuss! You can marinate the beef up to 24 hours in advance to let the flavors deeply penetrate the meat. Simply follow the marinade preparation instructions, then coat the sliced beef and store it in an airtight container in the refrigerator. For the best quality, avoid cooking the beef until you’re ready to serve. When you’re set to enjoy your meal, preheat your wok and sear the marinated beef as instructed. This way, you’ll have tender, flavorful Beef Yakiniku just as delightful as if made fresh, making dinner a breeze on those busy weeknights!
What to Serve with Beef Yakiniku
The vibrant flavors of this Japanese dish invite delightful companions to create a memorable meal.
- Steamed White Rice: A classic pairing, fluffy rice soaks up the savory marinade, providing a comforting and satisfying base.
- Chilled Sliced Cucumbers: Crisp and refreshing, they counterbalance the richness of the beef and brighten up your plate.
- Tomato Salad: Juicy tomatoes with a sprinkle of salt add a sweet, refreshing element that enhances the bold flavors of the yakiniku.
- Miso Soup: Warm and soothing, this traditional soup complements the meal with its umami depth, creating balance alongside the beef.
- Pickled Vegetables: Serve a side of tangy pickles for a delightful crunch that cuts through the richness and adds vibrant color.
- Grilled Asparagus: Tender, slightly charred asparagus brings an earthy flavor and a touch of smokiness that works beautifully with the yakiniku.
- Sake or Green Tea: Both drinks provide an authentic Japanese touch, with sake’s warmth enhancing the meal’s richness, while green tea refreshes the palate.
- Matcha Ice Cream: For dessert, this creamy treat offers a deliciously unique finish, echoing the flavors of Japan and delighting your taste buds.
- Fruit Salad: A light fruit salad adds a sweet, juicy contrast to wrap up your meal on a refreshing note.
Beef Yakiniku Recipe FAQs
What type of steak is best for Beef Yakiniku?
Flank or skirt steak is ideal for Beef Yakiniku because they are tender when sliced thinly against the grain. These cuts allow for the perfect texture that absorbs the marinade beautifully.
How should I store leftover Beef Yakiniku?
Store leftover Beef Yakiniku in an airtight container in the fridge for up to 3 days. Make sure the beef cools to room temperature before sealing to retain moisture and flavor.
Can I freeze Beef Yakiniku?
Absolutely! You can freeze Beef Yakiniku for up to 2 months. Transfer it to a freezer-safe bag or container, removing as much air as possible to prevent freezer burn. When ready to eat, thaw overnight in the refrigerator.
What should I do if my beef is tough after cooking?
If your Beef Yakiniku turns out tough, this might be due to slicing against the grain as well as not marinating long enough. For the best results, always slice thinly against the grain and consider marinating for up to 24 hours for maximum tenderness.
Can I make this recipe gluten-free?
Very! To make Beef Yakiniku gluten-free, simply substitute low-sodium light soy sauce with tamari or coconut aminos. This way, you can still enjoy all the delicious flavors without the gluten.
How can I adjust the spiciness of the marinade?
If you prefer a milder kick, reduce the amount of gochujang or replace it with sriracha for a different heat level. Feel free to modify according to your taste—cooking is all about making delicious food that you love!
Savory Beef Yakiniku: A Quick Japanese Grilled Delight
Ingredients
Equipment
Method
- Prepare the marinade by whisking together soy sauce, gochujang, mirin, ginger, garlic powder, sesame oil, neutral oil, and brown sugar in a mixing bowl until glossy.
- Marinate the steak by adding it to the marinade, ensuring it's fully coated. Let it rest in the refrigerator for at least 2 hours.
- Preheat a wok over high heat until smoking lightly.
- Cook the steak in a single layer; sear undisturbed for 3 minutes, then stir and cook for another 2-3 minutes. Transfer to a bowl and repeat with remaining beef.
- Garnish with sesame seeds and serve hot with rice and fresh vegetables.
Leave a Reply