
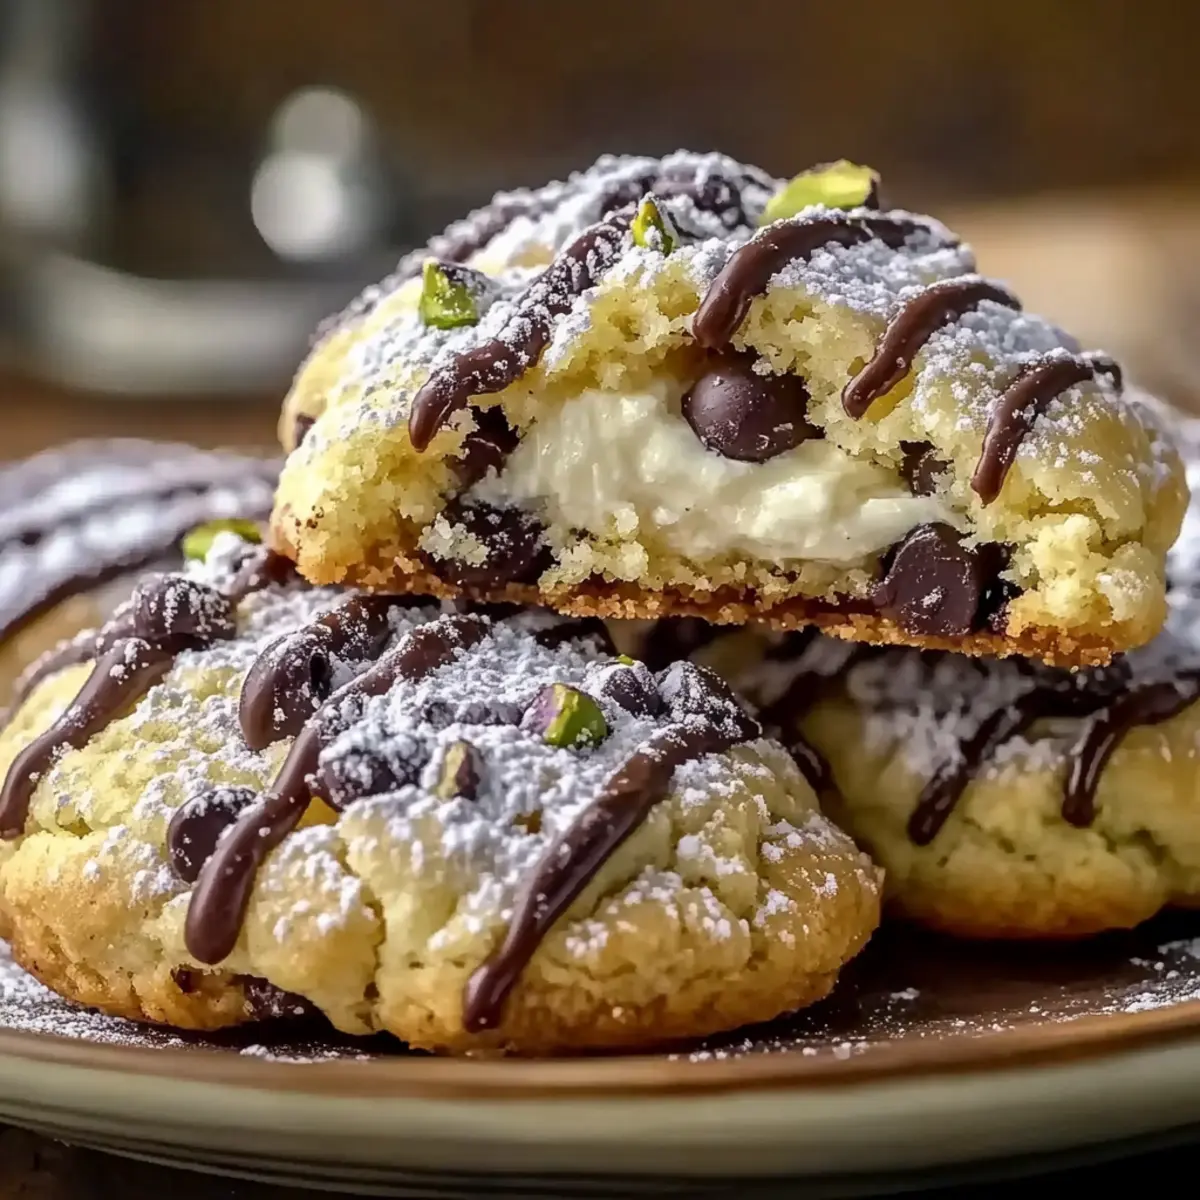
As I stood in my kitchen, the sweet aroma of ricotta mingling with a hint of lemon zest wafted through the air, instantly transporting me to the vibrant streets of Italy. That’s when I couldn’t help but whip up a batch of my beloved Cannoli Cookies. These little gems capture all the classic flavors of traditional Italian cannoli in a delightful, easy-to-make cookie form. With a crispy exterior and a creamy, dreamy filling accented by chocolate chips and pistachios, they bring an irresistible charm to any dessert table. Not only are these Cannoli Cookies a surefire crowd-pleaser, but they also make baking feel effortlessly rewarding. Are you ready to recreate a bite of Italy in your own home?

Why Are Cannoli Cookies So Irresistible?
Tradition in Every Bite: These Cannoli Cookies encapsulate the nostalgic flavors of Italy, making them a delightful homage to the classic dessert you love.
Simple to Make: With just a handful of ingredients and straightforward steps, even novice bakers can impress their friends and family.
Perfect for Any Occasion: Whether it’s a festive gathering or a cozy evening at home, these cookies are sure to impress any crowd.
Versatile Flavor: Feeling adventurous? Swap out pistachios for almonds or experiment with flavored extracts for a unique twist.
Make-Ahead Delight: Bake a batch and store them for a sweet treat that’s always on hand—perfect for dessert emergencies!
For more delightful treats like these, check out my Hawaiian Pineapple Cookies or the indulgent Cinnamon Coffee Crinkles.
Cannoli Cookies Ingredients
Here’s everything you need to create these delightful Cannoli Cookies that embody the classic flavors of Italy!
For the Cookie Dough
• All-Purpose Flour – Essential for structure; sift it for a lighter texture.
• Granulated Sugar – Adds sweetness and helps achieve that lovely golden color.
• Large Egg – Binds everything together for a rich, tender cookie.
• Vanilla Extract – Infuses warmth and sweetness, enhancing the overall flavor.
• Lemon Zest – Brightens the cookie with a citrus touch; opt for fresh for the best taste.
For the Filling
• Ricotta Cheese (¼ cup for dough, ¼ cup for filling) – Keeps cookies moist; swap with mascarpone for a creamier filling.
• Mini Chocolate Chips – Adds sweetness and delightful texture; dark chocolate chips offer a more decadent twist.
• Chopped Pistachios – Introduces a satisfying crunch and nutty flavor; almonds can be a great substitute.
For Finishing Touch
• Powdered Sugar – Dust over cooled cookies for a touch of elegance and extra sweetness.
Step‑by‑Step Instructions for Cannoli Cookies
Step 1: Preheat the Oven
Begin by preheating your oven to 350°F (175°C). This crucial step ensures that your Cannoli Cookies bake evenly and develop that desirable golden-brown color while remaining crisp on the outside. While the oven warms up, gather all your ingredients and have your baking sheets ready lined with parchment paper for easy cleanup.
Step 2: Mix Dry Ingredients
In a large mixing bowl, whisk together the all-purpose flour and granulated sugar until well combined. This blending not only infuses the flour with sweetness but also helps ensure there are no lumps. Take a moment to admire the dry ingredients before moving on; they’re the foundation of your delightful Cannoli Cookies!
Step 3: Combine Wet Ingredients
In a separate bowl, mix together ¼ cup of ricotta cheese, the large egg, vanilla extract, and lemon zest. Stir these together until the mixture is smooth and creamy, ensuring the ricotta is at room temperature to prevent lumps. This combination will create a luscious base, making your Cannoli Cookies tender and flavorful.
Step 4: Combine Mixtures
Gradually add the dry flour mixture into the wet ingredients, mixing gently until just combined. Be careful not to overmix; a light touch ensures that your cookie dough remains tender. Once well blended, let the dough rest for 30 minutes. This resting period allows the flavors to develop and the dough to hold together better.
Step 5: Shape the Cookies
After resting, roll out the dough onto a lightly floured surface until it’s about ¼ inch thick. Use a sharp knife or a cutter to cut the dough into rectangles about 2×3 inches in size. The shapes should look neat and uniform for even baking. Place each piece carefully onto the lined baking sheets, leaving some room in between.
Step 6: Prepare the Filling
In another bowl, mix the remaining ¼ cup of ricotta cheese, mini chocolate chips, and chopped pistachios until fully blended. This filling will impart a delightful creaminess and crunch to your Cannoli Cookies. Use a spoon to take a generous scoop of the mixture and place it on one half of each rectangle.
Step 7: Fold and Seal
Fold each rectangle over the filling to create a pocket and pinch the edges tightly to seal them closed. This step is essential to keep your scrumptious filling intact during baking. Ideally, you want a secure seal while also maintaining a beautiful shape. Make sure to check for any open edges, or your filling might ooze out!
Step 8: Bake the Cookies
Slide your prepared baking sheets into the preheated oven and bake for 15 to 18 minutes, or until the cookies are golden brown. Keep an eye on them as they bake; a slight golden hue will indicate the perfect level of doneness. The warm aroma wafting through your kitchen will confirm that something wonderful is happening!
Step 9: Cool the Cookies
Once baked, remove the Cannoli Cookies from the oven and let them cool on the baking sheets for about 5 minutes. This cooling period is essential for the cookies to firm up slightly before transferring them to a wire rack. Avoid cutting them too soon, as the filling will be hot and may leak.
Step 10: Finishing Touches
Once completely cooled, dust the Cannoli Cookies generously with powdered sugar to add a final touch of sweetness and elegance. This simple step enhances their visual appeal and provides a delightful contrast to the creamy filling. Now, your delicious Cannoli Cookies are ready to be enjoyed and shared with loved ones!
Expert Tips for Cannoli Cookies
-
Room Temperature Ricotta: Ensure your ricotta cheese is at room temperature for a smooth filling; cold ricotta can lead to lumps and uneven texture.
-
Gentle Mixing: Be cautious not to overmix the dough as it can lead to tougher cookies—mix just until ingredients are combined for tender Cannoli Cookies.
-
Watch Baking Time: Keep an eye on your cookies during baking; they should be golden brown, not dark. Dark cookies can indicate overbaking.
-
Cool Before Cutting: Allow the cookies to cool completely before dusting with powdered sugar. Cutting them too soon might cause the creamy filling to leak.
-
Seal Properly: Pinch the edges of the dough tightly when folding over the filling to prevent it from seeping out during baking, ensuring you get a delightful bite in every Cannoli Cookie.
Make Ahead Options
These Cannoli Cookies are ideal for busy home cooks looking to save time without compromising on flavor! You can prepare the cookie dough up to 24 hours in advance by mixing all the ingredients and storing it in the refrigerator. For the filling, combine the ricotta, chocolate chips, and pistachios, and keep it sealed in the fridge for up to 3 days. When you’re ready to enjoy these delightful cookies, simply roll out the chilled dough, fill, and bake as directed. This way, you’ll have freshly baked Cannoli Cookies with minimal effort, ready to impress family or guests with that same irresistible charm!
Storage Tips for Cannoli Cookies
Room Temperature: Store Cannoli Cookies in an airtight container at room temperature for up to 3 days to maintain their delightful texture and flavor.
Fridge: If you prefer a chill, you can refrigerate the cookies for about 5 days, although the filling may become firmer.
Freezer: To enjoy your Cannoli Cookies later, wrap them tightly in plastic wrap and store in the freezer for up to a month. Thaw before serving and dust with powdered sugar for a fresh touch.
Reheating: For a warm treat, briefly warm in the oven at 300°F (150°C) for 5-7 minutes, ensuring the creamy filling remains intact for a delightful bite every time.
What to Serve with Easy Cannoli Cookies
Imagine the delightful experience awaiting when you serve these Italian treasures alongside perfect pairings that will elevate any gathering.
-
Espresso: A rich, bold espresso complements the sweetness of the Cannoli Cookies, enhancing the flavors of both the cookie and the coffee for a memorable dessert experience.
-
Gelato: Pairing these cookies with a scoop of creamy gelato creates a luscious dessert tableau; consider flavors like pistachio or chocolate to echo the cookie filling.
-
Fresh Berries: Juicy strawberries or raspberries bring a bright, tart contrast, adding a refreshing element that balances the creamy, sweet filling.
-
Sweet Wine: A glass of dessert wine, like Moscato or Vin Santo, harmonizes beautifully with these cookies, providing a delightful sweetness that enhances the overall enjoyment.
-
Whipped Cream: A dollop of light whipped cream offers a cloud-like texture that beautifully contrasts the crispy exterior of the cookies.
-
Chocolate Sauce: Drizzling a bit of melted chocolate on top not only adds flavor but also makes for an elegant presentation that invites everyone to indulge.
-
Chopped Nuts: Serve the cookies with a side of chopped nuts (almonds or pistachios) for an extra crunch that reminds you of the cookie’s delicious filling.
-
Coconut Macaroons: The chewy sweetness of coconut macaroons makes for a delightful contrast to the crisp Cannoli Cookies, creating a wonderful texture and flavor interplay.
Cannoli Cookies Variations & Substitutions
Feel free to tailor these Cannoli Cookies to your taste buds and dietary needs for an even more delightful treat!
-
Dairy-Free: Substitute ricotta cheese with a plant-based alternative like cashew cream to maintain creaminess without dairy.
-
Gluten-Free: Use a gluten-free flour blend to create cookies that everyone can enjoy while keeping the same delightful taste.
-
Chocolate Lovers: Mix in dark chocolate chips along with or instead of mini chocolate chips for a deeper, richer flavor profile that chocolate enthusiasts will adore.
-
Nut-Free: Omitting the pistachios? Replace them with sunflower seeds or pumpkin seeds for a similar crunch without the nuts!
-
Extra Zing: Add a splash of orange zest alongside the lemon for a bright, citrusy twist that will have your taste buds dancing.
-
Spiced Up: Sprinkle in some ground cinnamon or a hint of nutmeg to the dough for a warming, aromatic touch that elevates these cookies to comfort food status.
-
Mini Cannoli Bites: Instead of rectangles, cut your dough into smaller squares for bite-sized treats that are perfect for sharing (or keeping all to yourself)!
For even more delectable inspiration, you might enjoy my luscious Hawaiian Pineapple Cookies or indulge in the rich flavors of Cinnamon Coffee Crinkles. The possibilities are endless; make these Cannoli Cookies truly yours!
Cannoli Cookies Recipe FAQs
What kind of ricotta cheese should I use for the filling?
Absolutely! For the best results, use whole milk ricotta cheese. This type will keep your filling moist and flavorful. Be sure to let it come to room temperature to achieve a creamy consistency, preventing any lumps in your filling. If you would like an alternative, mascarpone can be used for an extra-rich filling that rivals the classic cannoli taste.
How should I store Cannoli Cookies?
Very importantly, store your Cannoli Cookies in an airtight container at room temperature for up to 3 days. This helps maintain their delightful texture. If you have leftovers, you can refrigerate them for about 5 days, keeping in mind that the filling may firm up a bit.
Can I freeze Cannoli Cookies, and if so, how?
Absolutely! To freeze your Cannoli Cookies, first, let them cool completely after baking. Wrap each cookie tightly in plastic wrap and then place them in a freezer-safe bag or container. They can be stored in the freezer for up to a month. When you’re ready to enjoy them, simply thaw at room temperature and dust with powdered sugar for a fresh presentation before serving.
What should I do if my dough is too crumbly?
If your dough comes out too crumbly, don’t worry! This can happen sometimes. Try adding a tiny splash of milk or an extra tablespoon of ricotta cheese to help bind the ingredients. Mix gently until the dough comes together. Avoid overworking the dough, as this can lead to tougher cookies.
Are Cannoli Cookies suitable for people with nut allergies?
Yes, you can absolutely make Cannoli Cookies nut-free! Simply omit the chopped pistachios and replace them with a nut-free sprinkle, such as sunflower seeds or mini chocolate chips, if desired. Always double-check the packaging of all your ingredients too, especially the ricotta cheese, to ensure there are no traces of allergens.
Delicious Cannoli Cookies That Capture Italian Tradition
Ingredients
Equipment
Method
- Preheat your oven to 350°F (175°C). Gather all your ingredients and line your baking sheets with parchment paper.
- In a large mixing bowl, whisk together the all-purpose flour and granulated sugar until well combined.
- In a separate bowl, mix together ¼ cup of ricotta cheese, the large egg, vanilla extract, and lemon zest until smooth and creamy.
- Gradually add the dry flour mixture into the wet ingredients, mixing gently until just combined. Let the dough rest for 30 minutes.
- Roll out the dough onto a lightly floured surface until it's about ¼ inch thick. Cut the dough into rectangles about 2x3 inches.
- In another bowl, mix the remaining ¼ cup of ricotta cheese, mini chocolate chips, and chopped pistachios until blended.
- Fold each rectangle over the filling to create a pocket and pinch the edges tightly to seal.
- Bake for 15 to 18 minutes, or until the cookies are golden brown.
- Once baked, let them cool on the baking sheets for about 5 minutes, then transfer to a wire rack.
- Dust the cooled cookies generously with powdered sugar before serving.
Leave a Reply