
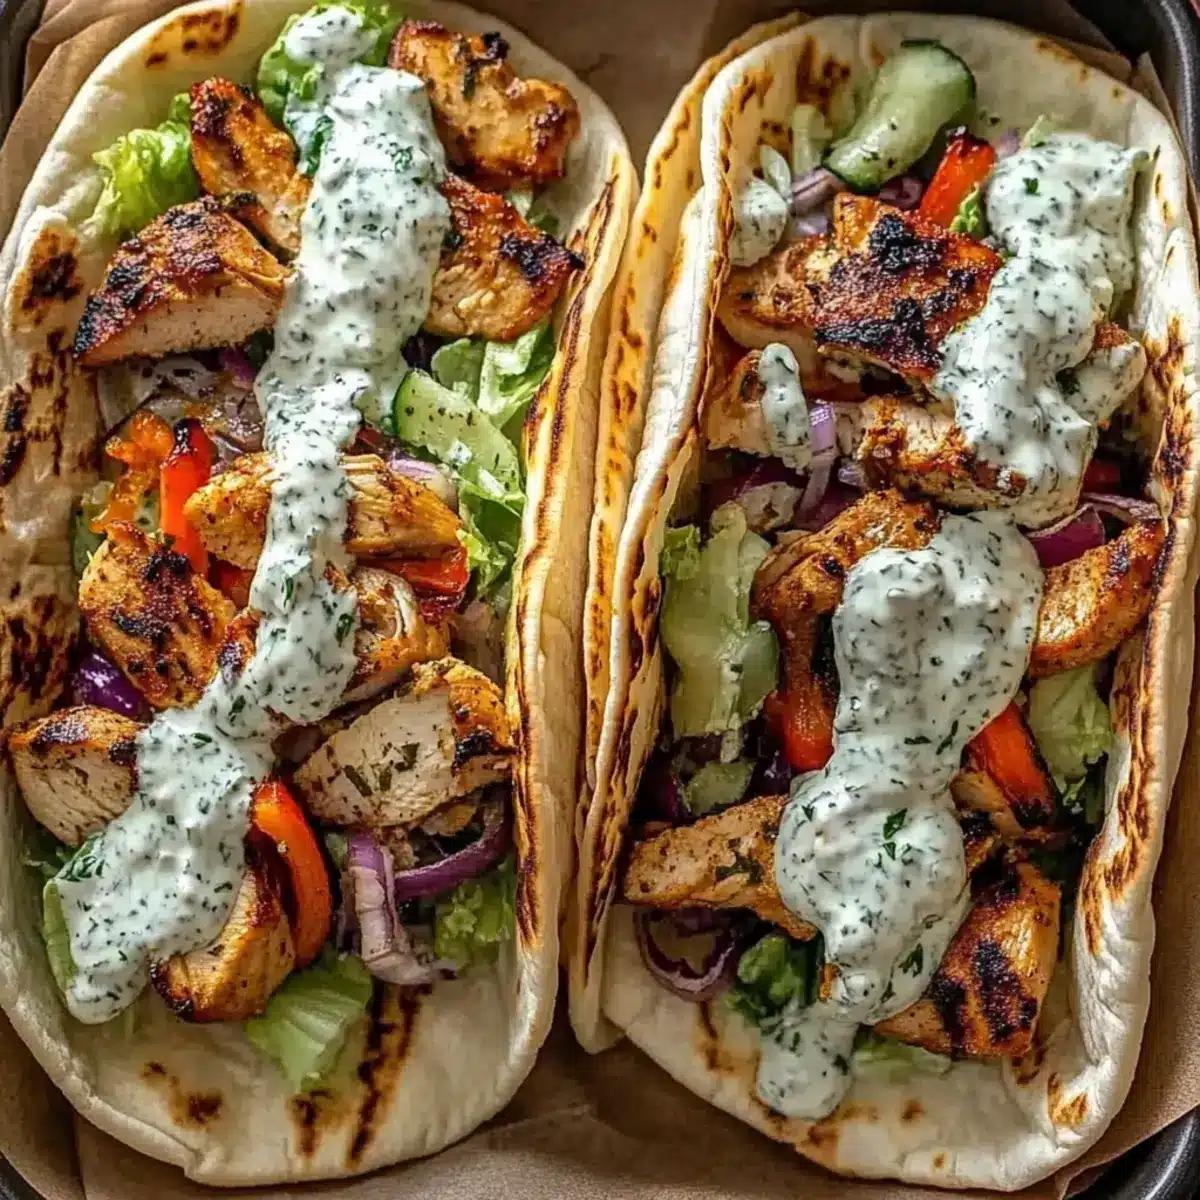
The savory aroma of paprika and roasted chicken fills the kitchen as I pull out a perfectly arranged sheet pan, ready to transform a hectic weeknight into a flavor-packed meal. These Sheet Pan Chicken Pitas with Herby Ranch not only come together in a snap, but they also offer the delightful flexibility to customize with your favorite toppings. Whether you’re family-style dining or crafting individual portions, this easy dinner is designed for both comfort and convenience. Each bite brings a comforting warmth that feels like a cozy hug, while the herby ranch dressing adds a fresh zing. Intrigued by how simple it is to elevate your dinner routine? Let’s dive into this mouthwatering recipe!

Why Are Sheet Pan Chicken Pitas So Great?
Versatile Customization: Feel free to experiment with your favorite toppings like pickled onions or crumbled feta. Quick Preparation: Everything cooks together on one pan, minimizing cleanup time. Flavor Explosion: Smoky paprika paired with zesty herby ranch offers a delightful taste combo. Crowd-Pleasing Appeal: Perfect for family dinners, this dish caters to everyone’s tastes. Health-Conscious Choice: Packed with lean protein and veggies, it’s a wholesome option for satisfying cravings without the fast food guilt. Try pairing it with a fresh green salad for an extra crunch!
Sheet Pan Chicken Pitas Ingredients
Get ready to savor every bite with these Sheet Pan Chicken Pitas with Herby Ranch!
For the Chicken & Vegetables
- Chicken Breasts – 2 pieces, boneless, skinless for juicy and tender filling.
- Olive Oil – 1 tablespoon to keep everything moist and promote a lovely golden brown.
- Salt & Pepper – To taste; essential for bringing out all those delightful flavors.
- Garlic Powder – 1 teaspoon adds complexity without overwhelming the palate.
- Paprika – 1 teaspoon brings a rich, smoky depth and vibrant color.
- Mixed Vegetables – 1 cup (bell peppers, onions, zucchini); cook down beautifully for added sweetness.
For the Herby Ranch Dressing
- Greek Yogurt – 1/2 cup creates a tangy and creamy base that perfectly complements the dish.
- Ranch Seasoning Mix – 1 tablespoon for a classic and convenient flavor profile.
- Fresh Herbs – To taste (like parsley and dill) add a bright burst of freshness.
For the Pitas
- Pitas – 4 pieces, choose soft or lightly toasted to cradle all those delicious fillings.
Feel free to get creative with toppings! You can make this dish your own, making the Sheet Pan Chicken Pitas a delightful mainstay in your weeknight dinner rotation.
Step‑by‑Step Instructions for Sheet Pan Chicken Pitas with Herby Ranch
Step 1: Preheat the Oven
Begin by preheating your oven to 400°F (200°C), allowing it to reach this temperature while you prepare the rest of your ingredients. This preheating step is essential for achieving perfectly roasted chicken and vegetables, so don’t skip it!
Step 2: Prepare Chicken & Vegetables
In a large mixing bowl, toss the boneless, skinless chicken breasts with olive oil, salt, pepper, garlic powder, and paprika until evenly coated. Once the chicken is ready, add your chosen mixed vegetables, like bell peppers, onions, and zucchini. Spread them out in a single layer on a baking sheet, ensuring they have enough space for browning.
Step 3: Bake the Chicken and Veggies
Place the sheet pan in your preheated oven and roast for 20-25 minutes. Keep an eye on the progress; the chicken should be beautifully golden and reach an internal temperature of 165°F. The vegetables will also soften and caramelize, creating enticing aromas.
Step 4: Make the Herby Ranch Dressing
While the chicken and vegetables are baking, combine Greek yogurt, ranch seasoning mix, and your choice of fresh herbs in a mixing bowl. Stir thoroughly until the dressing is smooth and creamy, bursting with flavor. This herby ranch will add a delightful touch to your Sheet Pan Chicken Pitas.
Step 5: Warm the Pitas
With about 5 minutes left for the chicken and veggies, toss the pitas onto the sheet pan or place them directly in the oven to warm. A quick toast will enhance their texture, making them even more enjoyable when stuffed with the roasted filling.
Step 6: Assemble the Pitas
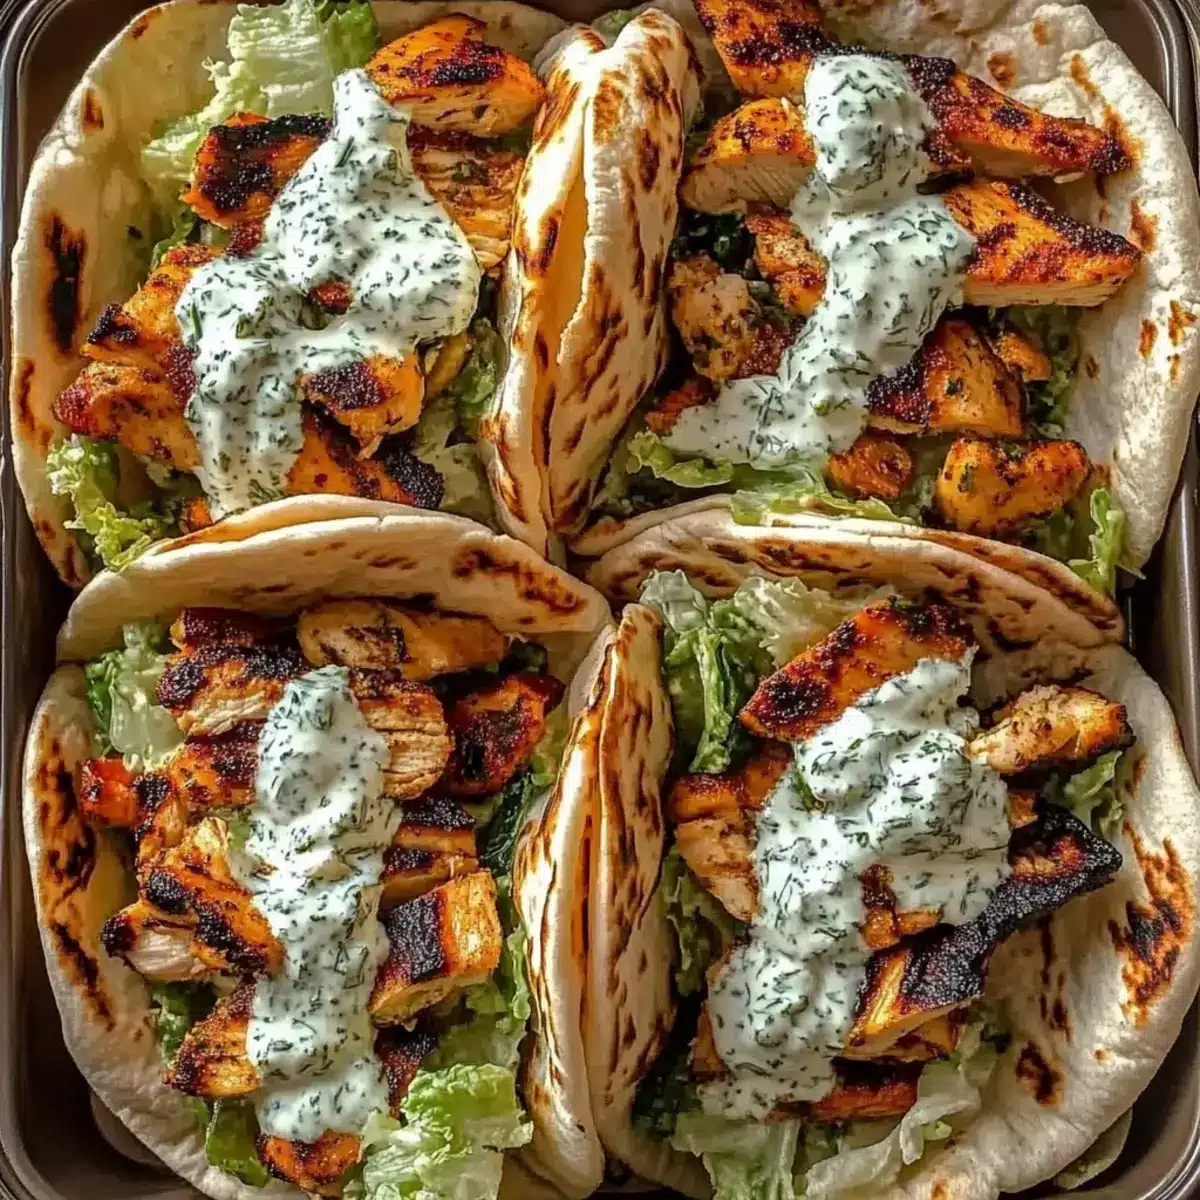
Once the chicken has finished roasting, let it rest for 3-5 minutes to ensure its juices redistribute. Slice the chicken into pieces, then carefully fill the warm pitas with a generous helping of sliced chicken, colorful roasted vegetables, and a drizzle of your homemade herby ranch dressing. Enjoy your delicious Sheet Pan Chicken Pitas as a satisfying meal crafted from your kitchen!
What to Serve with Sheet Pan Chicken Pitas with Herby Ranch
Transform your tasty sheet pan delights into a complete meal with these perfectly matched sides.
-
Creamy Coleslaw: A crunchy and tangy side that refreshes your palate and balances the savory flavors of the chicken pitas.
-
Roasted Cauliflower: Enjoy this caramelized veggie side that adds a nutty flavor, complementing the spices in the chicken.
-
Cucumber Tomato Salad: A light and refreshing mix of bright veggies that adds a crisp texture, enhancing each bite.
-
Sweet Potato Fries: Their natural sweetness pairs perfectly with the smoky chicken, offering a delightful contrast of flavors.
-
Grilled Asparagus: Tender and slightly charred, this seasonal vegetable adds a vibrant pop of color and flavor to your plate.
-
Pineapple Salsa: Sweet and zesty, this salsa brings a tropical twist, brightening the savory notes of the herby ranch.
-
Chickpea Salad: Nutritious and filling, featuring protein-rich chickpeas, this dish adds a wholesome element to your meal.
Feel free to mix and match these sides according to your mood and create a perfectly satisfying dinner experience!
Make Ahead Options
These Sheet Pan Chicken Pitas with Herby Ranch are ideal for meal prep, offering a satisfying solution for busy weeknights! You can marinate the chicken and chop the mixed vegetables up to 24 hours in advance, storing them in an airtight container in the refrigerator to maintain freshness. When ready to cook, simply spread the marinated chicken and vegetables on the sheet pan and roast as instructed. For the herby ranch dressing, make it ahead and refrigerate for up to 3 days; just give it a good stir before serving. By preparing these components ahead of time, you’ll have a quick and delicious meal that feels homemade with minimal effort!
Sheet Pan Chicken Pitas with Herby Ranch Variations
Let your creativity shine by customizing these delightful pitas with your favorite flavors and textures!
-
Dairy-Free: Substitute Greek yogurt with a dairy-free yogurt or avocado for a creamy alternative. This keeps the dressing rich yet gentle on the tummy.
-
Veggie Boost: Add roasted asparagus or cherry tomatoes for a burst of vibrant color and flavor. These fresh additions will make your meal even more appealing!
-
Spicier Kick: Toss in a pinch of red pepper flakes or add jalapeño slices to your roasting veggies for a delightful spicy twist. It’s a great way to elevate that herby ranch dressing!
-
Crunchy Toppings: Incorporate toppings like pickled red onions, cucumber slices, or crumbled feta for an exciting crunch and extra tangy flavor. These will bring your pitas to life!
-
Rotisserie Shortcut: Use store-bought rotisserie chicken for a quicker preparation. Just add your spices and finish it with the herby ranch for maximum flavor with minimal effort.
-
Mediterranean Flair: Swap in roasted eggplant and olives to give it a Mediterranean twist, and serve with a side of tzatziki for extra dippability!
-
Whole Grain Option: Opt for whole grain pitas instead of traditional ones for a heartier option that adds fiber and nutrients. Your body will thank you for the extra boost!
-
Make it a Salad: Transform this dish into a salad by serving the chicken and veggies over a bed of greens, drizzled with herby ranch dressing. It’s a fresh, light alternative that’s equally delicious!
These variations not only enrich your meal but also make cooking fun and inviting! Want more chicken inspiration? Check out my flavorful Ginger Scallion Chicken Noodle Soup or indulge in some mouthwatering Cajun Chicken Garlic.
Storage Tips for Sheet Pan Chicken Pitas with Herby Ranch
- Room Temperature: Serve the sheet pan chicken pitas immediately for the best flavor and texture. If left out, consume within 2 hours for food safety.
- Fridge: Store any leftovers in an airtight container in the fridge for up to 3 days. Keep pitas separate from the chicken and veggies to maintain their texture.
- Freezer: To freeze, place cooled chicken and vegetables in a freezer-safe container for up to 3 months. Thaw in the fridge overnight before reheating.
- Reheating: For the best results, reheat in the oven at 350°F (175°C) until warmed through, about 10-15 minutes. This keeps your Sheet Pan Chicken Pitas flavorful and delicious!
Expert Tips for Sheet Pan Chicken Pitas
- Rest the Chicken: Allow the chicken to rest for 3-5 minutes after baking. This helps redistribute juices for maximum tenderness and flavor.
- Avoid Soggy Pitas: Lightly toast your pitas before filling them. This simple step prevents them from getting soggy, making for a better bite!
- Use Rotisserie Chicken: Save time by opting for rotisserie chicken. Simply warm it up with your spices; it’s a quick alternative without sacrificing taste.
- Customize Veggies: Feel free to switch up your vegetables based on what’s in season. Zucchini, asparagus, or even cherry tomatoes can offer different flavors and textures.
- Broil for Extra Flavor: If you love a charred taste, consider broiling for 1-2 minutes after baking. This adds a delightful crispness to your Sheet Pan Chicken Pitas!
Sheet Pan Chicken Pitas with Herby Ranch Recipe FAQs
How do I choose the best chicken for this recipe?
Absolutely! When selecting chicken breasts, look for those that are plump and have a light pink color. Avoid any breasts that have dark spots or a slimy texture. Fresh chicken will yield the juiciest and most flavorful results in your Sheet Pan Chicken Pitas.
What is the best way to store leftovers?
To keep your Sheet Pan Chicken Pitas fresh, store any leftovers in an airtight container in the fridge for up to 3 days. Be sure to separate the pitas from the chicken and veggies to prevent them from getting soggy. This way, you can enjoy a delightful meal again without sacrificing texture!
Can I freeze the chicken and vegetables?
Yes! To freeze, allow the leftover chicken and vegetables to cool completely after cooking. Then, transfer them to a freezer-safe container, where they’ll keep well for up to 3 months. To reheat, simply thaw in the fridge overnight, and then warm them in the oven at 350°F (175°C) for 10-15 minutes until heated through. You’ll have an easy lunch or dinner ready to go!
What should I do if my chicken is dry after baking?
If your chicken turns out dry, try reducing the baking time slightly the next time you make this. The chicken should reach an internal temperature of 165°F; using a meat thermometer can help ensure you don’t overcook it. Also, letting the chicken rest for 3-5 minutes after baking allows the juices to redistribute, keeping it tender.
Are there any dietary considerations I should keep in mind?
Very! If you’re preparing these pitas for someone with allergies, be sure to double-check the ranch seasoning mix and any topping options you plan to include, as they could contain dairy or gluten. You may also consider using dairy-free yogurt for the herby ranch dressing or offering a variety of toppings to accommodate different dietary needs.

Sheet Pan Chicken Pitas with Herby Ranch for Easy Weeknight Bliss
Ingredients
Equipment
Method
- Preheat the oven to 400°F (200°C).
- In a large mixing bowl, toss chicken breasts with olive oil, salt, pepper, garlic powder, and paprika until coated. Add mixed vegetables and spread on a baking sheet.
- Roast in the preheated oven for 20-25 minutes until chicken is golden and internal temperature reaches 165°F.
- In a mixing bowl, combine Greek yogurt, ranch seasoning mix, and fresh herbs. Stir until smooth.
- With 5 minutes left, add pitas to the oven to warm.
- Allow the chicken to rest for 3-5 minutes, slice it, then fill the warm pitas with chicken, vegetables, and dressing.
Leave a Reply