
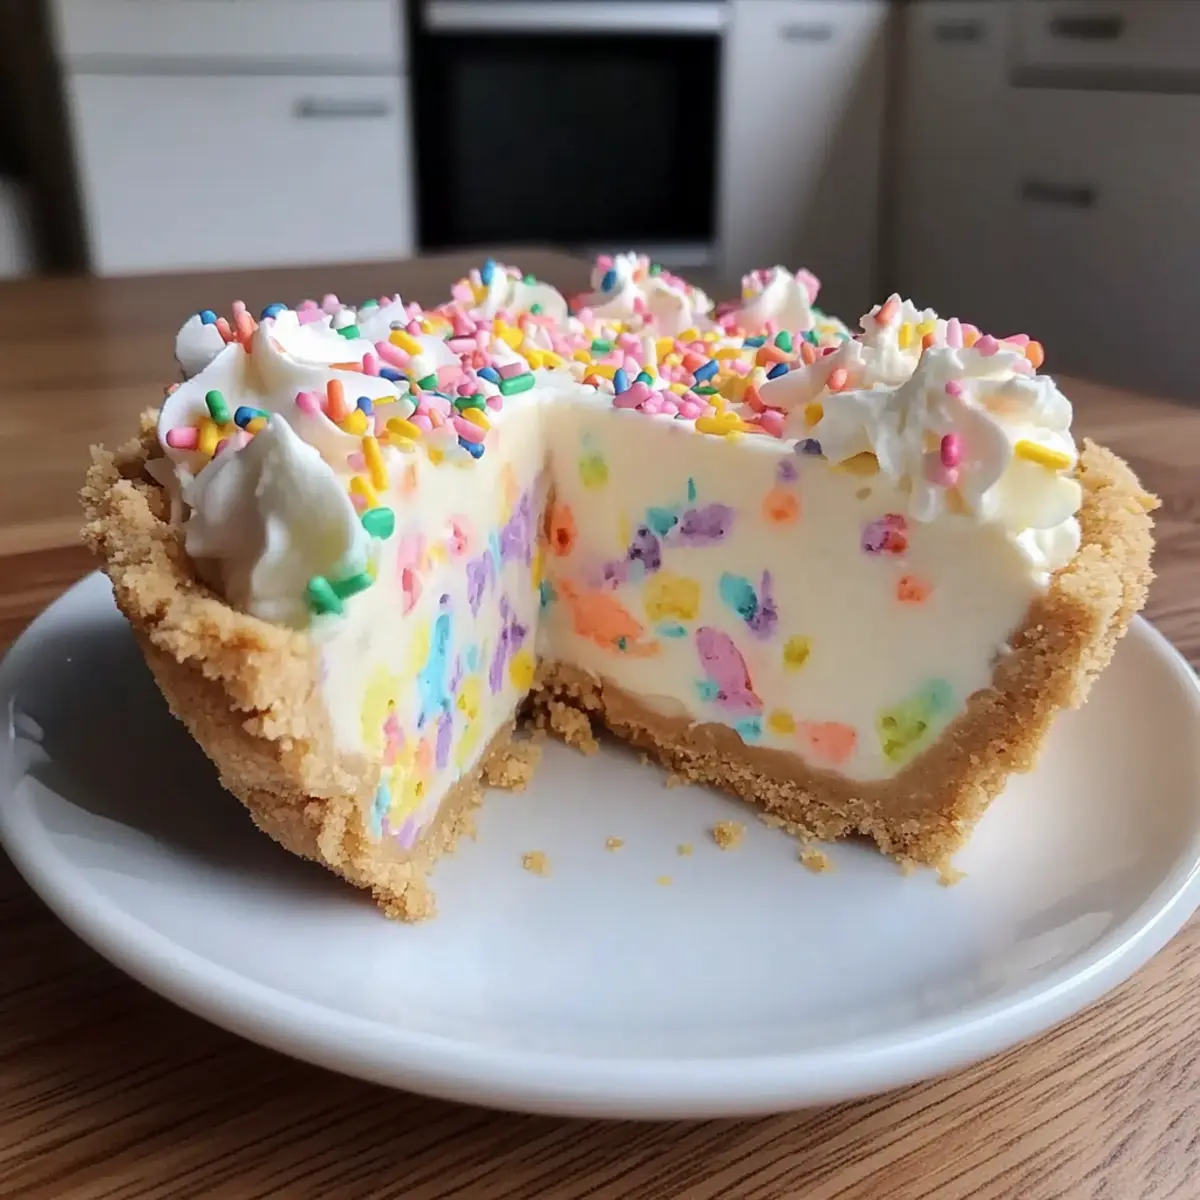
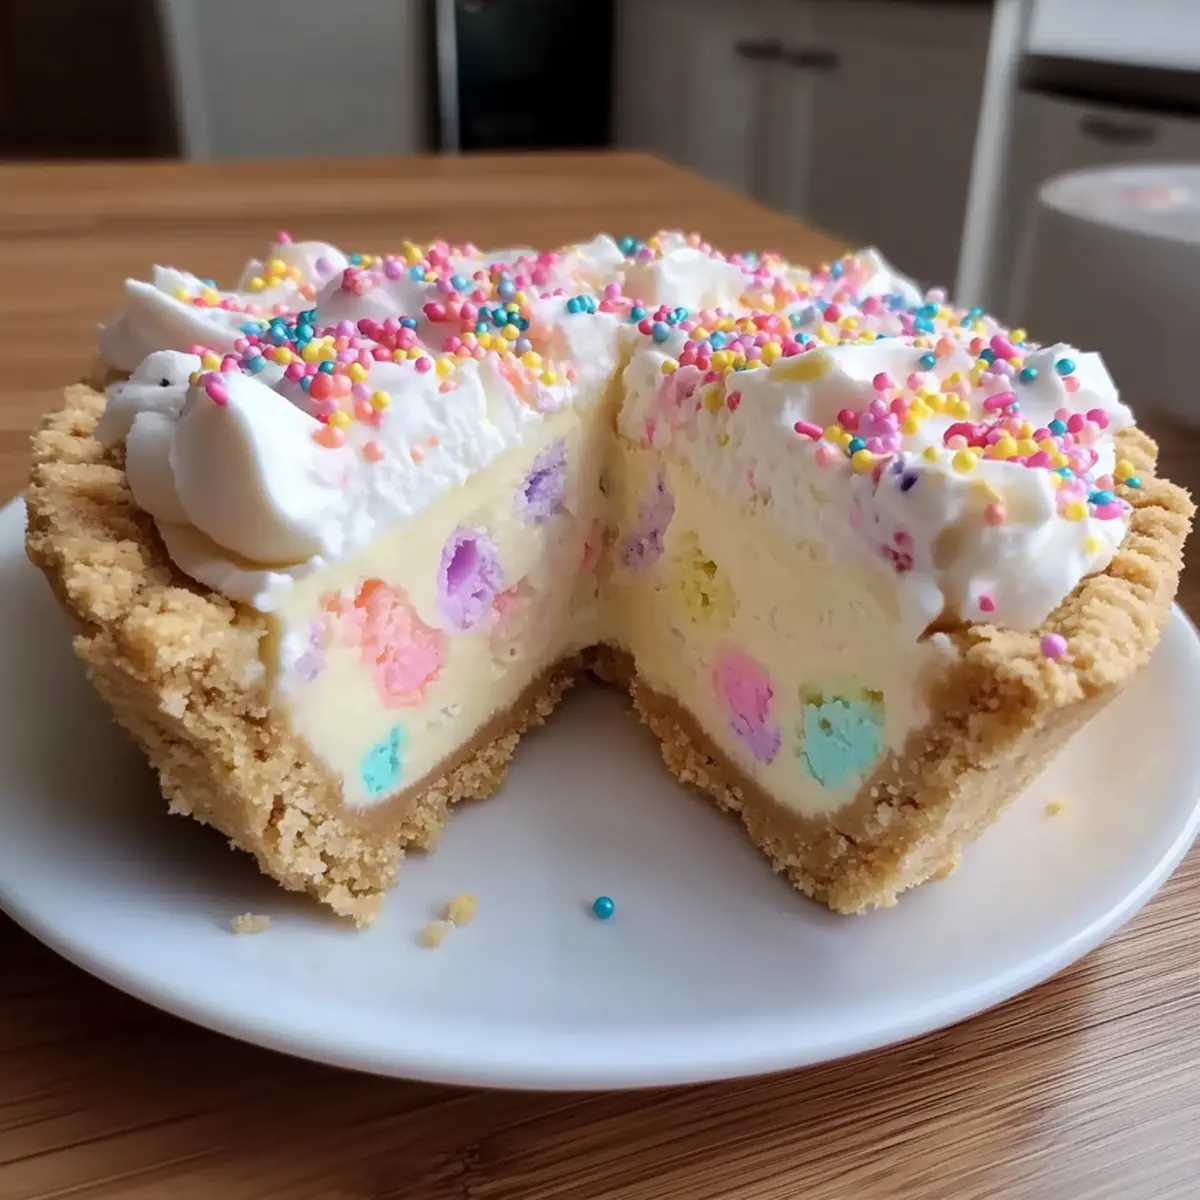
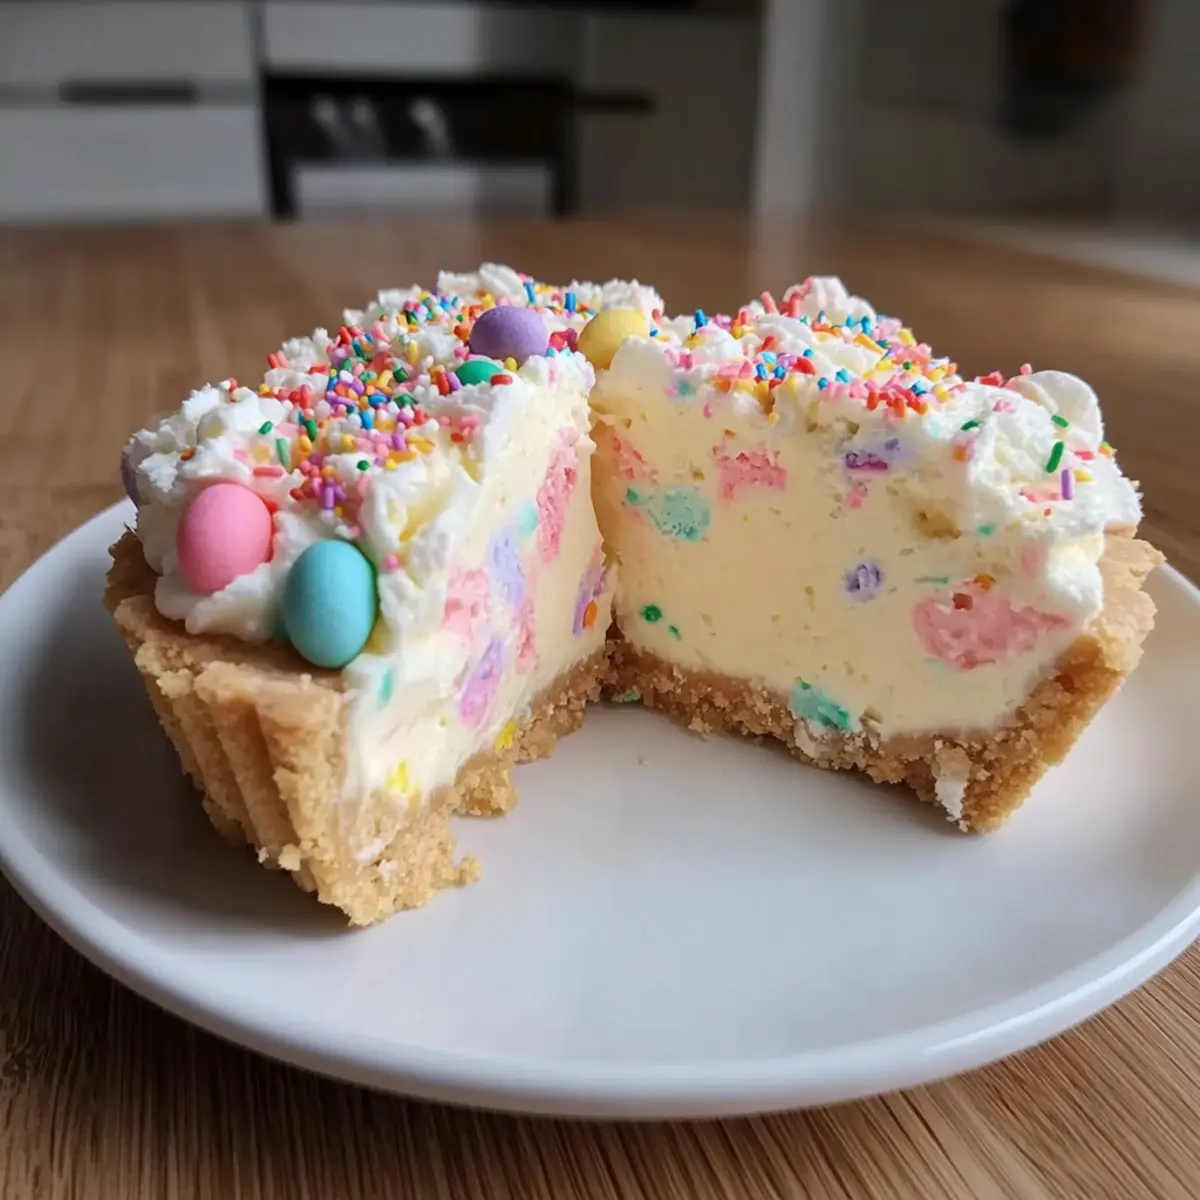
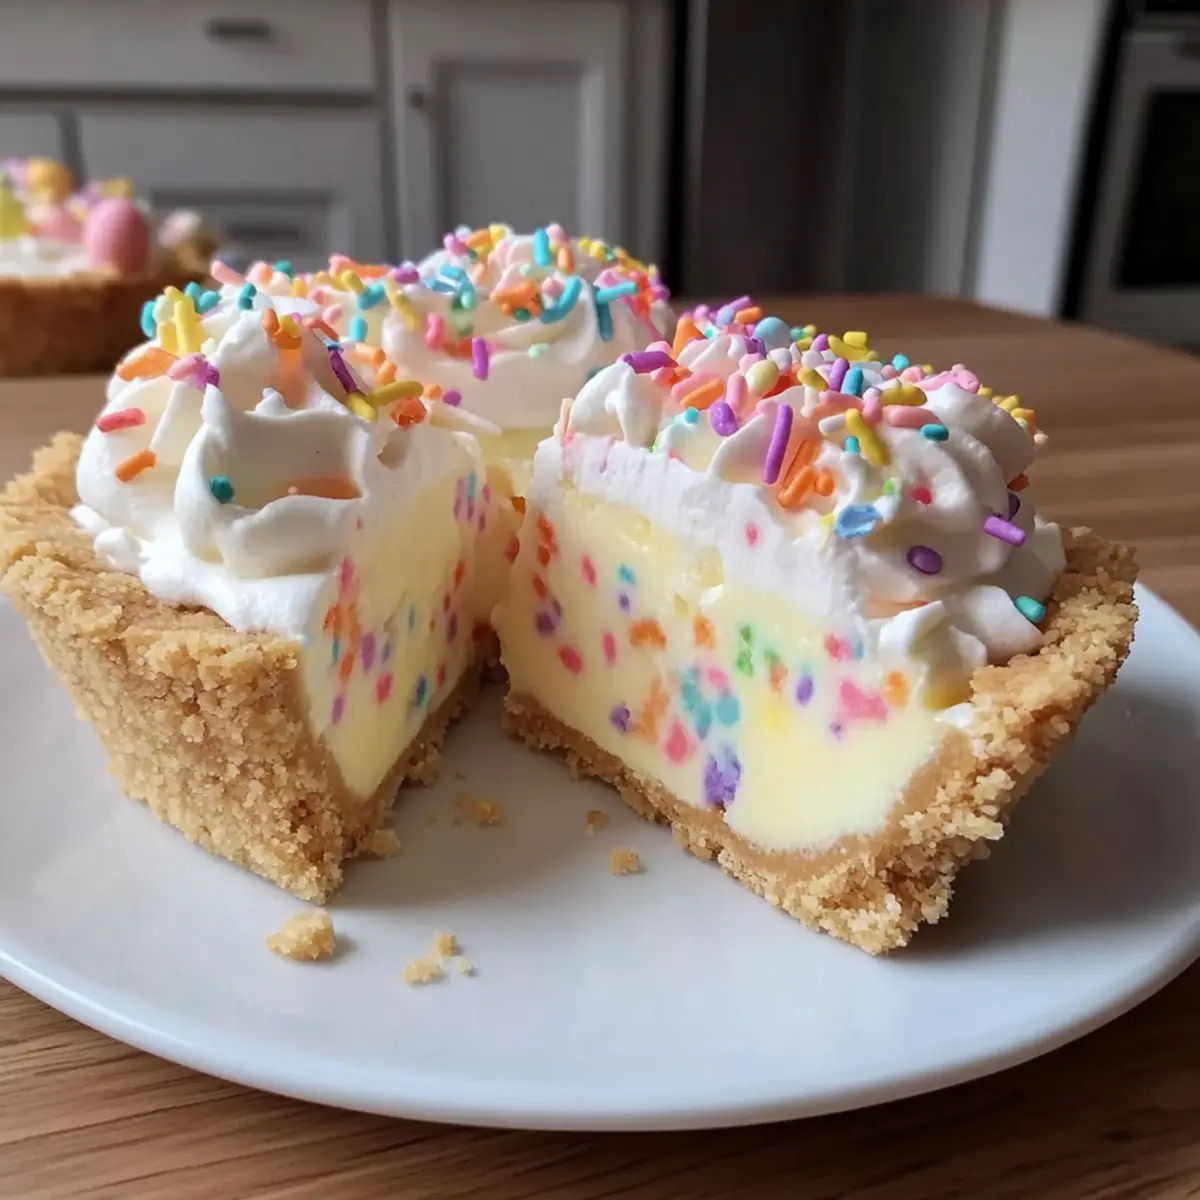
As I pulled open the fridge, a wave of excitement washed over me at the sight of colorful sprinkles waiting to be sprinkled over my latest creation. These No Bake Easter Treats are not just a dessert—they’re a canvas for festive fun, perfect for bringing the family together during this joyous holiday. With minimal effort and just a few ingredients, you can whip up these creamy delights that are as easy to prepare as they are delightful to eat. Imagine a rich filling nestled in a sweet graham cracker crust, chilled until just right—this is the perfect treat for keeping the Easter spirit alive. Not only do they offer a delicious break from the oven, but they’re also kid-friendly and sure to leave smiles all around. Want to know how to make them? Let’s dive into this delightful recipe that will impress your loved ones without any of the fuss!
Why Are These Treats So Amazing?
Effortless Preparation: These No Bake Easter Treats come together in a breeze, requiring no baking skills whatsoever—just mix and chill!
Kid-Friendly Fun: With colorful decorations, they invite little hands to help, making them perfect for family bonding during the holidays.
Delightfully Creamy: The rich, creamy filling with a graham cracker crust is a textural delight that feels indulgent yet light.
Versatile Flavor Profile: Customize it by adding unique extracts or toppings like mini chocolate eggs, allowing for endless variations that keep things exciting.
Crowd Pleaser: They are always a hit at gatherings, leaving everyone asking for seconds. Pair them with fresh berries for an extra burst of flavor!
Time-Saving Treat: Ready in no time, these treats can be made up to 48 hours in advance, giving you more time to enjoy the festivities—just like my Baked Tuscan Chicken or Garlic Butter Bake.
No Bake Easter Treats Ingredients
For the Crust
- Graham Cracker Crumbs – Provides a sweet and crunchy base; substitute with cookie or cracker crumbs if desired.
- Melted Butter – Binds the crust ingredients together; use coconut oil for a dairy-free option.
For the Filling
- Softened Cream Cheese – Adds creaminess to the filling; ensure it’s fully softened to avoid lumps.
- Whipped Topping – Contributes to the fluffiness of the filling; if unavailable, substitute with whipped cream (whipped to soft peaks).
- Pure Vanilla Extract – Enhances flavor; use almond extract for a change in flavor profile.
- Granulated Sugar – Sweetens the filling; can be replaced with a sugar substitute if desired.
- Powdered Sugar – Smooths out the texture of the filling; not easily replaced but can be omitted for a less sweet filling.
For Decoration
- Easter Sprinkles – For decoration; use colorful edible glitter for a festive touch.
- Food Coloring – Optional for creating pastel colors; gel food coloring is recommended for brighter shades.
Step‑by‑Step Instructions for No Bake Easter Treats
Step 1: Prepare the Crust
In a mixing bowl, combine graham cracker crumbs, melted butter, and a touch of powdered sugar. Use a fork to mix until the crumbs are well-coated and slightly crumbly. Press the mixture evenly into the bottom of a 9-inch pie plate, creating a firm crust that holds together. Aim for a smooth surface, and refrigerate the crust for about 15 minutes to set while you prepare the filling.
Step 2: Make the Filling
In a large bowl, beat the softened cream cheese using an electric mixer until it’s completely smooth and creamy, about 2 minutes. Gradually add in the granulated sugar and vanilla extract, continuing to mix until fully incorporated. Gently fold in the whipped topping with a spatula to keep the filling light and airy, mixing until well blended and fluffy, resembling a creamy cloud.
Step 3: Assemble the Treats
Once the filling is ready, carefully spread it over the chilled graham cracker crust using a spatula. For a pop of color, you can add a few drops of food coloring and swirl it into the filling, creating a pastel effect. Finally, sprinkle the festive Easter sprinkles generously over the top, pressing them gently to adhere to the filling for a delightful presentation.
Step 4: Chill
Cover the assembled No Bake Easter Treats with plastic wrap and place them in the refrigerator. Ideally, allow them to chill for at least 1 hour, although 2 hours is recommended for the filling to firm up perfectly. This waiting time will enhance the flavors and ensure that the treats maintain their shape when you slice into them.
Step 5: Serve and Enjoy
Once chilled and set, slice the No Bake Easter Treats into squares or wedges with a sharp knife. Serve them chilled, ideally alongside fresh berries for an added burst of flavor. These treats are perfect for sharing at holiday gatherings, ensuring every bite is as delightful as it looks with their colorful toppings.
How to Store and Freeze No Bake Easter Treats
Fridge: Store leftover No Bake Easter Treats in an airtight container in the refrigerator for up to 3 days. This keeps them fresh and prevents them from drying out.
Make-Ahead: You can prepare these treats up to 48 hours in advance. Just cover them well with plastic wrap or foil to maintain their flavor and texture.
Freezer: If you want to keep them longer, freeze the No Bake Easter Treats for up to 2 months. Slice them into squares, place them in a single layer on a baking sheet, then transfer to a freezer-safe container.
Thawing: To enjoy frozen treats, simply transfer them to the fridge to thaw overnight. Serve chilled for the best taste and texture!
Expert Tips for No Bake Easter Treats
-
Room Temperature Cheese: Ensure your cream cheese is at room temperature for easy blending, preventing lumps and achieving a creamy filling.
-
Gentle Folding: When adding whipped topping, gently fold it into the cream cheese mixture to keep the texture light and airy—overmixing can deflate it.
-
Press Firmly: Press the crust mixture firmly into the pie plate to maintain its shape when sliced. A well-pressed crust is key for stable servings.
-
Chill Time Matters: For best results, chill the No Bake Easter Treats for at least 2 hours. This allows the filling to set perfectly, making slicing easier.
-
Taste Test: Always taste your filling before spreading it on the crust. Adjust sweetness with extra sugar or vanilla for a flavor that’s just right for you!
What to Serve with No Bake Easter Treats
These delightful bites are the perfect centerpiece to elevate your holiday table—let’s explore some companion dishes that enhance their charm.
-
Fresh Berries: A vibrant medley of strawberries, blueberries, and raspberries adds a burst of freshness and tartness, making each bite even more indulgent.
-
Vanilla Ice Cream: Creamy, rich ice cream complements the sweet filling, inviting a combination of textures that’s irresistible with every scoop.
-
Chocolate Sauce: Drizzling warm chocolate sauce adds an indulgent touch, creating a delightful contrast to the cool, creamy treats while satisfying chocolate cravings.
-
Mint Leaves: A few fresh mint leaves can brighten up your dessert, providing a refreshing contrast to the sweetness and adding a lovely aroma.
-
Lemon Sorbet: This light and tangy sorbet cuts through the creaminess, cleansing the palate and providing a refreshing finish to your festive meal.
-
Sparkling Lemonade: A glass of bubbly, refreshing lemonade stirs excitement, offering a bright and cheerful complement that keeps the celebration lively.
Pair these suggestions thoughtfully, and you’ll create an effortless feast that everyone remembers fondly!
No Bake Easter Treats Variations
Feel free to get creative with your No Bake Easter Treats—each twist offers a new adventure in flavor and fun that will delight everyone!
- Dairy-Free: Substitute whipped topping with coconut whipped cream for a delightful, creamy alternative. The subtle coconut flavor adds a tropical twist.
- Flavored Creations: Enhance the filling with lemon or almond extract instead of vanilla for a refreshing flavor change that sings springtime.
- Nutty Crunch: Top your treats with crushed nuts or granola for an unexpected texture boost. It adds a satisfying crunch and richness!
- Decadent Chocolate: Incorporate cocoa powder into the filling or drizzle chocolate ganache on top for a tantalizing chocolate layer. Chocolate lovers will be in heaven!
- Candy Wonderland: Garnish with mini chocolate eggs or seasonal candies for an extra festive touch. This is a great way to get kids involved in the decorating!
- Fruity Flavor: Mix in small pieces of fresh fruit like strawberries or raspberries into the filling for bursts of freshness. This elevates both flavor and presentation.
- Shortcake Magic: Serve alongside fresh berry compote to create a delightful shortcake experience. The sweet and tart combination is irresistibly refreshing.
- Colorful Background: Instead of a plain crust, use crushed cookies or flavored crackers to swap flavors in the crust base, opening up a world of taste possibilities.
Explore more delightful recipes like Baked Fish Sticks or whip up an easy Garlic Butter Bake as you indulge your kitchen creativity!
Make Ahead Options
These No Bake Easter Treats are perfect for busy home cooks looking to save time during the holiday rush! You can prepare the crust and filling up to 48 hours in advance. Simply make the crust and press it into the pie plate, then make the filling and spread it over the crust. Cover your treats tightly with plastic wrap and refrigerate to maintain their freshness. When ready to serve, simply slice and garnish with the festive Easter sprinkles, ensuring they are vibrant and ready to impress. With this make-ahead option, you can enjoy delightful, creamy treats without the last-minute rush, keeping the spirit of the holiday alive!
No Bake Easter Treats Recipe FAQs
What type of graham cracker crumbs should I use?
You can use any brand of graham cracker crumbs, but I recommend using plain ones for the best flavor. If you don’t have graham crackers, feel free to substitute with cookie or cracker crumbs like digestive biscuits for a different texture.
How should I store leftover No Bake Easter Treats?
Leftover treats can be stored in an airtight container in the refrigerator for up to 3 days. This way, they stay fresh and retain their creamy texture. Just make sure to cover them well to prevent any drying out!
Can I freeze No Bake Easter Treats?
Absolutely! To freeze, slice the treats into squares, place them in a single layer on a baking sheet to freeze individually, then transfer them to a freezer-safe container. They can be frozen for up to 2 months. When you’re ready to enjoy, simply thaw them in the fridge overnight.
What can I do if my filling is too thick?
If your filling turns out too thick, it may be a result of under-beating the cream cheese. If this happens, you can add a tablespoon of milk or heavy cream to the mixture and beat it again until it reaches your desired consistency. This should help lighten the filling and make it creamier.
Are there any dietary considerations for this recipe?
Yes! For those with dairy allergies, consider using lactose-free cream cheese and whipped topping. You can also substitute melted coconut oil for butter if you need a dairy-free option. If serving at gatherings, it’s always best to ask about allergies to ensure everyone can enjoy these treats!
How can I customize my No Bake Easter Treats?
The possibilities are endless! You can use different flavor extracts such as lemon or almond to change up the filling. For toppings, crushed nuts or mini chocolate eggs add great texture, while colorful edible glitter can enhance the festive look. Get creative and make these treats your own!
No Bake Easter Treats: Fun and Festive for Everyone
Ingredients
Equipment
Method
- In a mixing bowl, combine graham cracker crumbs, melted butter, and powdered sugar. Press the mixture evenly into a 9-inch pie plate, refrigerate for 15 minutes.
- Beat the softened cream cheese until smooth. Gradually add in sugar and vanilla, then fold in whipped topping until well blended.
- Spread the filling over the chilled crust. Add food coloring if desired and swirl into the filling. Sprinkle with Easter sprinkles.
- Cover with plastic wrap and chill for at least 1 hour, ideally 2 hours, to enhance flavors.
- Slice into squares or wedges, serve chilled, ideally with fresh berries.
Leave a Reply