
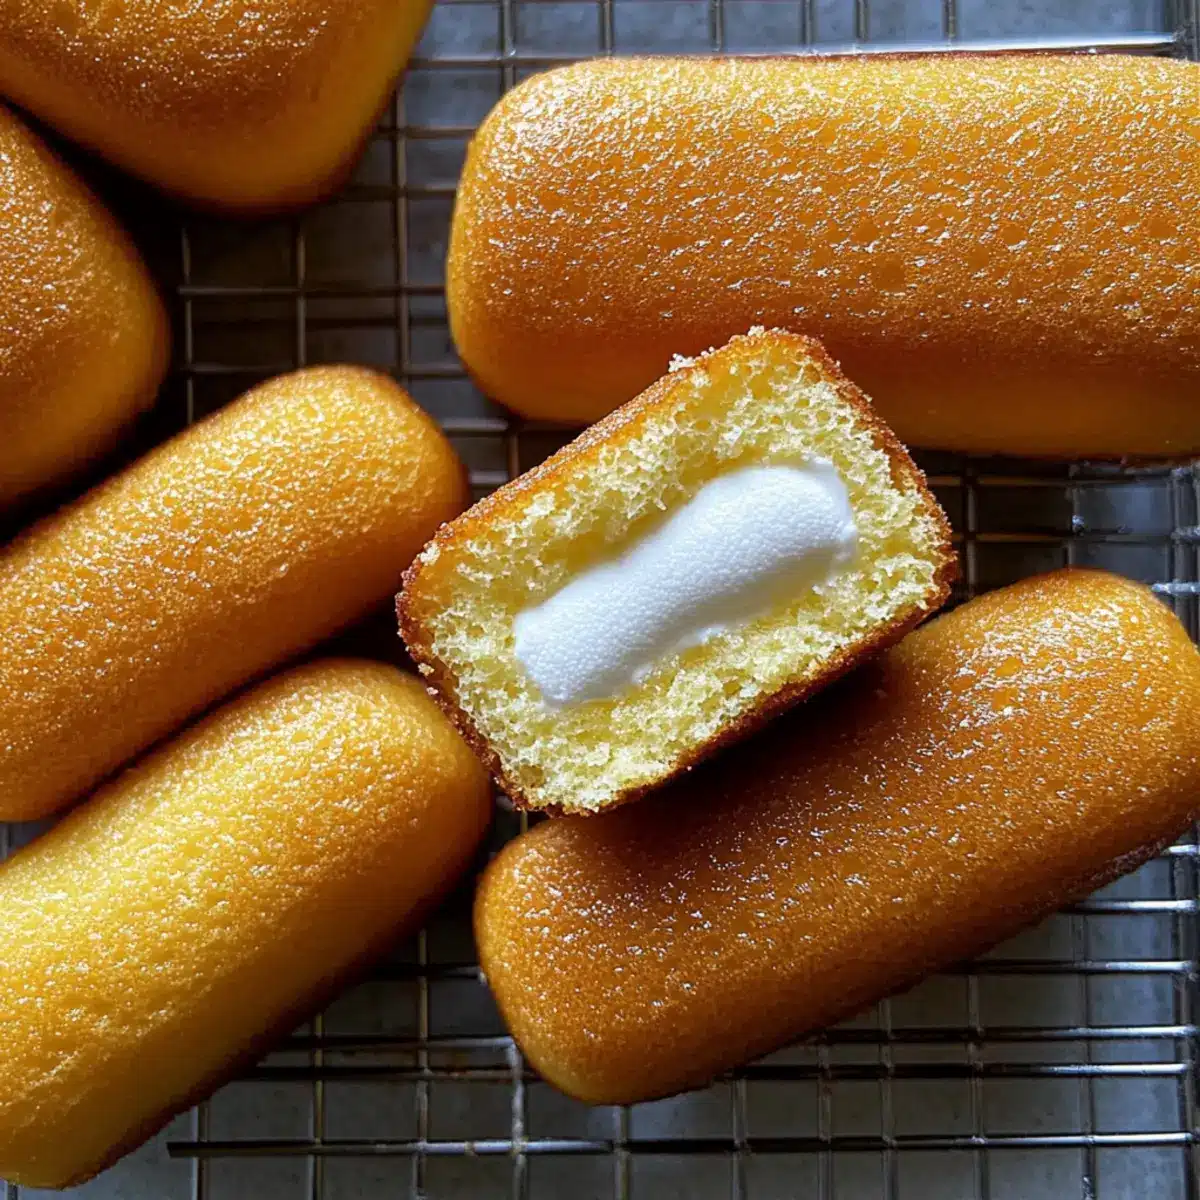
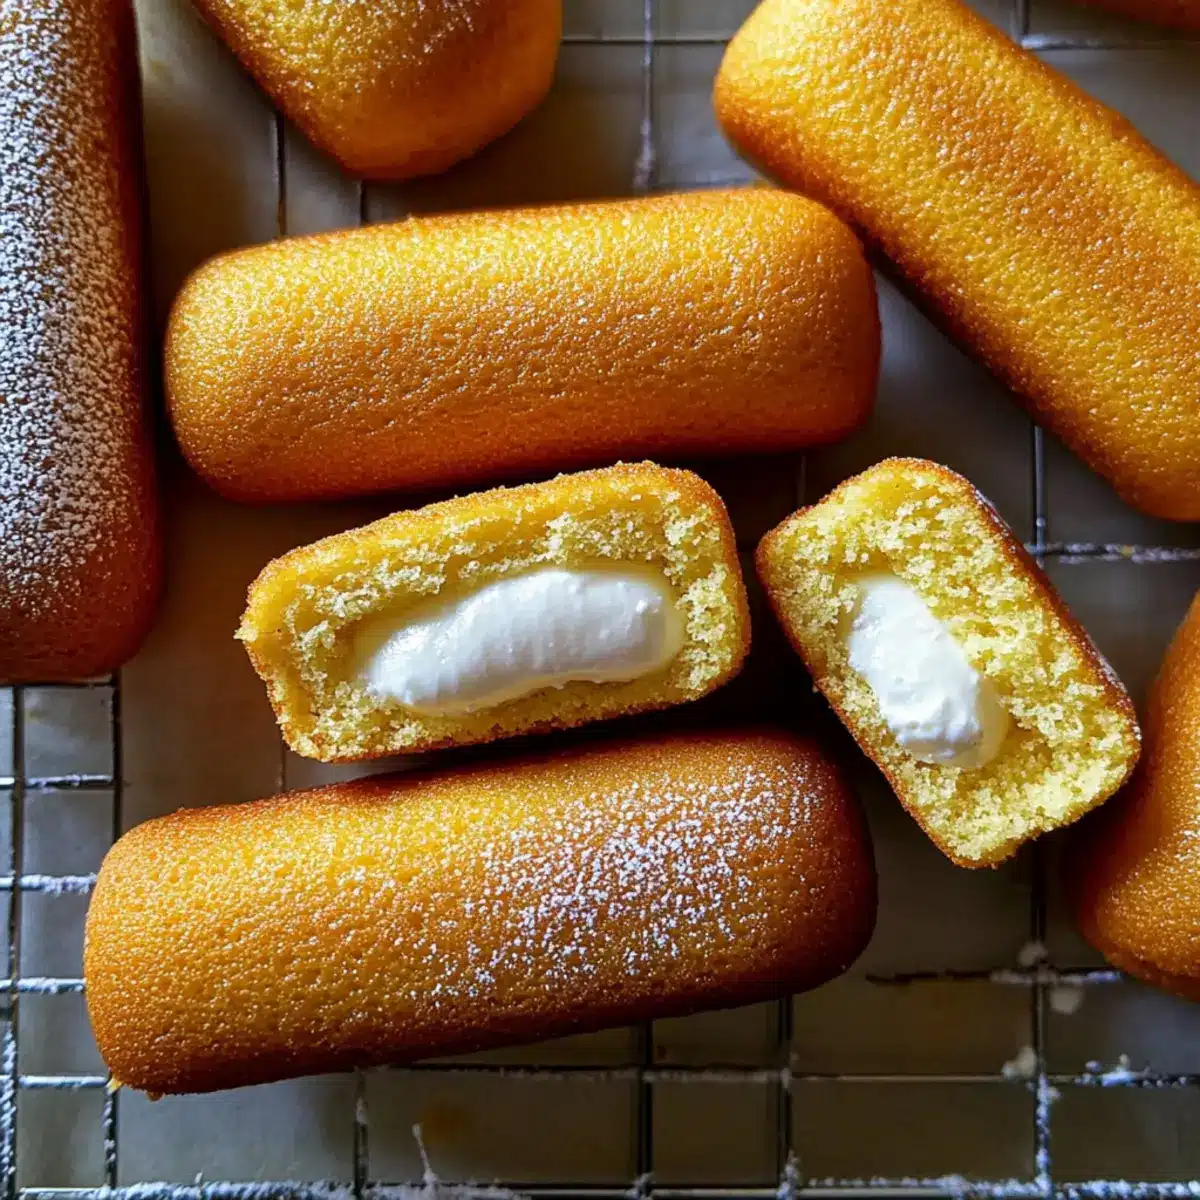
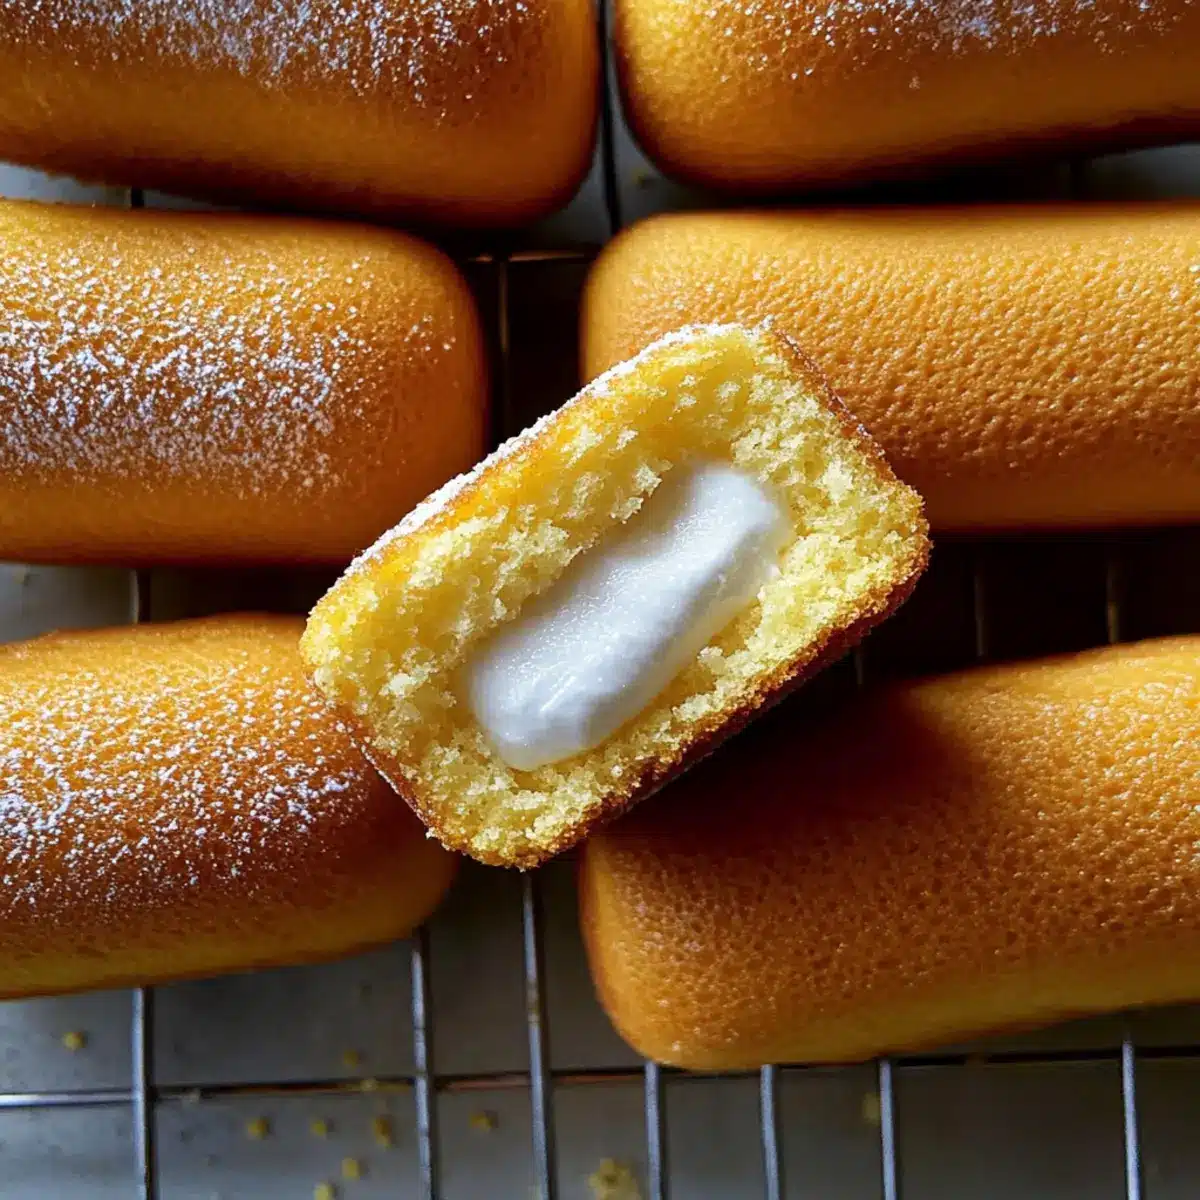
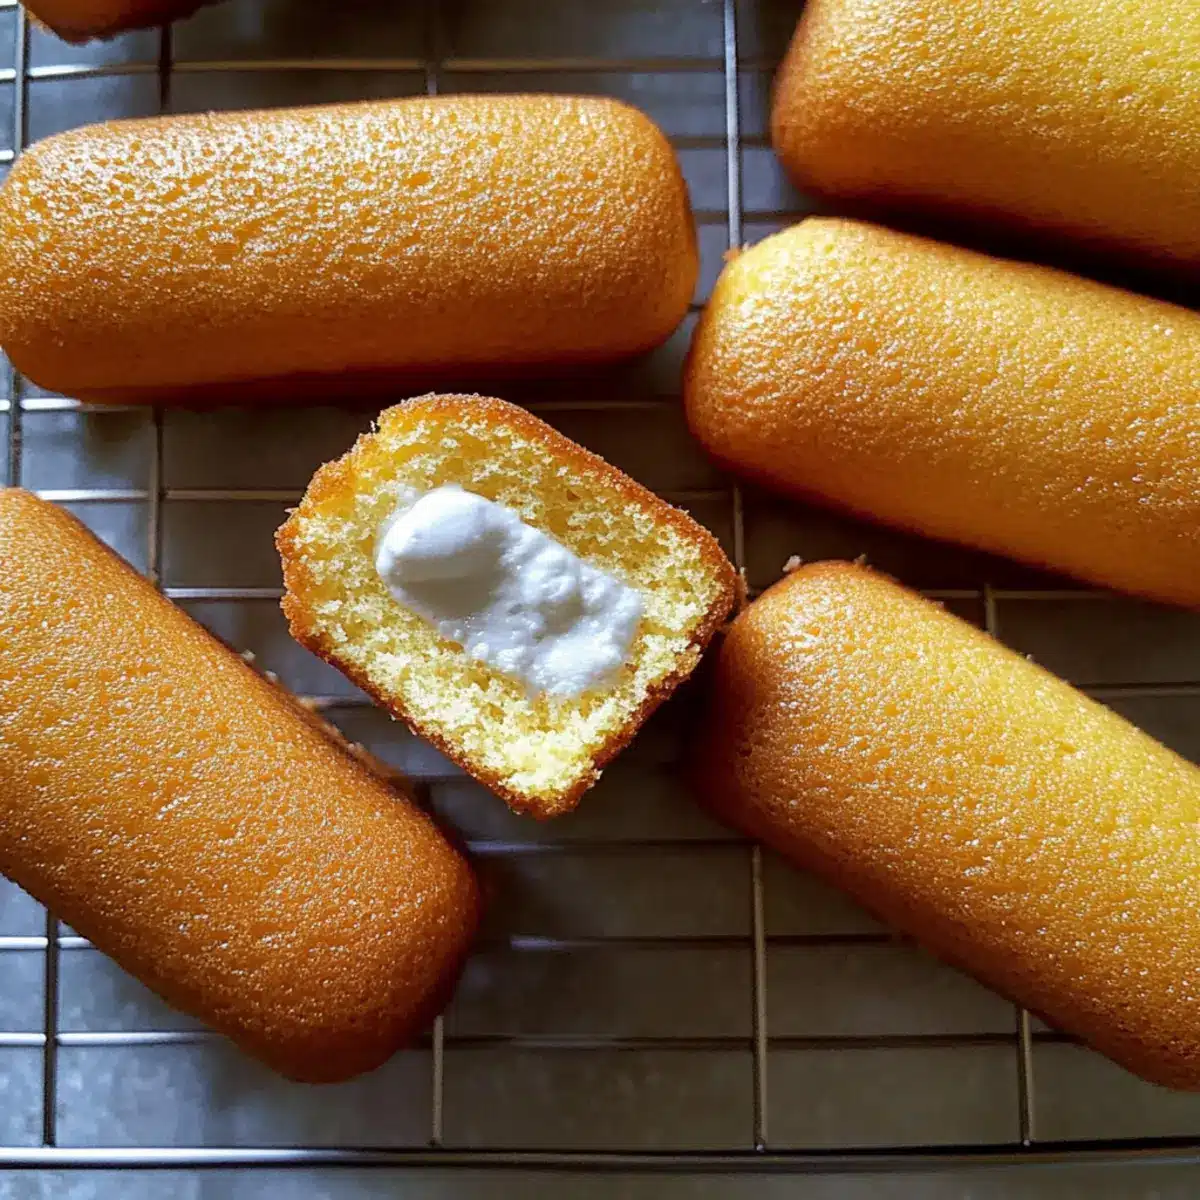
As I pulled the golden sponge cakes from the oven, a wave of nostalgia washed over me, transporting me straight back to my childhood kitchen. There’s something magical about homemade Twinkies, with their soft, airy texture and sweet marshmallow crème that instantly brings a smile. What’s even better? For this recipe, we’re using wholesome ingredients, leaving behind artificial flavors and preservatives often found in store-bought versions. Not only are these Homemade Twinkies a delightful treat perfect for parties or a cozy afternoon snack, but they also offer a fun twist—you can customize the filling to suit your tastes! So, are you ready to indulge in some nostalgic baking? Let’s get started!
Why Make Homemade Twinkies?
Pure Nostalgia: These homemade Twinkies offer a delightful trip down memory lane, reminding you of carefree childhood days spent indulging in sweet treats.
Wholesome Ingredients: Crafted without artificial flavors or preservatives, you can feel good about what you’re serving.
Customizable Delight: With options to tweak the filling, like adding chocolate chips or zest, you can concoct a flavor that suits any palate.
Easy Prep: The straightforward process makes it a fun activity for bakers of any skill level, allowing you to whip up a batch in no time.
Perfect for Sharing: Whether it’s for a party, bake sale, or cozy afternoon snack, these treats are sure to spark joy and conversation. Enjoy them alongside our Healthy Homemade Butterfingers for an unforgettable dessert spread!
Homemade Twinkies Ingredients
• Delight in the magic of homemade treats!
For the Sponge Cake
• All-Purpose Flour – Provides structure to the sponge cake. Note: Can substitute with gluten-free flour for a gluten-free option.
• Baking Powder – Helps the cake rise, ensuring a fluffy texture. Note: Keep an eye on expiration for best results.
• Salt – Balances sweetness and enhances flavor.
• Large Eggs (4) – Adds moisture and structure; use at room temperature for best air incorporation when beaten.
• Granulated Sugar (2/3 cup) – Sweetens the cake and contributes to its texture.
• Vanilla Extract (1/2 teaspoon) – Adds a classic aromatic flavor. Note: Substitute with almond extract for a different flavor profile.
• Milk (2 tablespoons, warm) – Moistens the batter. Note: Whole or almond milk can be used as substitutes.
• Unsalted Butter (1 tablespoon, melted) – Imparts richness; can use coconut oil as a dairy-free alternative.
For the Filling
• Unsalted Butter (1/2 cup, softened) – Creates a creamy filling texture.
• Marshmallow Crème (1/2 cup) – Key component for the iconic filling’s sweetness and texture.
• Powdered Sugar (1 cup) – Sweetens and thickens the filling.
• Vanilla Extract (1 teaspoon, for filling) – Enhances the flavor of the filling.
• Heavy Cream (1 tablespoon) – Adds a smooth texture to the filling.
With these wholesome ingredients, your homemade Twinkies will not only taste fantastic but also bring back the delightful nostalgia of your childhood!
Step‑by‑Step Instructions for Homemade Twinkies
Step 1: Preheat and Prep Pans
Begin by preheating your oven to 350°F (175°C). While the oven warms, generously grease your Twinkie or mini loaf pan with butter or non-stick spray. This will ensure easy release of your delightful homemade Twinkies once baked. Set the pan aside and let’s move on to mixing the dry ingredients.
Step 2: Prepare the Dry Ingredients
In a medium bowl, sift together 1 cup of all-purpose flour, 1 teaspoon of baking powder, and 1/4 teaspoon of salt. Sifting is crucial as it aerates the flour, contributing to the lightness of your sponge cake. Set this dry mixture aside while we tackle the wet ingredients to elevate our homemade Twinkies to bakery perfection.
Step 3: Beat the Eggs and Sugar
In a large mixing bowl, combine 4 large eggs and 2/3 cup of granulated sugar. Using an electric mixer, beat on medium-high speed for about 6-8 minutes until the mixture thickens and turns a pale, fluffy color. This step is vital, as incorporating air will give your Twinkies that light, airy texture we all love.
Step 4: Incorporate Vanilla and Dry Mixture
Gently fold in 1/2 teaspoon of vanilla extract into the egg-sugar mixture, ensuring it’s evenly distributed. Next, gradually add the sifted dry ingredients to the bowl. Use a spatula to carefully combine them, avoiding overmixing which would deflate the batter that’s crucial for our homemade Twinkies’ airy lift.
Step 5: Add Wet Ingredients
Next, it’s time to enrich the batter. Gently fold in 2 tablespoons of warm milk and 1 tablespoon of melted unsalted butter until just combined. The warm milk helps to keep the batter moist, while the melted butter contributes to the tender texture. Carefully incorporate this mixture to maintain the volume of your batter.
Step 6: Fill and Bake
Divide the batter among the prepared molds, filling each about 3/4 full to allow for rising. Bake in your preheated oven for 12-15 minutes, or until the edges turn golden and a toothpick inserted into the center comes out clean. Your kitchen will soon smell like a nostalgic bakery delight!
Step 7: Cool Completely
Once baked, remove the Twinkies from the oven and let them cool in the pan for about 5 minutes. Then, gently transfer them to a wire rack to cool completely. This ensures that your homemade Twinkies are set and ready to fill, preventing the crème from melting in a warm sponge.
Step 8: Prepare the Filling
As the cakes cool, whip up your filling. In a mixing bowl, beat 1/2 cup of softened unsalted butter until fluffy, then mix in 1/2 cup of marshmallow crème, 1 cup of powdered sugar, 1 teaspoon of vanilla extract, and 1 tablespoon of heavy cream. Continue whipping until the mixture is smooth and creamy, which will make for a delightful filling.
Step 9: Fill the Cakes
Once your homemade Twinkies are completely cool, poke three holes in the bottom of each cake using a toothpick or a skewer. Fill a piping bag with the marshmallow filling and carefully pipe it into the cakes through the holes. With each bite, you will experience the perfect balance of light sponge and sweet cream!
Make Ahead Options
These homemade Twinkies are perfect for meal prep enthusiasts! You can bake the sponge cakes up to 3 days in advance; simply cool them completely and store them in an airtight container in the refrigerator to maintain their fluffy texture. The filling can also be prepared 24 hours ahead—just keep it covered in the fridge until you’re ready to fill your Twinkies. To finish, poke holes in the cooled cakes and pipe in the creamy marshmallow filling right before serving to keep the crème fresh and delightful. By prepping ahead, you can enjoy these nostalgic treats with minimal effort on busy weeknights!
How to Store and Freeze Homemade Twinkies
Room Temperature: Homemade Twinkies can be stored at room temperature for up to 2 days in an airtight container to maintain their softness.
Fridge: For longer freshness, keep the Twinkies in the fridge for up to 5 days. Ensure they’re in an airtight container to prevent them from drying out.
Freezer: If you’d like to keep your treats for an extended period, freeze the Twinkies for up to 3 months. Wrap each individually in plastic wrap, then place them in a freezer-safe bag or container.
Reheating: To enjoy your frozen Twinkies, simply thaw them in the fridge overnight. For a warm treat, microwave for 10-15 seconds to restore some of that fresh-baked goodness before serving.
What to Serve with Homemade Twinkies?
Prepare to create a charming spread that pairs beautifully with your nostalgic treat, adding delightful variety to your dessert table.
-
Fresh Berries: A medley of vibrant berries like strawberries and raspberries adds a refreshing contrast to the sweetness of Twinkies. Their natural tartness complements the marshmallow filling perfectly.
-
Rich Chocolate Sauce: Drizzle warm chocolate sauce over your Twinkies for an indulgent touch. The silky chocolate envelops the sponge, bringing each bite to a new level of decadence.
-
Vanilla Ice Cream: Serve with a scoop of vanilla ice cream for a delightful contrast in temperature and texture. The creaminess of the ice cream pairs wonderfully with the soft sponge cake.
-
Coffee or Espresso: A warm cup of coffee or rich espresso enhances the flavors of your homemade Twinkies, balancing their sweetness while providing a cozy vibe.
-
Chocolate-Dipped Strawberries: These elegant treats offer a sweet and fruity offset to your Twinkies, enticing your taste buds with every bite. They’re also visually appealing on any dessert platter.
-
Sweetened Whipped Cream: A dollop of freshly whipped cream adds a light, airy touch to your plate. It balances the denser texture of the Twinkies and provides a lovely creamy complement.
-
Lemonade or Iced Tea: For beverages, a glass of refreshing lemonade or iced tea offers a zesty contrast to the sweetness of the dessert, ensuring your taste buds stay delighted and refreshed.
Expert Tips for Homemade Twinkies
-
Room Temperature Eggs: Make sure your eggs are at room temperature. This helps achieve maximum volume when beating, resulting in a lighter sponge for your homemade Twinkies.
-
Gentle Folding: When incorporating the dry ingredients into the wet, be gentle. Overmixing can deflate your batter, leading to denser cakes instead of the airy texture we love.
-
Cool Completely: Let your sponge cakes cool completely before filling. If they’re warm, the marshmallow filling can melt, resulting in a gooey mess rather than the delightful creaminess you desire.
-
Use Silicone Molds: Consider using silicone molds for baking. They provide uniformity and make it easy to release your baked goods without sticking.
-
Precision in Filling: A piping bag makes all the difference! Use one to fill your homemade Twinkies accurately, keeping the marshmallow crème right where it should be for a perfectly balanced treat.
Homemade Twinkies Variations & Substitutions
Feel free to give your homemade Twinkies a personal touch, making each bite uniquely delightful and satisfying!
-
Gluten-Free Flour: Substitute regular flour with a 1:1 gluten-free blend for a deliciously light alternative.
-
Dairy-Free Option: Use almond or coconut milk instead of regular milk and replace butter with coconut oil for dairy-free treats.
-
Flavorful Extracts: Swap out vanilla extract for almond, orange, or lemon for a refreshing twist on the classic flavor profile.
-
Filled with Fruit: Incorporate fresh fruit puree like raspberry or strawberry into the filling for a fruity, zingy surprise that brightens each bite.
-
Choco-Lovers Delight: Mix in mini chocolate chips or fold in cocoa powder into the batter to create a chocolatey version of your favorite treat.
-
Holiday Spirit: For seasonal flair, switch up the filling by adding festive spices like cinnamon or nutmeg, perfect for cozy gatherings.
-
Creamy Chocolate Ganache: For a decadent upgrade, drizzle or dip your Twinkies in chocolate ganache to add a rich, chocolatey finish.
-
Citrus Zest: Add grated orange or lemon zest to the filling for a burst of refreshing flavor that beautifully complements the sweetness.
For more delightful treats to share, consider our Winter Vegetable Quiche or whip up a batch of comforting Homemade Butter Chicken. Happy baking!
Homemade Twinkies Recipe FAQs
How do I know if my eggs are fresh for the Homemade Twinkies?
To check the freshness of your eggs, fill a bowl with water and gently place the eggs in it. Fresh eggs will sink and lay flat on the bottom. If they stand upright or float, it’s best to discard them as they’re past their prime.
What’s the best way to store my Homemade Twinkies?
Store your Homemade Twinkies in an airtight container at room temperature for up to 2 days. For longer freshness, keep them in the refrigerator for up to 5 days. Make sure the container is sealed properly to avoid drying out.
Can I freeze Homemade Twinkies? How?
Absolutely! To freeze your Homemade Twinkies, wrap each one individually in plastic wrap and then place them in a freezer-safe bag or container. They can last up to 3 months in the freezer. When you’re ready to enjoy, thaw them in the fridge overnight or microwave for 10-15 seconds for a quick warm treat!
What should I do if my Homemade Twinkies turned out dense?
If your Twinkies are denser than expected, it’s often due to overmixing the batter, which deflates the air incorporated during the egg-beating stage. Always fold in the dry ingredients gently! Ensure the eggs are at room temperature for a fluffier texture, too.
Is there a way to make these Twinkies gluten-free?
Yes! You can substitute the all-purpose flour with a gluten-free flour blend. Make sure to choose a 1:1 blend specifically designed for baking for optimal results. Just keep an eye on the baking time, as gluten-free flours can behave differently.
Can I use alternative ingredients for dietary restrictions?
Certainly! For a dairy-free option, replace the butter with coconut oil and use almond milk in place of regular milk. If you have egg allergies, you can try using a flax or chia seed mixture as a binding agent—mix 1 tablespoon of ground flaxseed or chia seeds with 2.5 tablespoons of water and let it sit for about 5 minutes to form a gel-like consistency.
Homemade Twinkies: Wholesome Retro Treats From Your Kitchen
Ingredients
Equipment
Method
- Preheat your oven to 350°F (175°C) and grease your Twinkie or mini loaf pan with butter or non-stick spray.
- In a medium bowl, sift together 1 cup of all-purpose flour, 1 teaspoon of baking powder, and 1/4 teaspoon of salt. Set aside.
- Combine 4 large eggs and 2/3 cup of granulated sugar in a large mixing bowl. Beat on medium-high speed for about 6-8 minutes until pale and fluffy.
- Fold in 1/2 teaspoon of vanilla extract, then gradually add the sifted dry ingredients and combine carefully.
- Gently fold in 2 tablespoons of warm milk and 1 tablespoon of melted unsalted butter until just combined.
- Divide the batter among the prepared molds, filling each about 3/4 full, and bake for 12-15 minutes until golden.
- Let the Twinkies cool in the pan for about 5 minutes, then transfer to a wire rack to cool completely.
- Prepare the filling by beating 1/2 cup of softened unsalted butter until fluffy, then mix in remaining filling ingredients until smooth.
- Poke three holes in the bottom of each cake, then use a piping bag to fill them with the marshmallow filling.
Leave a Reply