
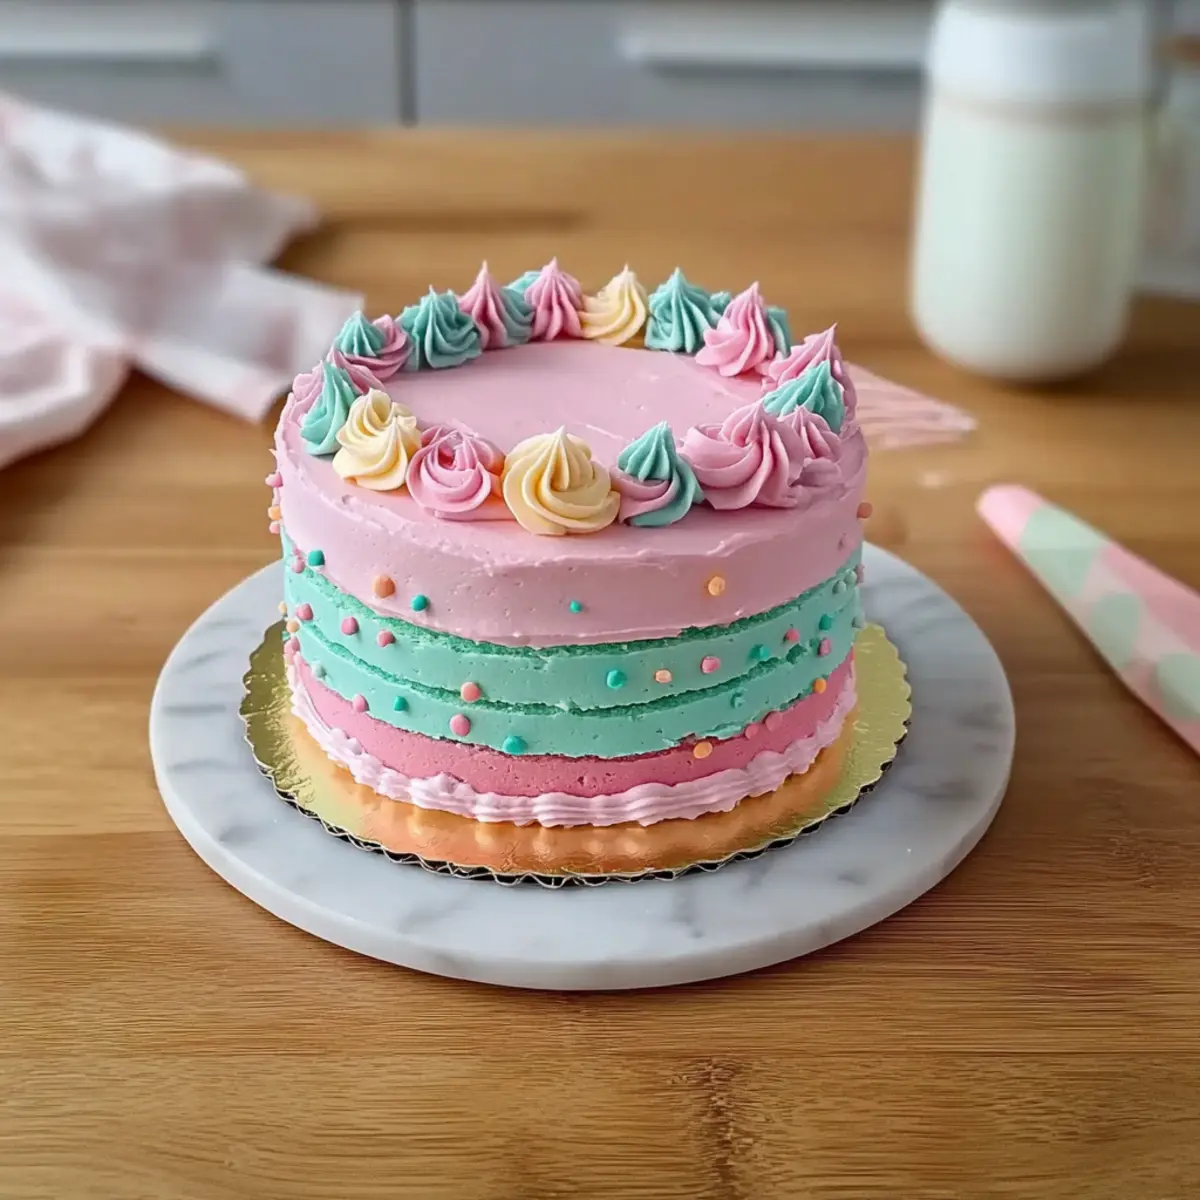
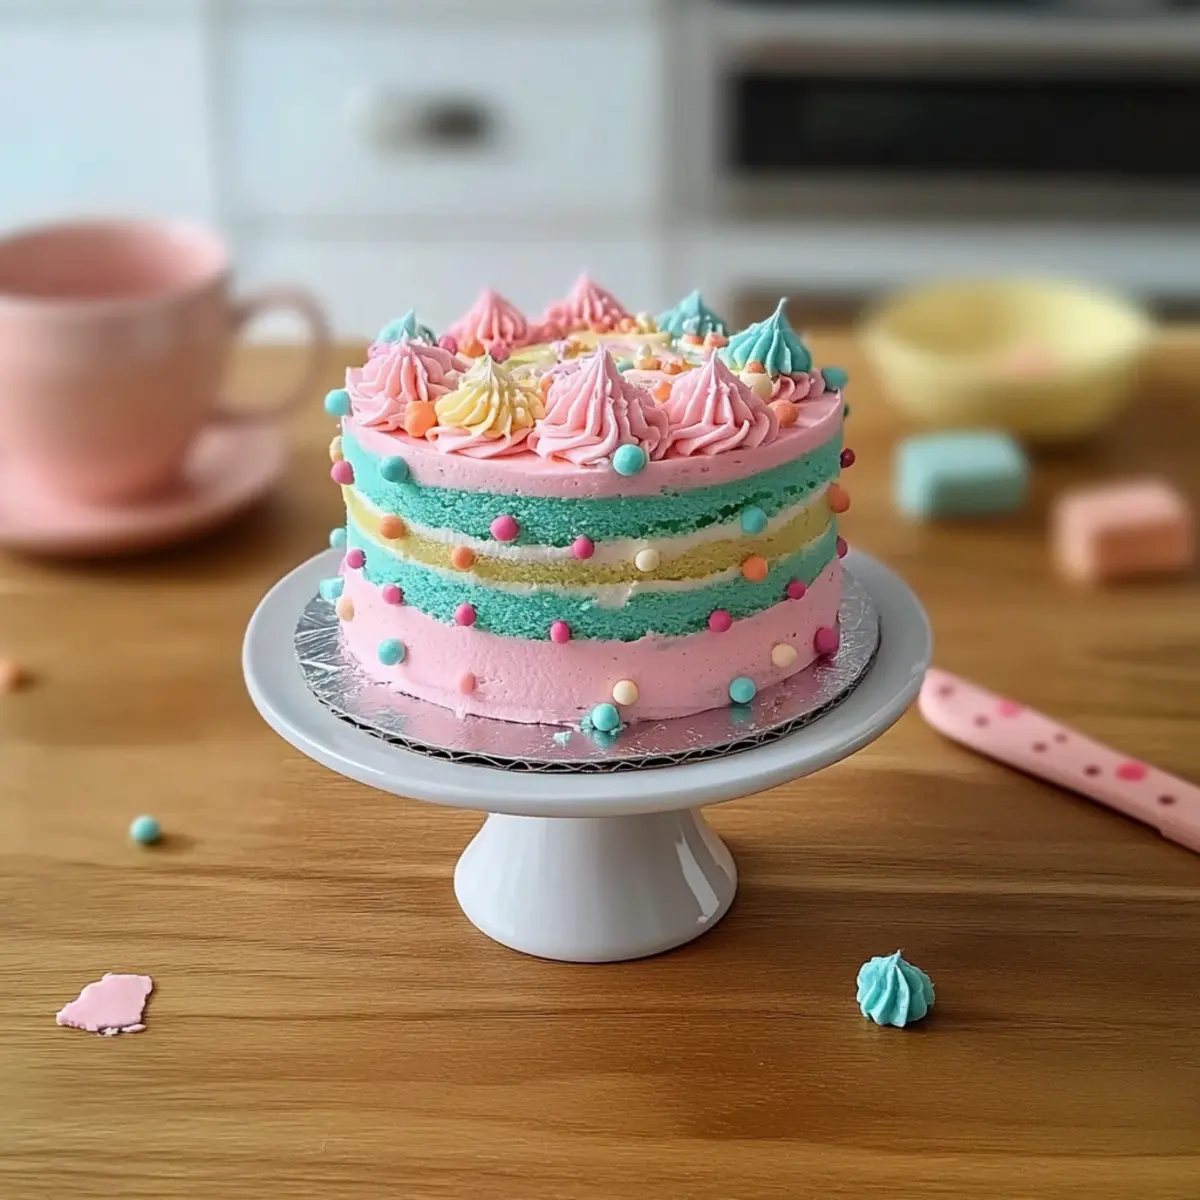
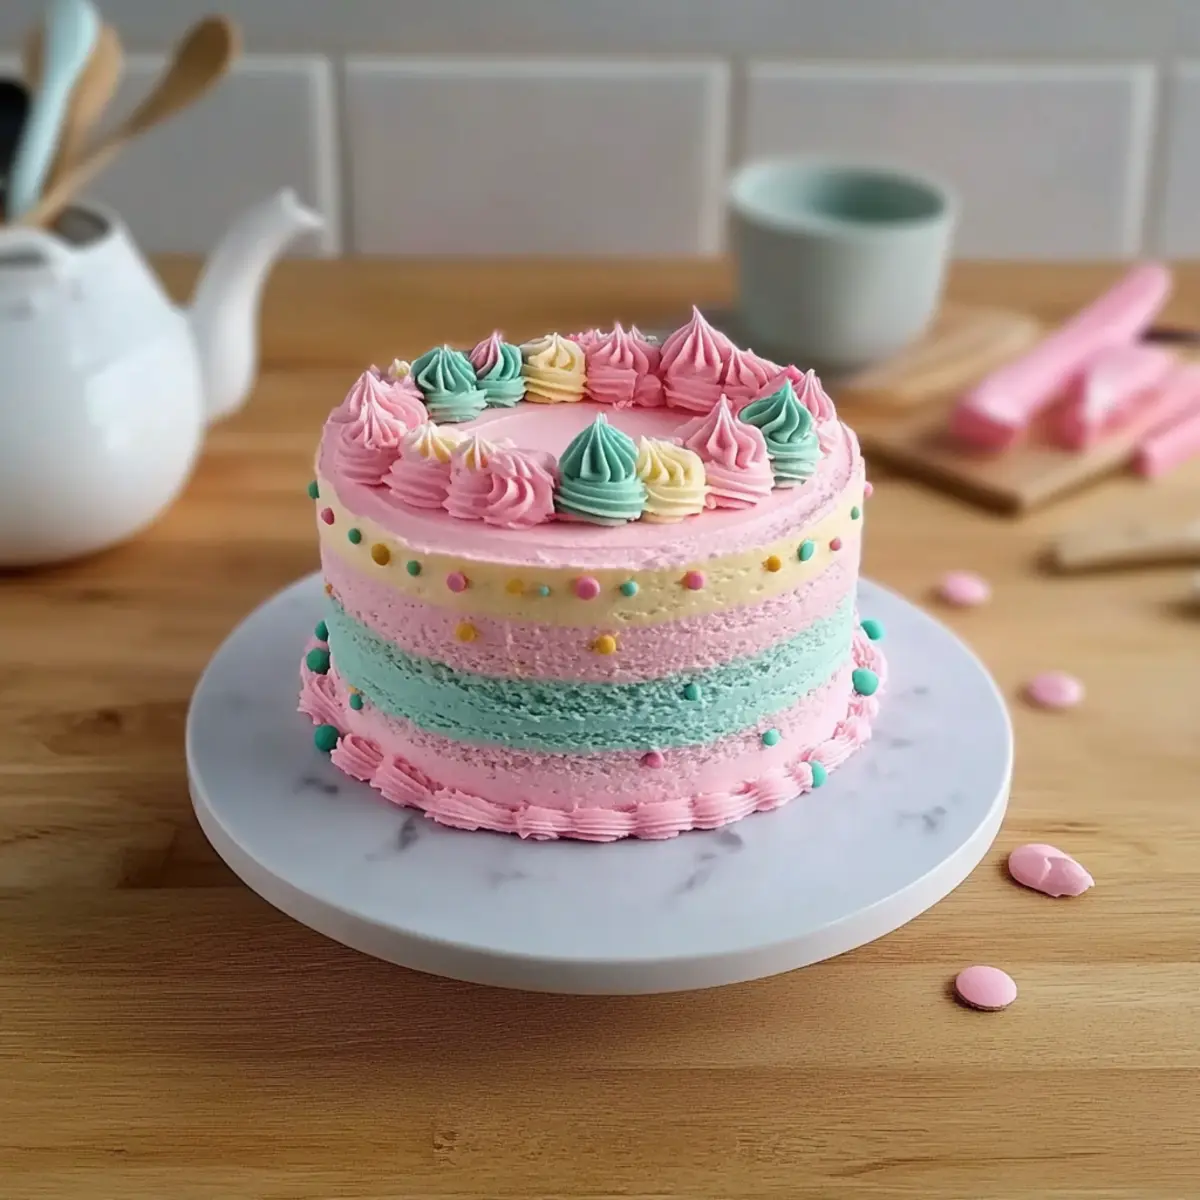
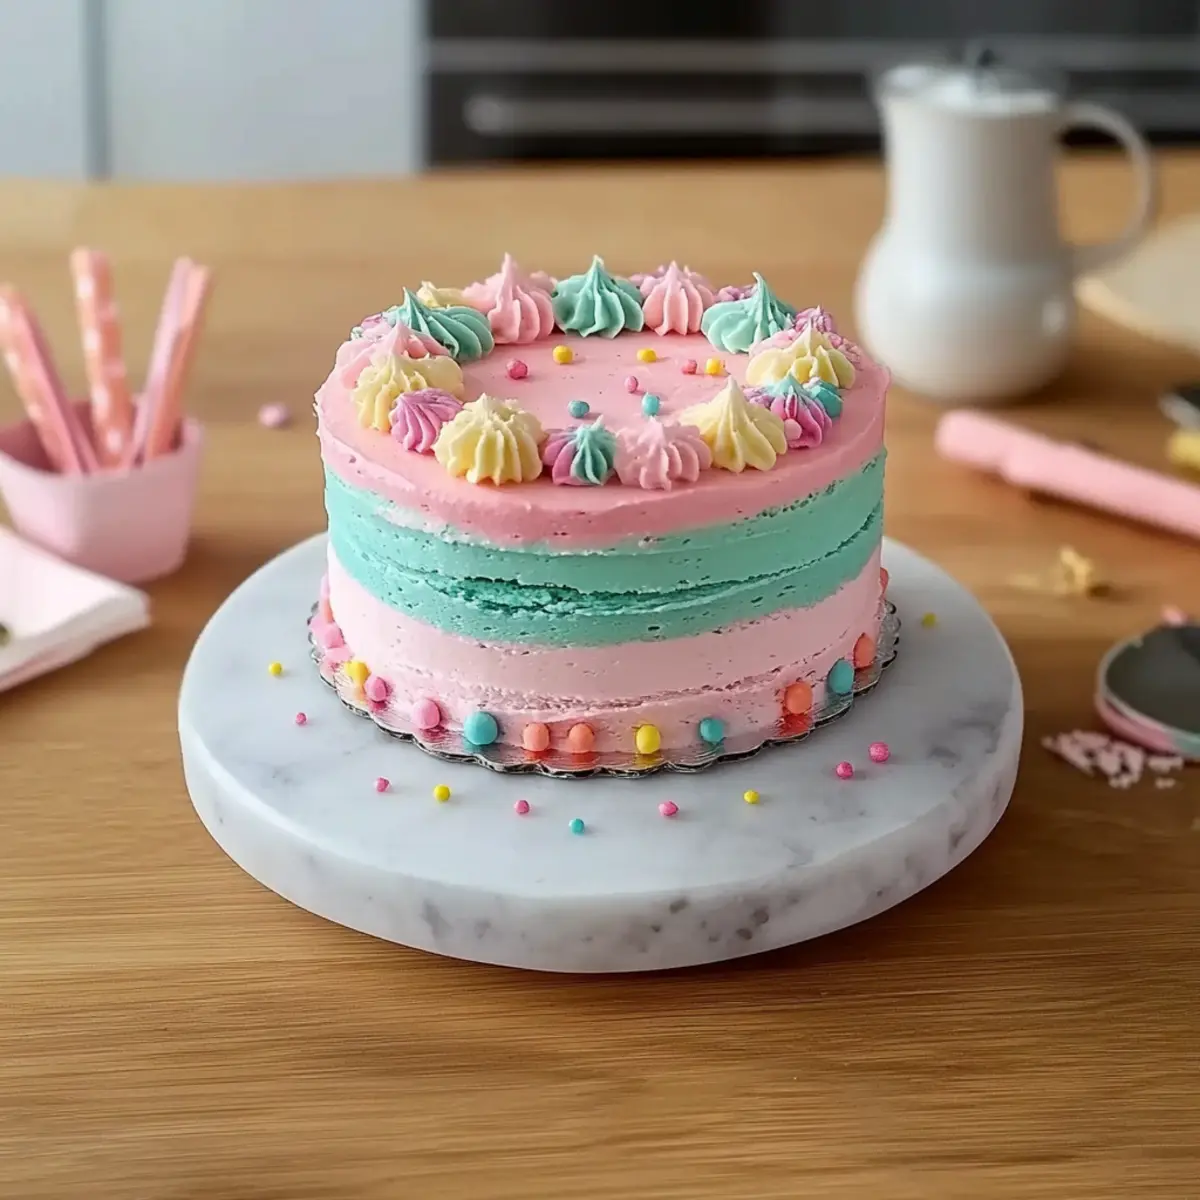
As I rummaged through my pantry the other day, a sudden craving for something sweet hit me—but not just any dessert. It needed to be a personal masterpiece, perfectly portioned and visually delightful. Enter the bento cake! These enchanting 4-inch mini cakes are not only a breeze to whip up but also drastically cut down your baking time—30% faster than traditional layer cakes! Whether you’re celebrating a birthday or simply indulging on a quiet night in, bento cake ideas bring out your inner artist while letting you customize flavors to suit any palate. With a touch of creativity, these mini treats can wow your guests and make you feel like a pro, all while ensuring you’re not drowning in leftovers. Ready to dive into the world of adorable bento cakes? Let’s uncover the magic!
Why Customize Your Bento Cake?
Personalized Creativity: Each bento cake is a canvas waiting for your touch. Tailor the flavors and decorations to reflect your personality or the occasion!
Perfect Portions: The 4-inch size is just right—no leftovers and no guilt. Each bite delivers sweetness without overwhelming.
Quick to Make: With 30% less baking time compared to traditional cakes, you can craft these beauties even on busy days.
Vegan-Friendly Options: Swap in vegan ingredients for a delightful treat that accommodates everyone, perfect for gatherings or special diets.
Showstopper Appeal: Adorned with vibrant colors and themes, these cakes are sure to impress at any celebration!
Whether you’re aiming for a rich chocolate experience or a light lemon delight, bento cakes offer endless possibilities, much like the delicious Zucchini Bundt Cake you might want to try next!
Bento Cake Ideas
-
For the Cake Base
• Butter – Provides a rich, moist texture; substitute with plant-based butter for a vegan option.
• Sugar – Sweetens the cake and ensures great structure; no substitutes needed here!
• Egg – Binds the ingredients for structure; use applesauce or a vegan egg replacer for a plant-based version.
• Vanilla Extract – Elevates flavor; stick with pure vanilla for the best taste.
• Flour – Supports the cake structure; all-purpose or gluten-free flour works perfectly.
• Baking Powder – Acts as a leavening agent; essential for a light and airy cake.
• Salt – Balances out the sweetness and enhances flavor; don’t skip it!
• Milk – Adds moisture; swap with your favorite plant-based milk for a dairy-free treat. -
For the Frosting
• Powdered Sugar – Creates a smooth texture for frosting; essential for that classic finish.
• Heavy Cream – Provides a rich, creamy frosting; use non-dairy cream if going vegan.
With these bento cake ideas, you can create delightful mini masterpieces that cater to every taste and occasion!
Step‑by‑Step Instructions for Bento Cake Ideas
Step 1: Prepare the Oven and Pan
Preheat your oven to 350°F (175°C). While the oven warms up, grab a 4-inch cake pan and line it with parchment paper, ensuring it fits snugly to prevent sticking. This preparation is essential for the perfect bento cake, allowing it to bake evenly and release easily once cooled.
Step 2: Cream Butter and Sugar
In a mixing bowl, combine softened butter and sugar, using a hand mixer or stand mixer. Beat them together on medium speed for about 3 minutes until the mixture becomes light and fluffy, resembling a pale cream. This step creates the rich base needed for your delectable bento cake.
Step 3: Combine Wet Ingredients
Add an egg and vanilla extract to your creamed mixture, then mix on low speed until fully combined. This should take about 30 seconds. The moisture from the egg and the flavor from the vanilla will elevate your cake, making it irresistible with every slice.
Step 4: Mix Dry Ingredients
In a separate bowl, whisk together flour, baking powder, and salt until evenly blended. This dry mix is crucial for the structure of your bento cake. Avoid clumping by ensuring your baking powder is fresh and thoroughly incorporated so your cake rises beautifully during baking.
Step 5: Combine Mixtures
Gradually add the dry ingredients to the wet mixture, alternating with milk. Start with a third of the flour mixture, followed by half of the milk, repeating this process until all ingredients are combined. Mix gently until just combined; overmixing can lead to a dense cake that won’t achieve the fluffy texture you desire.
Step 6: Bake
Pour the cake batter into the prepared pan, smoothing the top with a spatula for an even bake. Place it in the preheated oven and bake for 22-25 minutes. Check for doneness by inserting a toothpick; it should come out clean or with a few moist crumbs attached. This ensures your bento cake is perfectly fluffy!
Step 7: Cool the Cake
Once baked, remove the cake from the oven and let it cool in the pan for about 10 minutes. Afterward, carefully invert it onto a wire rack to cool completely. Cooling is important to set the texture, making it easier to slice and frost your bento cake beautifully.
Step 8: Level and Slice
Once the cake has fully cooled, use a serrated knife to level the top gently. With the top even, slice the cake horizontally into 2-3 even layers. This technique allows for a stunning presentation and ensures an indulgent frosting experience with each layer of your bento cake.
Step 9: Make the Frosting
In a clean mixing bowl, beat softened butter until creamy and smooth. Gradually add powdered sugar, vanilla extract, and heavy cream, beating on high until the frosting is light and fluffy—this should take about 3-5 minutes. A well-made frosting is key to enhancing the flavor of your bento cake.
Step 10: Assemble the Cake
Begin layering your bento cake by spreading frosting between each layer you’ve sliced. Apply a thin crumb coat around the outside to lock in crumbs, then refrigerate for 15-20 minutes. This step allows for a perfect base before adding a final layer of smooth frosting that makes your cake truly stunning!
Bento Cake Ideas: Creative Twists
Explore these delightful adaptations to make your bento cakes uniquely yours, satisfying every craving!
- Vegan Option: Swap butter for plant-based butter and use applesauce instead of eggs for a dairy-free, egg-free cake. You won’t lose the deliciousness!
- Gluten-Free: Use a gluten-free flour blend for an equally scrumptious cake that everyone can enjoy. This ensures there’s a slice for every guest.
- Flavor Infusions: Experiment with extracts like lemon or almond for a fun twist on the classic vanilla flavor. Your taste buds will thank you for the exhilarating surprise!
- Fruit-Infused: Fold in pureed fruits like strawberries or mango into the batter for natural sweetness and a pop of color. Each slice will be bursting with flavor!
- Decadent Chocolate: Replace a portion of the flour with cocoa powder for a rich, chocolatey bento cake that will satisfy any chocoholic. Pair it with a light cream cheese frosting for balance.
- Heat Things Up: Add a pinch of cayenne or chili powder to the batter for a spicy kick that complements sweet frostings perfectly. It’s a fun way to surprise your friends!
- Colorful Layers: Use different food colorings for your frosting to create vibrant layers of delight—perfect for themed celebrations like birthdays or holidays. Kids (and adults) can’t resist the charm!
- Frosting Swaps: Replace heavy cream with coconut cream for a tropical flavor in your frosting, giving a unique twist that transforms your bento cake into a mini paradise!
With these bento cake ideas, let your creativity shine! If you’re looking to explore new flavors, try a lovely Coconut Loaf Cake for a different take on sweet treats or indulge in a classic Moist Chocolate Cake for your next baking adventure!
Make Ahead Options
Bento cakes are perfect for meal prep enthusiasts looking to save time! You can prepare the cake layers up to 3 days in advance; just bake, cool, and tightly wrap each layer in plastic wrap before refrigerating. For even better results, consider freezing unwrapped layers for up to 1 month; just let them thaw overnight in the fridge before frosting. The frosting can also be made ahead—store it in an airtight container in the refrigerator for up to 24 hours. When you’re ready to serve, simply layer the cake with the frosting and add any final decorations. This prep strategy ensures your bento cake will be just as delicious while fitting seamlessly into your busy week!
What to Serve with Bento Cake?
Create a delightful sweet spread that complements your bento cake beautifully, transforming your occasion into a memorable feast.
-
Fresh Berries:
Juicy strawberries or blueberries provide a vibrant contrast to the cake’s sweetness, enhancing its presentation and flavor. -
Whipped Coconut Cream:
Light and airy, this dairy-free topping is perfect for adding a creamy texture that plays well with your mini masterpiece. -
Matcha Latte:
The earthy tones in a matcha latte harmonize remarkably with the sweetness of your bento cake, creating a comforting beverage pairing. -
Lemon Zest Cookies:
Zesty and crumbly, these cookies bring a refreshing contrast to the bento cake’s rich flavor, creating a delightful taste experience. -
Sparkling Rose:
A chilled glass of sparkling rosé adds a touch of elegance while its fruity notes beautifully complement the cake’s sweetness. -
Chocolate Ganache:
A drizzle of rich chocolate ganache can elevate your bento cake’s indulgence, adding an extra layer of luxurious flavor. -
Caramel Sauce:
Dollops of warm caramel sauce can create a beautiful presentation and bring an irresistible depth of flavor that pairs beautifully with any cake. -
Cheese Platter:
A selection of creamy cheeses can balance the sweetness and enhance the overall flavor profile of your celebration spread. -
Mini Fruit Tartlets:
These bite-sized desserts add a splash of color and freshness, making for a fun contrast alongside your charming bento cake. -
Tea Sparkler:
A refreshing tea sparkler blends a hint of fruitiness with effervescence, cleansing the palate between delectable bites of your sweet creation.
Storage Tips for Bento Cake
-
Room Temperature: Store uncovered for up to 1 day; once cooled, ensure each layer is airtight to maintain moisture and prevent spoilage.
-
Fridge: Keep leftover bento cake wrapped in plastic wrap or in an airtight container for up to 3 days. This will help retain its moist tenderness.
-
Freezer: For longer storage, freeze the decorated bento cake for up to 2 months. Wrap it tightly in plastic wrap and aluminum foil to prevent freezer burn.
-
Reheating: If desired, thaw frozen bento cake in the fridge overnight before serving. For a warm touch, microwave in short intervals—10-15 seconds—checking frequently.
Expert Tips for Bento Cake
-
Room Temperature Ingredients: Ensure all ingredients are at room temperature for optimal mixing; this helps achieve a light and airy bento cake.
-
Don’t Overmix: To maintain the cake’s tender texture, mix the batter only until combined. Overmixing can lead to a dense result.
-
Stabilize Layers: For more stability in your cake decoration, consider baking two separate 4-inch cakes instead of one thick layer.
-
Proper Cooling: Allow the cake to cool completely on a wire rack before leveling and slicing; this makes frosting much easier and prevents it from melting.
-
Frosting Techniques: For smooth frosting, apply a thin crumb coat before the final layer. This trick keeps unsightly crumbs from showing through your beautiful bento cake.
-
Storage Tip: Keep any uneaten cake in an airtight container in the refrigerator for up to 3 days to preserve freshness.
Bento Cake Recipe FAQs
What is the best way to select ripe ingredients for a bento cake?
Absolutely! For the best results, choose fresh, high-quality ingredients. Look for butter that is slightly softened but not overly melted, eggs that are free from cracks, and vanilla extract that is pure. If using milk, opt for fresh dairy or plant-based substitutes. Check your flour for any lumps or moisture—it should be light and airy.
How should I store leftover bento cake, and how long does it last?
For optimal freshness, wrap uneaten bento cake tightly in plastic wrap or place it in an airtight container and refrigerate. This way, it will stay moist for about 3 days. You can also store it at room temperature for one day—just make sure it’s covered to prevent drying out!
Can I freeze bento cake, and how does that process work?
Yes, freezing your bento cake is a great option for long-term storage! First, ensure the cake is completely cooled. Wrap it tightly in plastic wrap, followed by aluminum foil to prevent freezer burn. You can freeze it for up to 2 months. When you’re ready to enjoy it, simply thaw it in the fridge overnight before serving.
What should I do if my bento cake doesn’t rise properly?
Very! If your cake doesn’t rise as expected, there could be a couple of culprits. Check that your baking powder is fresh—if it’s expired, it won’t provide the lift your cake needs. Also, make sure you didn’t overmix the batter; gentle folding is key to keeping it light and airy. If you follow the steps carefully next time, you should achieve perfect results.
Are there any dietary considerations for bento cakes?
Absolutely! If you’re accommodating dietary restrictions, you can easily make your bento cake vegan-friendly. Substitute eggs with applesauce or a commercial egg replacer, and use plant-based butter and milk. For those with gluten sensitivities, choose a gluten-free flour blend to ensure everyone can enjoy these delightful mini cakes.
What’s the best way to decorate my bento cake?
The more the merrier! Start with a smooth crumb coat to lock in those pesky crumbs, refrigerate for 15-20 minutes, then apply a thicker layer of frosting. You can customize the decorations with colorful sprinkles, edible flowers, or even fruit slices for a festive touch! Let your creativity shine, and have fun with it!
Bento Cake Ideas: Adorable Mini Cakes You Can Customize!
Ingredients
Equipment
Method
- Preheat your oven to 350°F (175°C) and line a 4-inch cake pan with parchment paper.
- Cream together softened butter and sugar until light and fluffy.
- Blend in an egg and vanilla extract until fully combined.
- In a separate bowl, whisk together flour, baking powder, and salt.
- Gradually combine dry ingredients with wet mixture, alternating with milk.
- Pour batter into prepared pan and bake for 22-25 minutes until done.
- Cool the cake in the pan for 10 minutes, then transfer to a wire rack.
- Use a serrated knife to level the top and slice the cake into layers.
- Beat together ingredients for frosting until light and fluffy.
- Layer cake with frosting between layers and apply a crumb coat.
Leave a Reply