
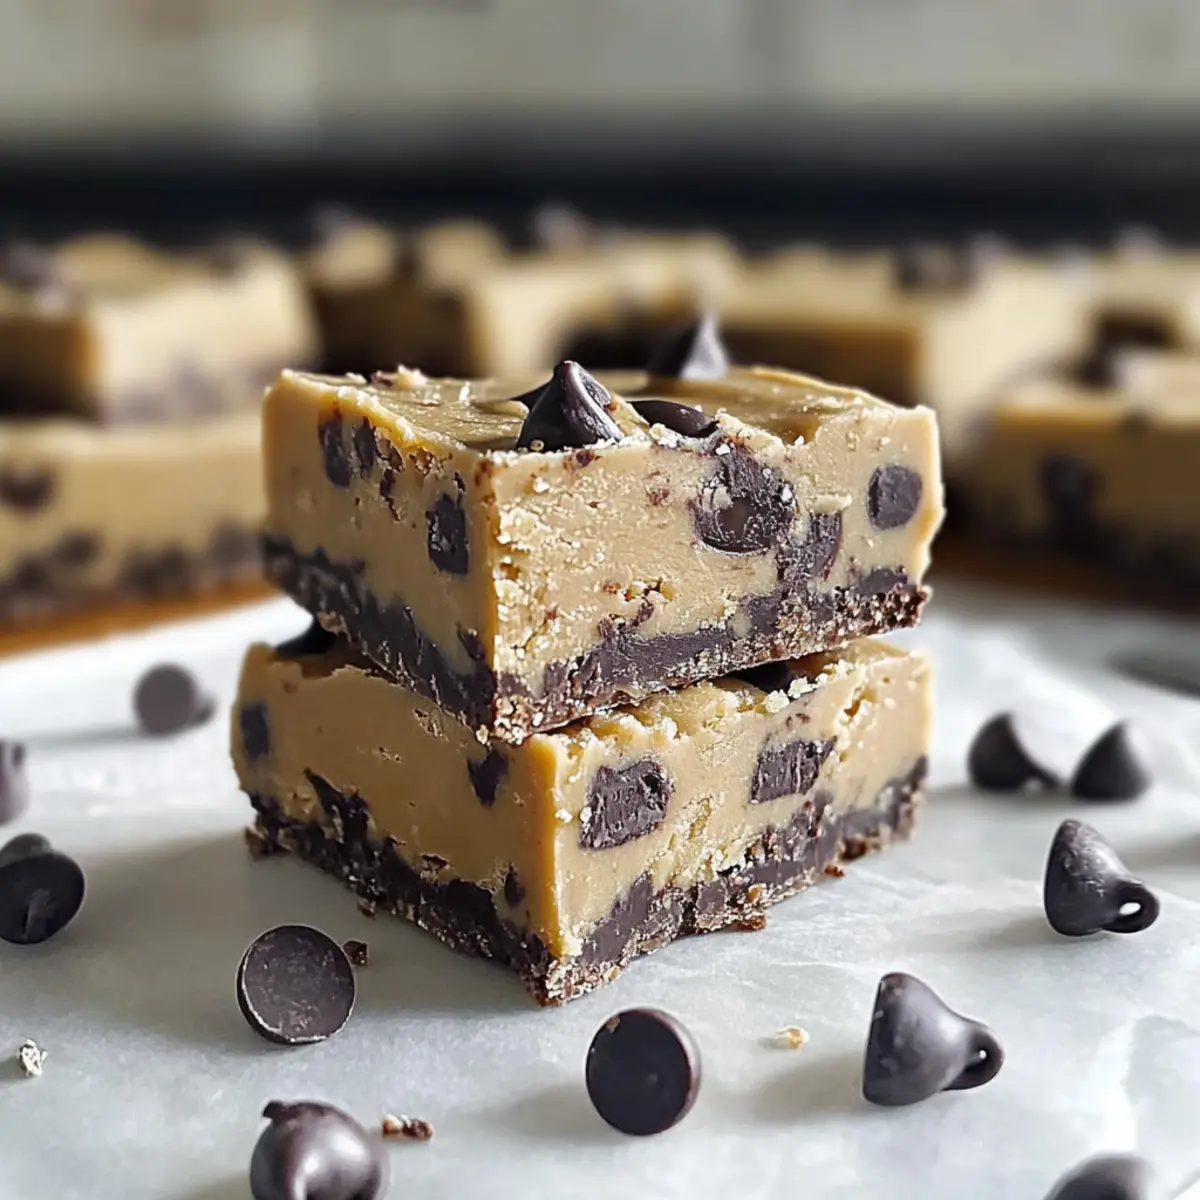
There I was, scrolling through my old recipe box, when I stumbled upon a forgotten gem: No Bake Cookie Dough Bars. Instantly, I was transported back to carefree afternoons in the kitchen, stirring up something sweet with friends. These bars are a delightful blend of melt-in-your-mouth chocolate chips and a rich, chewy texture—all without needing to turn on the oven! What’s even better? They’re quick to whip up and absolutely customizable, making them the perfect solution for busy weeknights or spontaneous gatherings. Plus, they’re kid-friendly, so you can get the whole family involved in creating your own unique flavors. Curious about the secret to making these no bake wonders? Let’s dive into the delicious details!
Why Are These Bars So Irresistible?
Quick and Easy: This recipe requires minimal prep time, allowing you to whip up a tasty treat in under 30 minutes! Kid-Friendly Fun: Perfect for involving the little ones, they’ll love mixing and creating their own flavors. Endless Variations: Whether you crave chocolate, butterscotch, or a sprinkle surprise, you can customize with every batch. No Oven Needed: Enjoy the convenience of no-bake goodness, perfect for hot days or last-minute gatherings. Guilt-Free Indulgence: With heat-treated flour, these bars bring all the fun of cookie dough without the worry. You might also enjoy our No Bake Peanut Butter Energy Bites for another delicious twist!
No Bake Cookie Dough Bars Ingredients
For the Base
- All-Purpose Flour – Heat-treated to ensure safety; essential for that cookie dough feel.
- Brown Sugar – Provides sweetness and moisture; substitute with coconut sugar for a healthier option.
- Granulated Sugar – Adds extra sweetness and texture to the bars.
- Unsalted Butter – Adds richness and helps bind the mixture; can be substituted with coconut oil for a dairy-free treat.
For Flavoring
- Vanilla Extract – Enhances the overall flavor; a must-have for that classic cookie dough taste.
- Chocolate Chips – Adds delightful sweetness and texture; feel free to swap for nuts or dried fruits for a twist.
For Binding and Moisture
- Milk – Provides moisture and helps bind everything together; you can use any type of milk or even a plant-based alternative!
These No Bake Cookie Dough Bars can be customized to suit your family’s taste, making them a delightful treat for any occasion!
Step‑by‑Step Instructions for No Bake Cookie Dough Bars
Step 1: Prepare the Flour
Begin by heat-treating your all-purpose flour to ensure it’s safe for consumption. Spread the flour on a baking sheet and bake it at 350°F (175°C) for about 5-7 minutes, or microwave it in 30-second intervals, stirring in between, until it reaches 160°F (70°C). Allow the flour to cool slightly before using it in the no bake cookie dough bars recipe.
Step 2: Cream the Butters and Sugars
In a large mixing bowl, cream together ½ cup of softened unsalted butter, ¾ cup of brown sugar, and ¼ cup of granulated sugar. Use an electric mixer on medium speed for about 2-3 minutes until the mixture is light and fluffy. The texture should be smooth, indicating that the sugars are well incorporated into the butter, setting a delicious base for your cookie dough bars.
Step 3: Mix in the Liquids
Add 1 teaspoon of vanilla extract and 2 tablespoons of milk to the creamed mixture. Continue to mix on low speed until everything is well combined and forms a smooth, creamy consistency. The addition of these liquid ingredients enhances the flavor and moisture of the no bake cookie dough bars while ensuring a delightful texture that’s easy to blend.
Step 4: Incorporate the Flour
Gradually stir in the heat-treated flour using a spatula or wooden spoon, mixing until fully integrated. Be gentle to avoid overworking the dough, as it should result in a thick, cookie dough-like consistency. Once the flour is well combined, fold in ¾ cup of chocolate chips, ensuring they are evenly distributed throughout the mixture.
Step 5: Transfer to Baking Dish
Line an 8×8-inch baking dish with parchment paper for easy removal. Pour the cookie dough mixture into the dish, and using a spatula, press it down firmly and evenly into the corners. The top should be smooth, creating an attractive base for your no bake cookie dough bars, which will set nicely once chilled.
Step 6: Chill to Set
Place the baking dish in the refrigerator and let the mixture chill for at least 1-2 hours. This chilling time helps the no bake cookie dough bars firm up, making them easier to cut into perfect squares. You’ll know they’re ready when they feel firm to the touch but still have that soft, chewy texture.
Step 7: Slice and Serve
Once set, remove the bars from the baking dish using the edges of the parchment paper. Transfer to a cutting board and slice into squares or rectangles with a sharp knife for clean edges. Serve these delightful no bake cookie dough bars cold from the fridge or at room temperature for a rich, homemade treat everyone will love.
How to Store and Freeze No Bake Cookie Dough Bars
Fridge: Keep your no bake cookie dough bars in an airtight container in the refrigerator for up to 1 week. This preserves their freshness while making them an easy grab-and-go treat.
Freezer: For longer storage, freeze the bars by wrapping them tightly in plastic wrap followed by aluminum foil. They can last in the freezer for up to 3 months—great for meal prep!
Thawing: When ready to enjoy, simply remove from the freezer and let them sit at room temperature for about 15-30 minutes before serving. They’ll be just as delicious as when you first made them!
Reheating: While these bars are best enjoyed cold or at room temperature, if you prefer them slightly softened, microwave for 10-15 seconds—just enough to warm them without melting.
What to Serve with No Bake Cookie Dough Bars
Indulging in rich, chewy treats is even sweeter when you pair them with delightful sides or accompaniments!
-
Creamy Ice Cream: A scoop of vanilla or chocolate ice cream creates a heavenly contrast to the soft, chewy bars. The cold creaminess complements the sweet flavors beautifully.
-
Fresh Berries: Bright, juicy strawberries or raspberries add a refreshing touch to your dessert plate. Their tartness balances the sweetness of the cookie dough bars, offering a vibrant burst of flavor.
-
Homemade Whipped Cream: Light and fluffy whipped cream enhances the richness of the cookie dough. Dollop it generously on top for an extra indulgent experience that feels luxurious!
-
Chocolate Drizzle: Drizzle some melted chocolate over the bars for an elegant finish. The added chocolate takes these no bake cookie dough bars to a whole new level of decadence.
-
Nutty Granola: Crunchy granola provides a satisfying texture and flavor contrast. Throw in some nuts for a pop of protein, making it a fun pairing that adds a delightful crunch.
-
Milk or Dairy Alternatives: A glass of cold milk, whether dairy or plant-based, is the classic accompaniment that almost everyone loves. It helps wash down the sweetness while adding a creamy texture.
-
Coffee or Espresso: A warm cup of coffee or a shot of espresso pairs perfectly with the sweet intensity of cookie dough. The rich flavors of coffee enhance the chocolate chips, making for an aromatic experience.
These pairings elevate the experience of enjoying No Bake Cookie Dough Bars, making each bite even more memorable!
No Bake Cookie Dough Bars Variations
Feel free to get creative with these delicious no bake cookie dough bars—they’re the perfect canvas for your favorite flavors!
-
Chocolate Chip Switch: Substitute standard chocolate chips with butterscotch or white chocolate chips for a new taste twist.
Add a sweeter touch that complements the rich dough while giving a beautiful color contrast too! -
Nutty Delight: Mix in chopped nuts like walnuts or pecans for a satisfying crunch.
The added texture and healthy fats not only enhance flavor but also create a delightful surprise in every bite. -
Dried Fruit Fusion: Replace some chocolate chips with your favorite dried fruits, such as cranberries or cherries.
This adds a chewy, tangy element that balances the sweetness beautifully, making each bar a new experience! -
Peanut Butter Swirl: Create a marble effect by swirling in creamy or crunchy peanut butter before chilling.
This indulgent twist can be a hit for all peanut butter lovers and adds a rich meaning to the classic flavors! -
Plant-Based Treat: Make the bars vegan by swapping butter for coconut oil and using a plant-based milk.
Your no bake cookie dough bars will be just as tasty while catering to those seeking plant-based delights! -
Spiced Up: Add a pinch of cinnamon or a dash of nutmeg for a warm, cozy flavor.
These spices can elevate your bars into the realm of delightful autumn treats, perfect for any season! -
Sprinkle Fun: For a festive touch, mix in colorful sprinkles to the dough before chilling.
This brings a joyful pop of color and is especially great for parties or celebrations. -
Cocoa Dreams: For a chocolate lover’s paradise, add cocoa powder to the dough for a richer chocolate flavor.
This variation takes your bars to a whole new level of decadence, perfect for those chocolate cravings!
Consider trying one or more of these suggestions to make your no bake cookie dough bars truly your own! And if you’re looking for more quick and delightful recipes, why not check out our Chocolate Chip Cookie or Salted Caramel Cookie for a tasty pairing?
Expert Tips for No Bake Cookie Dough Bars
Heat-Treat Flour: Ensure your flour is heat-treated properly to eliminate any risk from raw flour; bake or microwave it thoroughly.
Creaming Technique: Cream the butter and sugars until light and fluffy, as this aeration affects the final texture of your bars.
Consistent Texture: If the mixture feels too dry, gradually add more milk. For a wet mix, add additional flour until you achieve the right consistency for your no bake cookie dough bars.
Chilling Time: Be patient and allow your bars to chill for at least 1-2 hours; this ensures they set properly and are easier to slice.
Sharp Knife Use: To achieve clean edges when slicing, use a sharp knife. This keeps your presentation beautiful and appetizing.
Make Ahead Options
These No Bake Cookie Dough Bars are ideal for meal prep, allowing you to create delicious treats ahead of time! You can prepare the mixture and press it into your baking dish up to 24 hours before serving. Simply follow the recipe up to the chilling step, cover the baking dish tightly, and refrigerate it to maintain freshness. When it’s time to enjoy, just remove the bars from the fridge, slice them into squares, and serve—no additional steps needed! For maximum quality, ensure the bars are stored in an airtight container after cutting, and they will stay delightful and chewy for up to 5 days.
No Bake Cookie Dough Bars Recipe FAQs
What kind of flour should I use for the No Bake Cookie Dough Bars?
Absolutely! You should use all-purpose flour that has been heat-treated to ensure it’s safe to eat. You can do this by spreading the flour on a baking sheet and baking it at 350°F (175°C) for about 5-7 minutes, or by microwaving in 30-second intervals until it reaches 160°F (70°C). This process eliminates any harmful bacteria, making your delicious bars truly guilt-free!
How should I store No Bake Cookie Dough Bars, and how long do they last?
Store your no bake cookie dough bars in an airtight container in the fridge, where they will stay fresh for up to 1 week. I often keep mine in a container, ready to grab as a snack. Just make sure that the container is sealed well to maintain their chewy texture and rich flavor!
Can I freeze No Bake Cookie Dough Bars, and how long will they last in the freezer?
Yes! To freeze your no bake cookie dough bars, wrap them tightly in plastic wrap followed by aluminum foil to prevent freezer burn. They can be stored in the freezer for up to 3 months. When you’re ready to enjoy them, remove from the freezer and let them sit at room temperature for about 15-30 minutes. They’ll taste just as delicious as the day you made them!
What should I do if my mixture is too dry or too wet while making the bars?
Very good question! If your dough seems too dry, try adding a little more milk, one tablespoon at a time, until you reach the desired consistency. On the flip side, if it’s too wet, gradually mix in more heat-treated flour until you get that perfect cookie dough-like texture. This step is key to ensuring your bars hold their shape and provide a satisfying bite!
Are there any dietary considerations I should be aware of?
Of course! This recipe is vegetarian and can easily be made dairy-free by substituting unsalted butter with coconut oil and using a plant-based milk alternative. For those with allergies, be cautious with ingredients like chocolate chips, which may contain allergens. Always check the labels as some brands also process their products in facilities that handle nuts or gluten.
Can I customize the No Bake Cookie Dough Bars for different flavors?
Absolutely! This recipe is incredibly versatile. You can swap chocolate chips for butterscotch or white chocolate chips. Add nuts, seeds, or even a swirl of peanut butter for added flavor and crunch. The more the merrier when it comes to taste, so feel free to experiment and find your favorite combination!

Irresistible No Bake Cookie Dough Bars for Sweet Cravings
Ingredients
Equipment
Method
- Heat-treat the all-purpose flour to ensure safety by baking it at 350°F for 5-7 minutes or microwaving it in intervals until it reaches 160°F. Allow to cool.
- In a large mixing bowl, cream together unsalted butter, brown sugar, and granulated sugar using an electric mixer until light and fluffy.
- Add vanilla extract and milk to the creamed mixture and mix until well combined.
- Gradually stir in the heat-treated flour, then fold in chocolate chips.
- Line an 8x8-inch baking dish with parchment paper, pour the mixture in, and press it down firmly.
- Chill in the refrigerator for at least 1-2 hours to set.
- Once set, slice into bars and serve cold or at room temperature.
Leave a Reply