
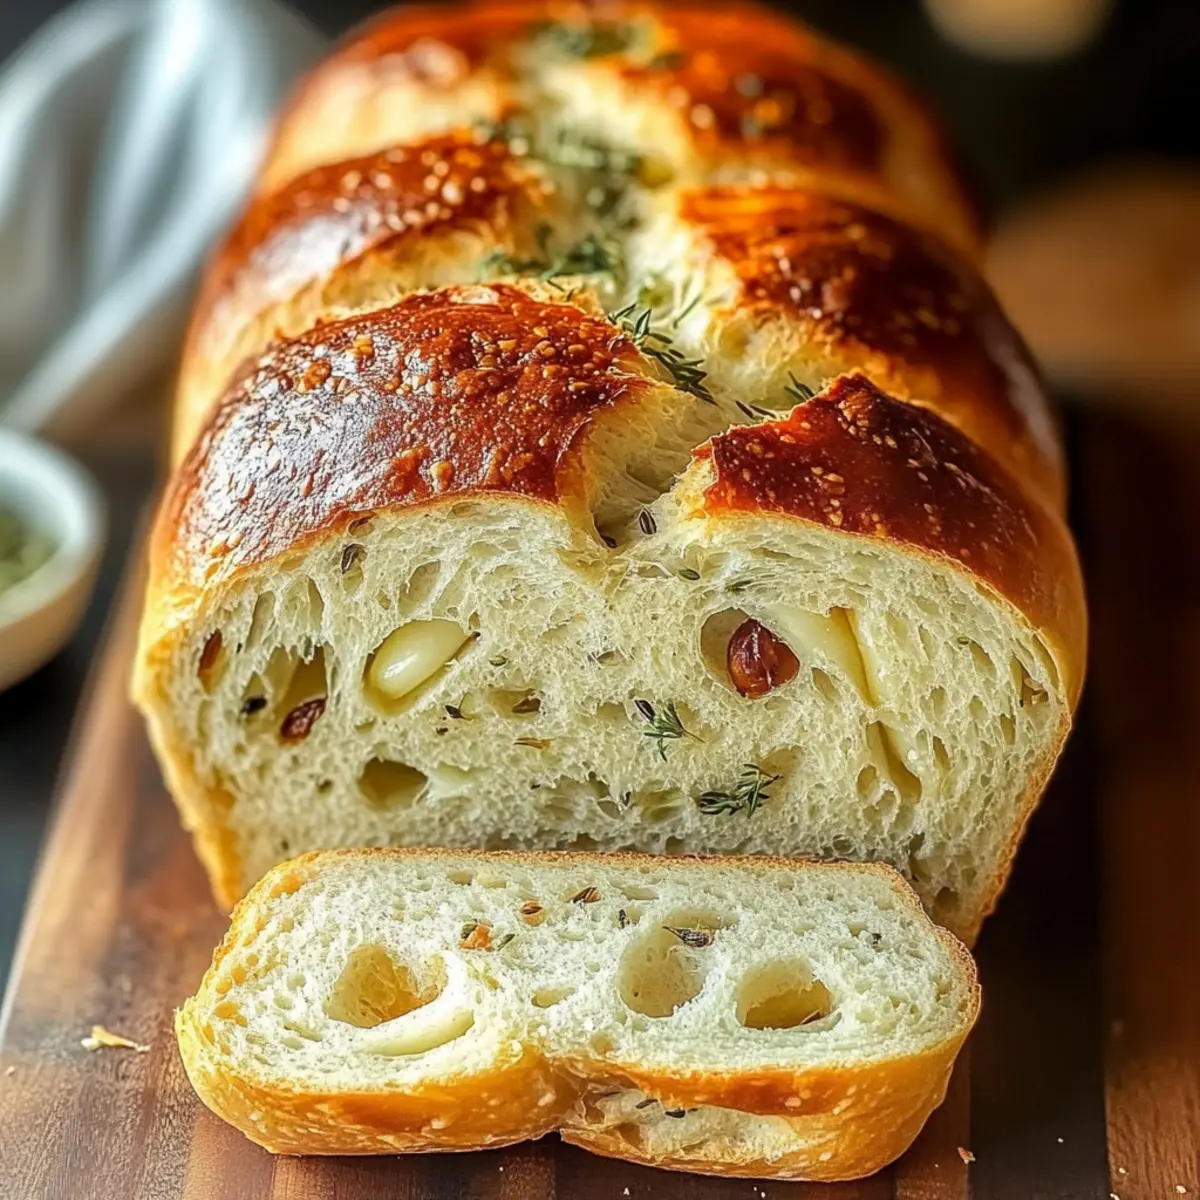
The intoxicating aroma of fresh bread is something that evokes comfort and joy. It’s hard to resist the warm, golden-brown loaf as it emerges from the bread machine, ready to transform any mealtime into a celebration. My Garlic Herb Bread is an easy yet delightful way to elevate your home dining experience. This recipe isn’t just straightforward; it’s a major time-saver, allowing you to enjoy homemade goodness without the fuss. Infused with the robust flavors of garlic and fragrant herbs, it’s perfect whether you’re serving it alongside your favorite pasta dish or simply enjoying a slice with olive oil for dipping. Curious to see how effortlessly delicious homemade bread can be? Let’s dive in!
Why Is Garlic Herb Bread So Irresistible?
Aromatic Bliss: The moment this bread starts baking, your kitchen fills with a savory aroma that’s impossible to resist.
Time-Saving Delight: With your bread machine doing all the work, you’ll save precious time while enjoying freshly baked goodness.
Ultimate Flavor Boost: Infused with garlic and herbs, each bite bursts with rich, vibrant flavors that enhance any meal.
Versatile Pairing: Perfect with soups, stews, or even as a dipper for olive oil, it’s a wonderfully adaptable addition to your menu.
Crowd-Pleasing Treat: This Garlic Herb Bread is great for gatherings, creating a warm and inviting atmosphere for friends and family.
Easy to Make: The straightforward process makes this recipe accessible even for beginners, ensuring everyone can enjoy homemade bread!
Garlic Herb Bread Ingredients
• Discover the simple components that create rich flavor!
For the Dough
- Warm Water – Hydrates the dough and activates the yeast; ensure it’s around 110°F/43°C for best results.
- Olive Oil – Adds moisture and richness; feel free to substitute with melted butter for a different flavor.
- Bread Flour – Provides structure and chewiness; using bread flour is key for the ideal texture.
- Sugar – Enhances browning and balances flavors; you can use refined or unrefined sugars interchangeably.
- Salt – Enhances flavor and controls yeast activity; the right amount is crucial for successful bread.
- Garlic Powder – Infuses the bread with a savory garlic flavor; fresh garlic can be used but may change the texture.
- Dried Italian Herbs – Adds aromatic notes and complexity; feel free to substitute with basil, oregano, or your favorite dried herbs.
- Active Dry Yeast – Essential for leavening; always use fresh yeast to ensure the bread rises beautifully.
Optional Variations
- Cheese – Add grated cheese like Parmesan or mozzarella for a savory twist.
- Spices – Experiment with red pepper flakes for a spicy kick to your garlic herb bread.
- Additional Herbs – Try rosemary or thyme to personalize the flavor profile of your creation.
Step‑by‑Step Instructions for Garlic Herb Bread
Step 1: Combine the Liquid Ingredients
Begin by pouring warm water, approximately 110°F (43°C), into the bread machine pan. Next, add the olive oil to create a moisture-rich base for your Garlic Herb Bread. Ensure that the pan is securely positioned in the machine before moving on to the next step.
Step 2: Add the Dry Ingredients
Gently layer the bread flour on top of the liquid mixture, ensuring it fully covers the surface. Sprinkle in the sugar, salt, garlic powder, and dried Italian herbs evenly across the flour. This layering technique ensures that your ingredients blend together perfectly during the mixing phase.
Step 3: Insert the Yeast
With your finger, create a small well in the center of the flour, deep enough to hold the active dry yeast without touching the liquid. Carefully pour the yeast into this well, ensuring it remains separate from the salt to activate successfully. This crucial step helps in achieving the perfect rise for your Garlic Herb Bread.
Step 4: Select the Baking Program
Close the lid of your bread machine and choose the Basic or White Bread setting. If your machine allows, adjust the crust preference to your liking, selecting light, medium, or dark for your bread’s exterior. This selection will greatly influence the final texture and color of your bread.
Step 5: Start the Baking Process
Press the start button and let the machine work its magic. This process should take approximately 2 hours and 30 minutes, during which the bread machine will mix, knead, rise, and bake your Garlic Herb Bread. Avoid opening the lid during this time to maintain a steady temperature for rising.
Step 6: Cool and Serve
Once the baking is complete, carefully remove the pan from the machine using oven mitts, as it will be hot. Transfer the bread onto a wire rack to cool completely before slicing. This cooling step is essential to prevent sogginess, allowing the Garlic Herb Bread to develop its lovely texture and flavor.
Make Ahead Options
These Garlic Herb Bread loaves are perfect for meal prep, allowing you to enjoy fresh-baked goodness even on the busiest days! You can prepare the dough up to 24 hours in advance by mixing the ingredients (except the yeast) and refrigerating them in an airtight container. To keep the dough fresh, make sure to cover it tightly to prevent drying out. When you’re ready to bake, simply take the dough out, allow it to come to room temperature for about 30 minutes, and then proceed to add the yeast, select your desired baking setting, and let the bread machine do the rest. With this simple make-ahead option, you’ll have a delightful loaf of Garlic Herb Bread ready with minimal effort!
Garlic Herb Bread: Flavorful Variations
Feel free to let your creativity shine and tailor this garlic herb bread to suit your taste!
- Gluten-Free: Use a gluten-free flour blend instead of bread flour for a gluten-free twist without sacrificing flavor.
- Cheesy Goodness: Stir in shredded cheese, like cheddar or mozzarella, to the dough for a mouthwatering cheesy version that melts in your mouth.
- Herb Mix-Up: Swap dried herbs for fresh ones. Chopped fresh rosemary or thyme adds a delightful, robust flavor, bringing your bread to life!
- Spicy Kick: Add red pepper flakes or diced jalapeños for a fiery variation that will ignite your taste buds.
- Sundried Tomatoes: Toss in chopped sundried tomatoes for a Mediterranean flair that beautifully complements the garlic and herbs.
- Olive Oil Drizzle: Brush the finished loaf with olive oil and sprinkle with sea salt and garlic powder for an added flavor boost.
- Onion Bagel Style: Mix in minced onions and flavored seeds like sesame or poppy for a unique bagel-inspired bread.
For more delicious carb-loaded ideas, consider pairing your garlic herb bread with dishes like Cajun Chicken Garlic or serving alongside some homemade Garlic Butter Steak for an unforgettable meal!
What to Serve with Garlic Herb Bread
Your dining experience can be effortlessly elevated when you pair this fragrant, homemade loaf with delightful accompaniments.
- Creamy Tomato Soup: The rich, creamy texture and tangy flavor of tomato soup make it a perfect match, inviting you to dip your bread for a savory delight.
- Garden Salad: Fresh greens tossed with vibrant vegetables provide a crisp contrast to the soft bread, creating a balanced and healthy meal option.
- Herbed Olive Oil: A dish of herbed olive oil for dipping complements the garlic flavors, inviting a multi-sensory experience that enhances every bite.
- Roasted Vegetable Medley: The natural sweetness and earthiness in roasted vegetables harmonize beautifully with the fragrant notes of garlic and herbs in the bread.
- Italian Pasta Dishes: Pair with your favorite pasta—like a classic marinara or a rich Alfredo sauce—for a comforting meal that feels like a hug on a plate.
- Cheesy Garlic Spread: Slather warm Garlic Herb Bread with a cheesy garlic spread for a double garlic experience that’s utterly irresistible.
- Savory Stews: Hearty beef or lentil stew provides a cozy, warming dish that’s perfect for dunking, perfectly complementing the bread’s texture.
- Red Wine: A glass of robust red wine rounds out the meal, effortlessly enhancing the flavors of both the bread and your chosen dishes.
How to Store and Freeze Garlic Herb Bread
Room Temperature: Store your Garlic Herb Bread in an airtight container at room temperature for up to 3 days to maintain its freshness.
Freezer: If you want to keep your bread longer, slice it and wrap each slice tightly in plastic wrap or foil before placing them in a freezer bag. It can be frozen for up to 3 months.
Reheating: To enjoy your bread after freezing, simply thaw slices at room temperature or reheat them in a toaster or oven until warmed through. This will revive its original texture and flavor.
Avoid Sogginess: Always cool the bread completely on a wire rack before storing to prevent moisture buildup, ensuring each slice remains invitingly soft and crusty.
Expert Tips for Garlic Herb Bread
- Temperature Matters: Ensure your warm water is around 110°F (43°C) to properly activate the yeast for fluffy garlic herb bread.
- Layering Technique: Always layer the dry ingredients over the wet ones to ensure even mixing and activation during the bread machine’s process.
- Resist Peeking: Avoid opening the bread machine during rising to keep the temperature stable, which is vital for a perfect loaf.
- Cool Completely: Let the bread cool on a wire rack to prevent a soggy bottom and maintain that delightful texture.
- Choose Quality Ingredients: Use fresh, high-quality garlic powder and dried herbs to elevate the flavor profile of your garlic herb bread.
Garlic Herb Bread Recipe FAQs
What should I look for when selecting garlic and herbs for the dough?
Absolutely! When choosing garlic, look for firm cloves that are free from dark spots or sprouting — this indicates freshness. For herbs, dried varieties such as Italian seasoning or basil should be aromatic and vibrant in color. If using fresh herbs, ensure they are bright and crisp, as wilted or discolored herbs can detract from flavor.
How should I store Garlic Herb Bread to keep it fresh?
To preserve the wonderful flavor and texture of your Garlic Herb Bread, store it in an airtight container at room temperature for up to 3 days. This prevents it from drying out. For extended storage, slice the bread and wrap each piece tightly in plastic wrap or aluminum foil, then place it in a freezer bag. It can be successfully frozen for up to 3 months.
Can I freeze Garlic Herb Bread, and if so, how?
Yes, you can absolutely freeze Garlic Herb Bread! For optimal freezing, wait until the bread has completely cooled. Slice the loaf, then wrap each slice in plastic wrap or foil to protect against freezer burn. Place wrapped slices in a freezer-safe bag, and try to remove as much air as possible. When you’re ready to enjoy, simply thaw the slices at room temperature or pop them in the toaster for a few minutes to refresh their warmth and texture.
What should I do if my bread doesn’t rise properly?
If your Garlic Herb Bread fails to rise, first check if your yeast is fresh. Expired or inactive yeast will not give you the desired rise. Also, ensure you used warm water, about 110°F (43°C), to activate the yeast effectively. If your kitchen is too cold, this could inhibit rising; try placing the bread machine in a warmer spot or covering it with a towel during the first rise. Lastly, avoid opening the bread machine during its rising phase, as it requires consistent warmth for proper fermentation.
Is Garlic Herb Bread suitable for those with dietary restrictions?
Very much so! You can tailor this Garlic Herb Bread to accommodate various dietary needs. If you are avoiding gluten, consider using a certified gluten-free bread flour. For dairy concerns, stick with olive oil instead of butter, and for herbal allergies, simply omit the garlic and choose suitable alternatives like onion powder. Always check your specific ingredient labels to ensure they meet your dietary restrictions.
Can I add extra ingredients to the Garlic Herb Bread?
The more, the merrier! You can definitely put your spin on this recipe by adding grated cheeses, such as Parmesan or cheddar, for enhanced flavor. Feel free to experiment with spices like red pepper flakes for a spicy kick, or incorporate additional herbs like rosemary or thyme for different flavor profiles. Just keep in mind to adjust the moisture content slightly if you’re including significantly wet ingredients.
Garlic Herb Bread: Effortless Flavor in Every Slice
Ingredients
Equipment
Method
- Begin by pouring warm water into the bread machine pan. Add the olive oil to create a moisture-rich base.
- Layer the bread flour on top of the liquid mixture, covering it fully. Sprinkle in the sugar, salt, garlic powder, and dried Italian herbs.
- Create a small well in the center of the flour and pour the yeast into this well, ensuring it remains separate from the salt.
- Close the lid and choose the Basic or White Bread setting. Adjust the crust preference if your machine allows.
- Press the start button and let the machine bake the bread for approximately 2 hours and 30 minutes.
- Once baking is complete, carefully remove the pan and transfer the bread onto a wire rack to cool completely before slicing.
Leave a Reply