
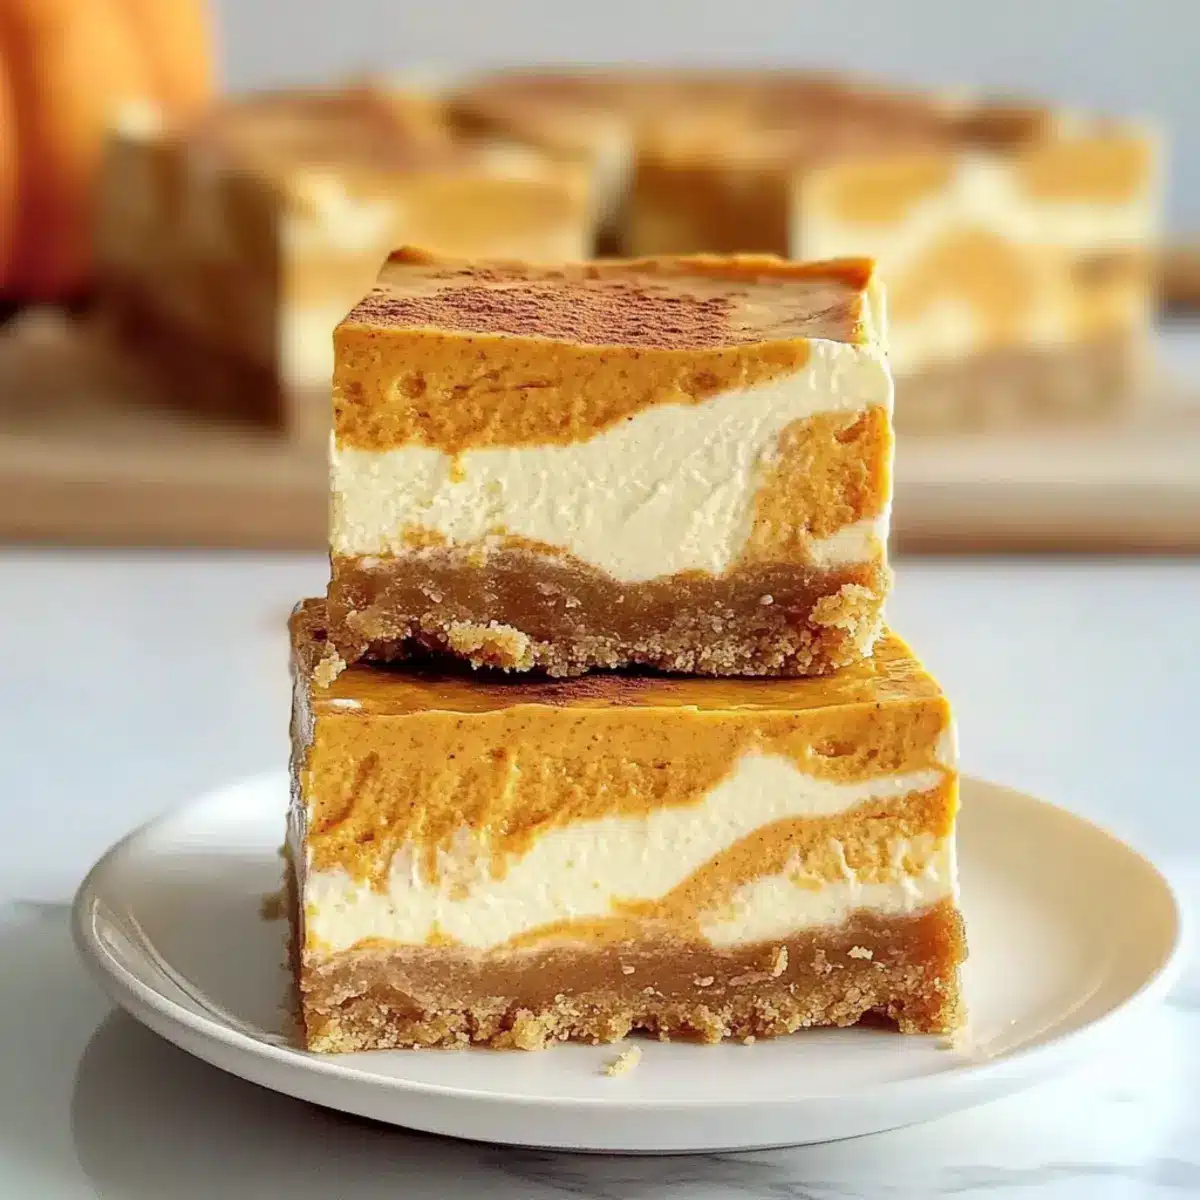
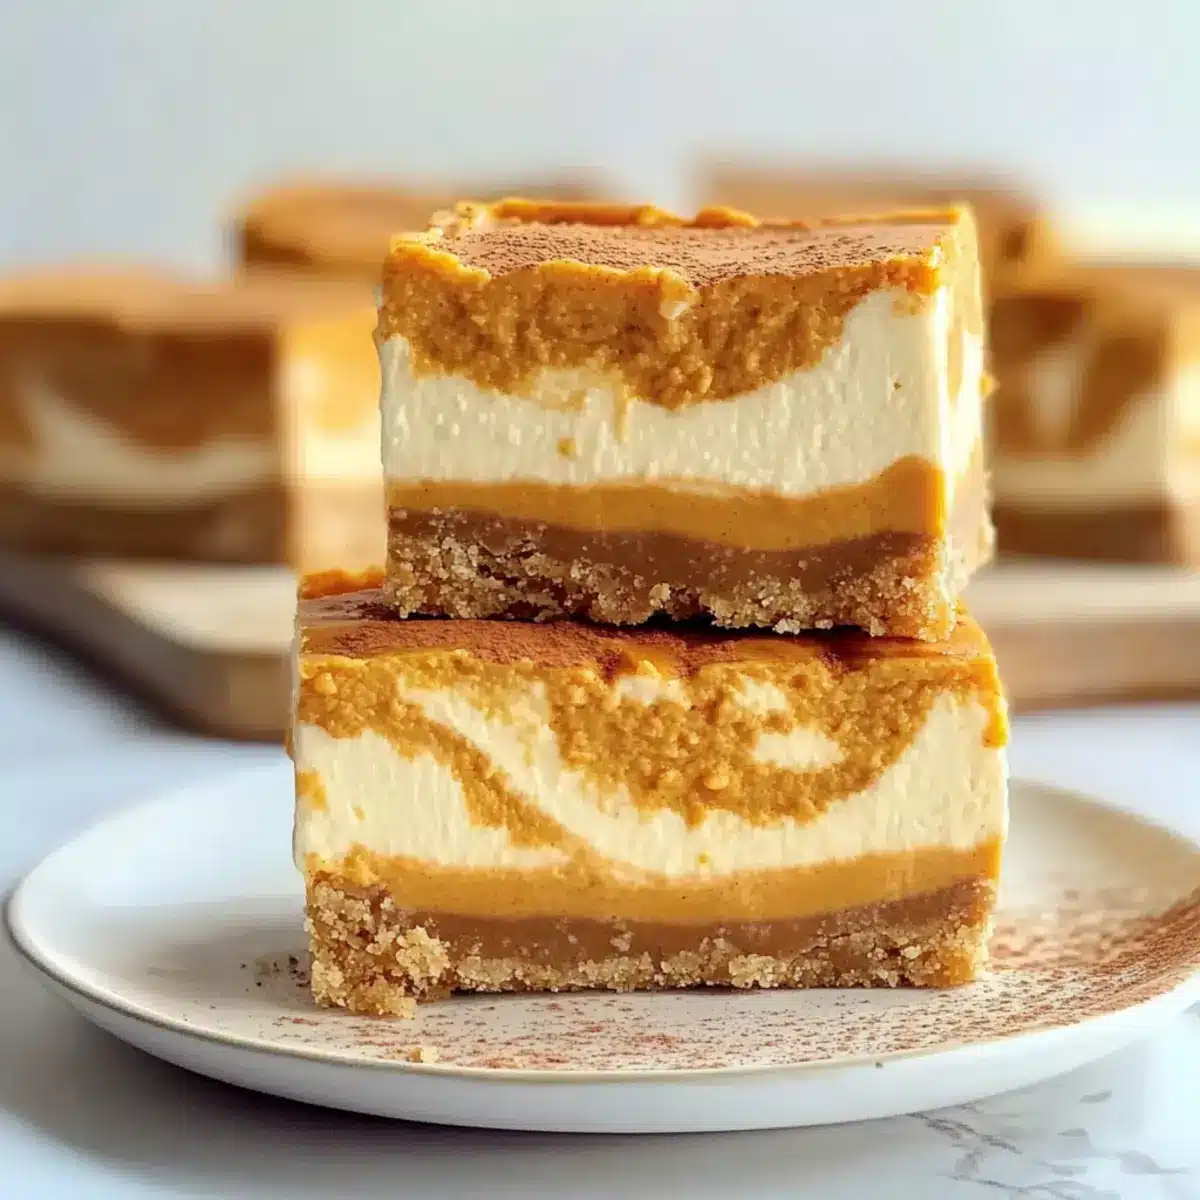
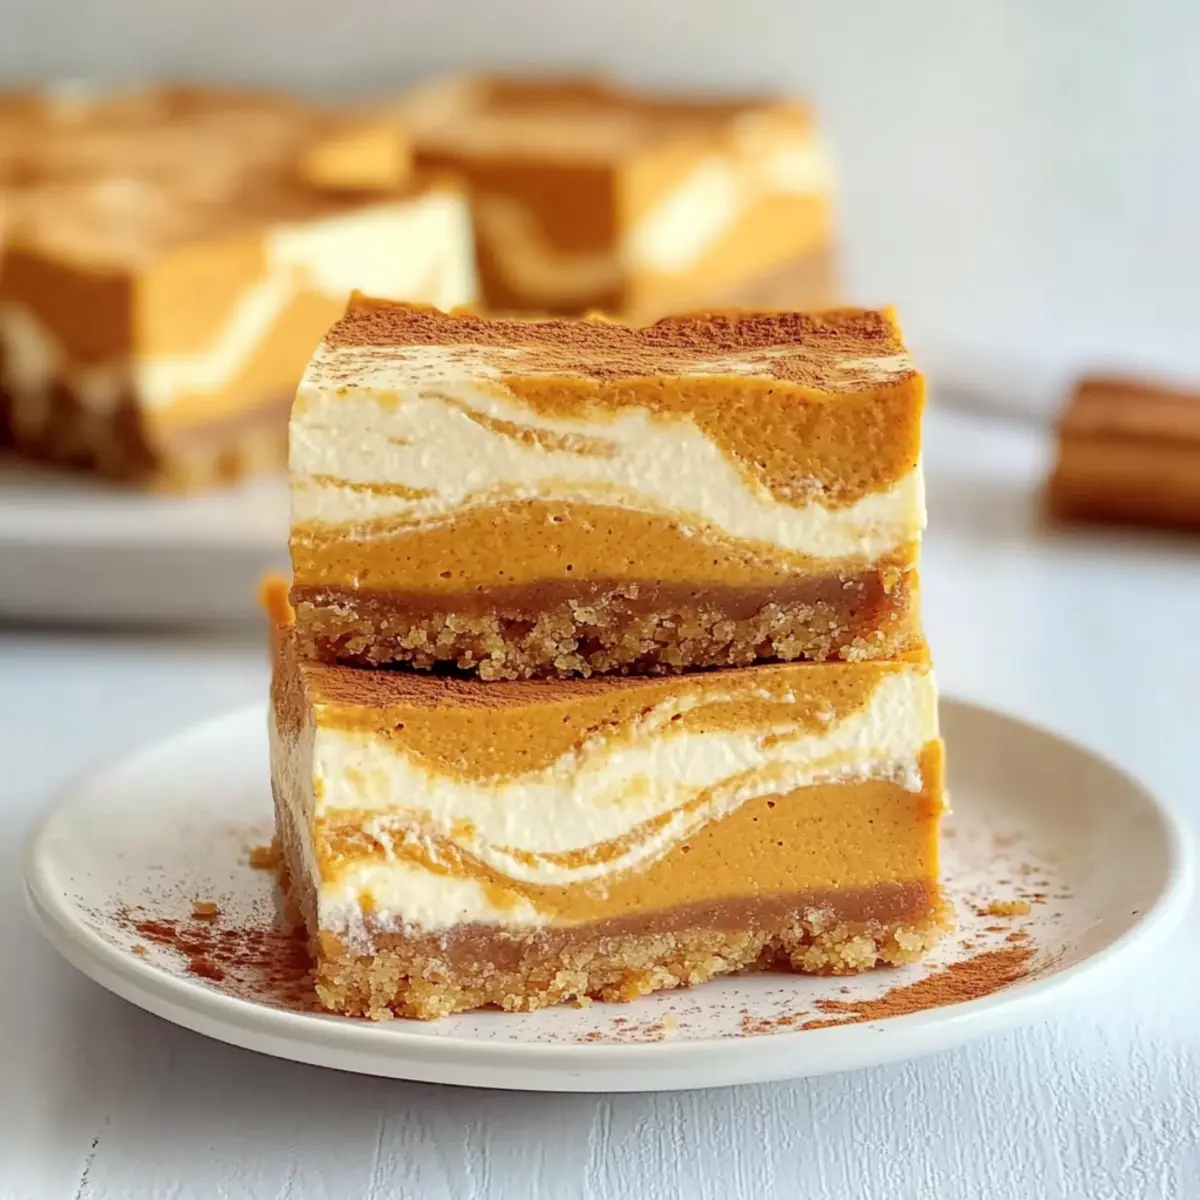
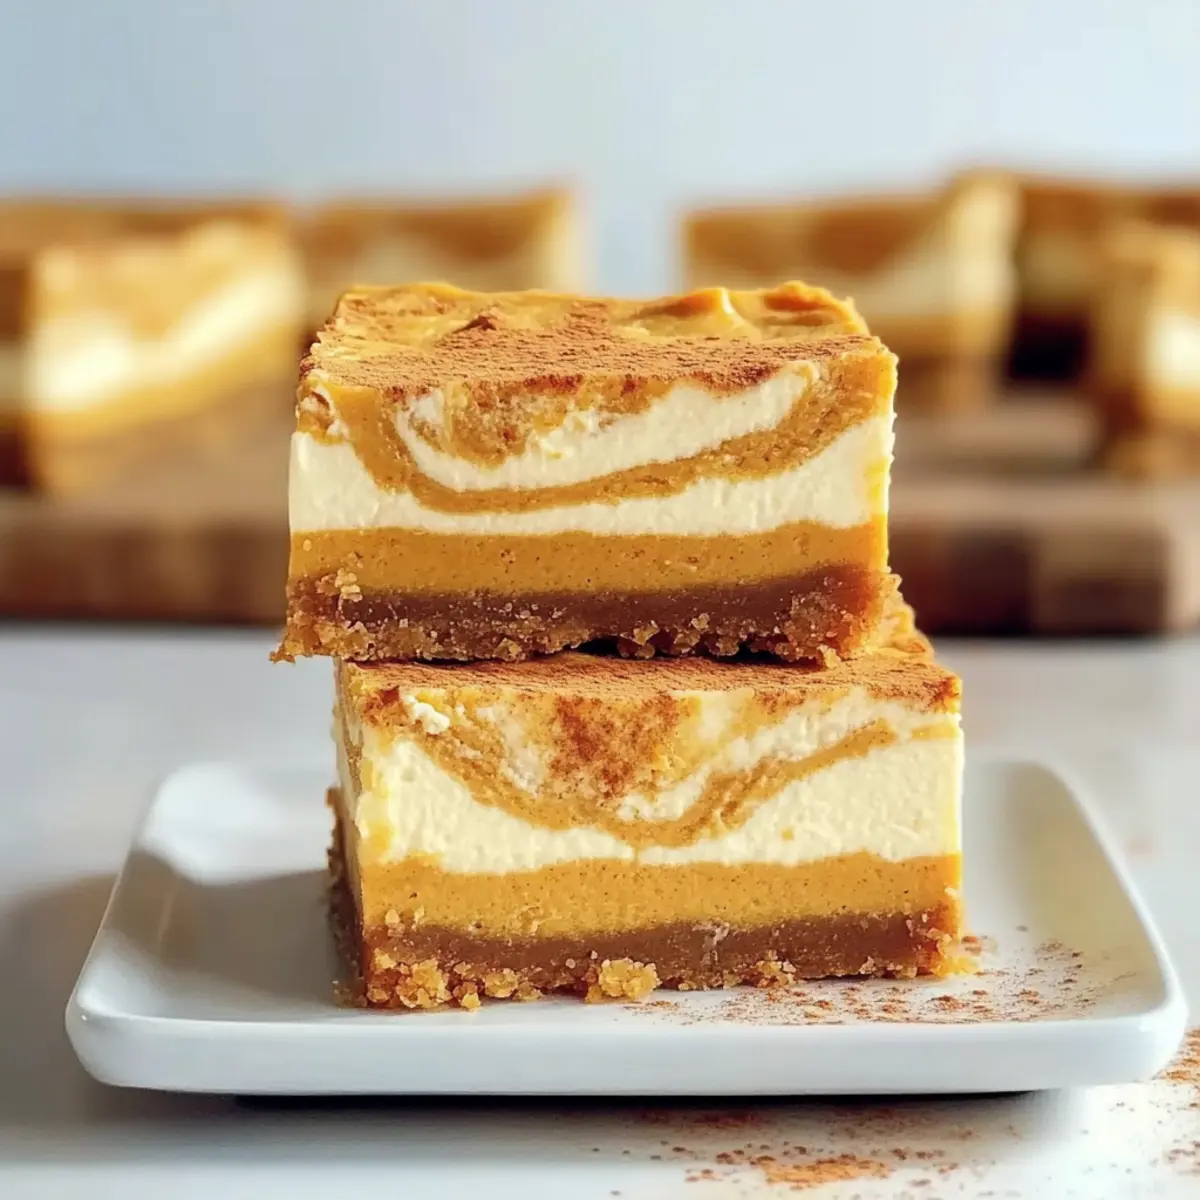
As the leaves turn and the air gets crisper, I find myself longing for the comforting flavors of fall—a sunbeam of warmth amidst the chill. Enter these Easy Rich Pumpkin Cheesecake Bars, a delightful twist on a classic that captures the essence of autumn in every bite. Perfect for potlucks or cozy gatherings, these bars are not only a cinch to whip up, but they also bring the indulgent, creamy richness of pumpkin cheesecake without the fuss of traditional slices. Imagine serving these decadent treats alongside a cup of spiced chai, instantly warming hearts and sparking conversation. Curious how to make this season’s must-have dessert? Let’s dive into the details!
Why Are Pumpkin Cheesecake Bars Irresistible?
Creamy, Rich Flavor: The combination of cream cheese and pumpkin creates an indulgent dessert that’s perfect for the season.
Quick & Easy: These bars simplify the classic cheesecake process, making them a breeze to prepare!
Versatile Base: The graham cracker crust can be adapted with gluten-free options, ensuring everyone can enjoy.
Perfect for Gatherings: Their bar format makes serving easy at potlucks or family gatherings, just like my Mini Pumpkin Bread.
Fall Festive: With the warm spices of pumpkin pie, these bars evoke the cozy spirit of autumn, ideal for Thanksgiving celebrations.
Storage Friendly: Easy to keep and freeze, savor these treats well beyond the holidays. Enjoy them cold with a drizzle of caramel sauce for that extra touch!
Rich Pumpkin Cheesecake Bars Ingredients
For the Crust
- Graham Crackers – The foundation for a delicious crust; swap for gluten-free varieties if needed.
- White Sugar – Sweetens both crust and filling; consider using brown sugar for more depth.
- Unsalted Butter – Binds the crust ingredients; can be replaced with coconut oil for a dairy-free version.
For the Filling
- Canned Pumpkin Purée – The star of our Rich Pumpkin Cheesecake Bars, giving that classic fall flavor; fresh pumpkin purée works well too.
- Pumpkin Pie Spice Blend – Infuses the filling with traditional spices; feel free to mix your own with cinnamon, nutmeg, and ginger.
- Ground Cinnamon – Adds warmth to the filling; optional for sprinkling on top for extra festivity.
- All-Purpose Flour – Stabilizes the filling; almond flour is a great gluten-free alternative.
- Cream Cheese – Essential for the creamy cheesecake consistency; choose dairy-free cream cheese to keep it vegan.
- Sour Cream – Adds a tangy creaminess; Greek yogurt can serve as a wonderful substitute.
- Vanilla Extract – Elevates the flavor profile; opt for an alcohol-free version if desired.
- Eggs – Provide structure; flax eggs can be used for a vegan alternative.
- Salt – Enhances sweetness while rounding out flavors; don’t skip this crucial ingredient!
Step‑by‑Step Instructions for Rich Pumpkin Cheesecake Bars
Step 1: Preheat the Oven
Begin by preheating your oven to 350°F (175°C). While the oven warms up, grease a 9×13 inch baking pan with non-stick spray or butter to ensure your Rich Pumpkin Cheesecake Bars release easily after baking. Set the prepared pan aside as you move on to the crust.
Step 2: Make the Crust
In a food processor, blend graham crackers into fine crumbs until they resemble sand. In a bowl, combine the crumbs with sugar and melted butter; mix until evenly moistened. Press this mixture firmly into the bottom of your greased pan, ensuring it’s compact. Bake for 10–15 minutes, or until fragrant and slightly golden, then let it cool while you prepare the filling.
Step 3: Prepare the Filling
In a medium bowl, whisk together the canned pumpkin purée, pumpkin pie spice, and all-purpose flour until smooth; set this aside. In a large bowl, beat the cream cheese with sugar until creamy. Add sour cream and vanilla extract, mixing until well incorporated. Carefully add the eggs one at a time, mixing just until combined to keep the filling smooth and lump-free.
Step 4: Combine Mixtures
Now, gently stir a portion of the cream cheese mixture into the pumpkin mixture to create a marbled effect. This is where the flavors of pumpkin and cheesecake harmonize beautifully. Be cautious not to overmix, as you want to maintain a lovely swirl that enhances both the look and taste of your Rich Pumpkin Cheesecake Bars.
Step 5: Assemble the Bars
Using a large spoon, dollop alternating scoops of the cream cheese and pumpkin mixtures over your cooled crust. With a knife, swirl the mixtures together to create a beautiful pattern that will look stunning once baked. Make sure to create a balance of both flavors throughout the layers for the perfect taste in every bite.
Step 6: Bake
Place your assembled bars in the preheated oven and bake for 35-45 minutes. The edges should be set and only the center should jiggle slightly when you gently shake the pan. Keep an eye on the bars towards the end of the baking time to ensure they don’t overcook. Once done, remove from the oven and allow them to cool completely at room temperature.
Step 7: Chill and Serve
After cooling, cover your Rich Pumpkin Cheesecake Bars with plastic wrap and refrigerate for several hours, ideally overnight. This chilling time lets the flavors deepen and the bars firm up perfectly. When ready to serve, cut into squares and drizzle with your favorite caramel sauce or whipped cream for a delightful finish!
Make Ahead Options
These Rich Pumpkin Cheesecake Bars are a fantastic choice for meal prep, allowing you to savor their creamy goodness with minimal effort on the day of your gathering! You can prepare the crust up to 24 hours in advance by making and baking it, then storing it in an airtight container. Additionally, you can mix the cheesecake filling and refrigerate it for up to 3 days. Just be sure to cover the bowl tightly to preserve freshness. When you’re ready to bake, simply layer the filling on the pre-baked crust, swirl, and follow the baking instructions. This approach not only saves time but ensures that your bars are just as delicious as if made fresh on the day!
Rich Pumpkin Cheesecake Bars Variations
Let your creativity shine as you explore these delightful twists on the classic pumpkin cheesecake bars!
-
Dairy-Free: Substitute regular cream cheese and sour cream with dairy-free options for a creamy vegan version that everyone will love.
This adaptation ensures that no one misses out on the joy of these delicious bars! -
Gluten-Free: Use gluten-free graham crackers or almond flour to create a crust that caters to gluten-sensitive friends.
They’ll be thrilled to enjoy their favorite dessert without any compromise! -
Chocolate Variation: Swirl in chocolate chips to the filling for a luscious chocolate-pumpkin combination that’s rich and irresistible.
This decadent addition will delight both pumpkin and chocolate lovers alike! -
Spicy Kick: Add a pinch of cayenne or chili powder to the filling for a surprising heat that contrasts beautifully with the sweetness.
This bold twist will intrigue adventurous eaters and elevate the flavor profile. -
Nutty Crunch: Top with chopped pecans or walnuts before baking for added texture and richness, enhancing each bite.
Creating that delightful crunch adds a satisfying element to the creamy bars. -
Fresh Flavor: Incorporate finely grated orange zest into the filling for a citrusy brightness that complements the pumpkin.
This will add a refreshing twist and elevate the autumn flavors to new heights! -
Layered Delight: Create a layered dessert by adding a layer of caramel between the crust and filling for an indulgent treat.
The combination of caramel and pumpkin is simply heavenly and perfect for special occasions. -
Toffee Crunch: Sprinkle toffee bits on top of the bars before baking for a sweet, crunchy finish that everyone will adore.
This delightful addition will keep guests coming back for more!
Whether you’re preparing for a potluck or a cozy family gathering, these variations on the Rich Pumpkin Cheesecake Bars will surely impress. And while you’re at it, consider serving it with a slice of my Red Velvet Cheesecake or alongside my favorite Pecan Shortbread Bars for an unforgettable dessert table!
Storage Tips for Rich Pumpkin Cheesecake Bars
Fridge: Store in an airtight container for up to 5 days, allowing the flavors to meld as they chill.
Freezer: These bars freeze beautifully for up to 3 months. Wrap them tightly in plastic wrap and then place them in a freezer-safe bag.
Thawing: Thaw in the refrigerator overnight or at room temperature for a quick serve without compromising quality.
Reheating: For a warm treat, gently reheat in the microwave for a few seconds, ensuring not to overheat to maintain creaminess.
Tips for the Best Rich Pumpkin Cheesecake Bars
Room Temperature Ingredients: Make sure your cream cheese, eggs, and sour cream are at room temperature to prevent lumps and achieve a smooth filling.
Don’t Overmix: Once you add the eggs, mix just until combined to avoid excess air, which can cause cracks in your pumpkin cheesecake bars.
Perfect Swirl: For a beautiful marbled effect, gently fold the cream cheese mixture into the pumpkin mixture instead of fully blending—they should be swirled, not combined!
Proper Cooling: Allow the bars to cool completely at room temperature before refrigerating. This helps them set properly and avoids a soggy texture.
Watch Baking Time: Keep an eye on the bars as they bake; they’re done when the edges are firm and the center jiggles slightly. Overbaking can lead to dryness.
Serve Chilled: For the best flavor and texture, serve your Rich Pumpkin Cheesecake Bars after they’ve chilled in the fridge, allowing all those delicious flavors to meld beautifully!
What to Serve with Rich Pumpkin Cheesecake Bars
As you prepare to indulge in these creamy delights, consider enhancing the experience with complementary flavors that elevate the entire meal.
-
Whipped Cream: A fluffy dollop adds a light sweetness, perfectly contrasting the rich, spiced flavor of the cheesecake bars.
-
Caramel Sauce: Drizzling some homemade or store-bought caramel offers a luscious, buttery layer that enhances every bite.
-
Spiced Chai: This warm, fragrant tea parallels the seasonal spices in the dessert; it’s a hug in a cup that invites long conversations.
-
Pecan or Walnut Topping: Chopped nuts provide a delightful crunch and rustic touch, balancing the silky texture of the bars.
-
Applesauce: A side of unsweetened applesauce brings extra moisture and fruity brightness to the plate; it’s a classic fall pairing.
-
Hot Coffee: The bittersweet quality of coffee beautifully contrasts the sweetness, creating a comforting, cozy duo that warms the heart.
-
Pumpkin Spice Latte: For an autumn twist, this beloved coffee drink complements the flavors of your bars, rounding out a fall-themed dessert experience.
Rich Pumpkin Cheesecake Bars Recipe FAQs
How do I choose the right pumpkin purée?
Absolutely! For the best flavor, I recommend using canned pumpkin purée rather than fresh pumpkin, as it’s usually richer and smoother. If you prefer fresh, select a sugar pumpkin; just ensure you properly bake and drain it to remove excess moisture for the best texture in your Rich Pumpkin Cheesecake Bars.
What’s the best way to store these cheesecake bars?
Very easily! You can store your Rich Pumpkin Cheesecake Bars in an airtight container in the refrigerator for up to 5 days. This allows the flavors to develop beautifully. For longer storage, feel free to freeze them for up to 3 months. Just wrap each bar tightly in plastic wrap, and then place them in a freezer-safe bag to preserve freshness.
Can I freeze the Rich Pumpkin Cheesecake Bars?
You can! To freeze, first cut the bars and wrap each piece tightly in plastic wrap. Then, place them in a freezer-safe bag or container. When you’re ready to indulge again, thaw them in the refrigerator overnight or at room temperature. This way, they’ll taste freshly made again!
What should I do if my cheesecake bars crack while baking?
If you notice cracks, don’t worry! This can happen if the mixture is overmixed after adding the eggs or if the oven temperature is too high. To reduce this risk next time, avoid overmixing and keep a close eye on your baking time. If cracks do occur, topping with whipped cream or caramel can cleverly mask them!
Are there any dietary considerations I should keep in mind?
Absolutely! If you’re serving these Rich Pumpkin Cheesecake Bars to those with dietary restrictions, you can easily make them gluten-free by using gluten-free graham crackers and almond flour. For a dairy-free option, substitute the cream cheese with a vegan cream cheese alternative and use coconut oil in the crust. Always check for any specific allergies your guests may have, especially with eggs and dairy products.
Can I use a different type of sweetener in the recipe?
Certainly! You can substitute white sugar with brown sugar for a richer taste or even use natural sweeteners like honey or maple syrup. Just remember to adjust the liquid ratios slightly if using liquid sweeteners—reduce other liquids in the mix by about one quarter to maintain the cheesecake’s creamy texture.
Rich Pumpkin Cheesecake Bars to Wow Your Fall Gatherings
Ingredients
Equipment
Method
- Preheat your oven to 350°F (175°C) and grease a 9x13 inch baking pan.
- Blend graham crackers into fine crumbs, mix with sugar and melted butter, and press into the bottom of the baking pan. Bake for 10–15 minutes and let cool.
- Whisk together canned pumpkin purée, pumpkin pie spice, and all-purpose flour until smooth. In a separate bowl, beat cream cheese with sugar until creamy, then add sour cream and vanilla extract, followed by eggs one at a time.
- Gently stir a portion of the cream cheese mixture into the pumpkin mixture to create a marbled effect.
- Dollop alternating scoops of cream cheese and pumpkin mixtures over the crust, then swirl together with a knife.
- Bake for 35-45 minutes until edges are set. Cool completely at room temperature.
- Refrigerate for several hours or overnight. Cut into squares and drizzle with caramel sauce to serve.
Leave a Reply