
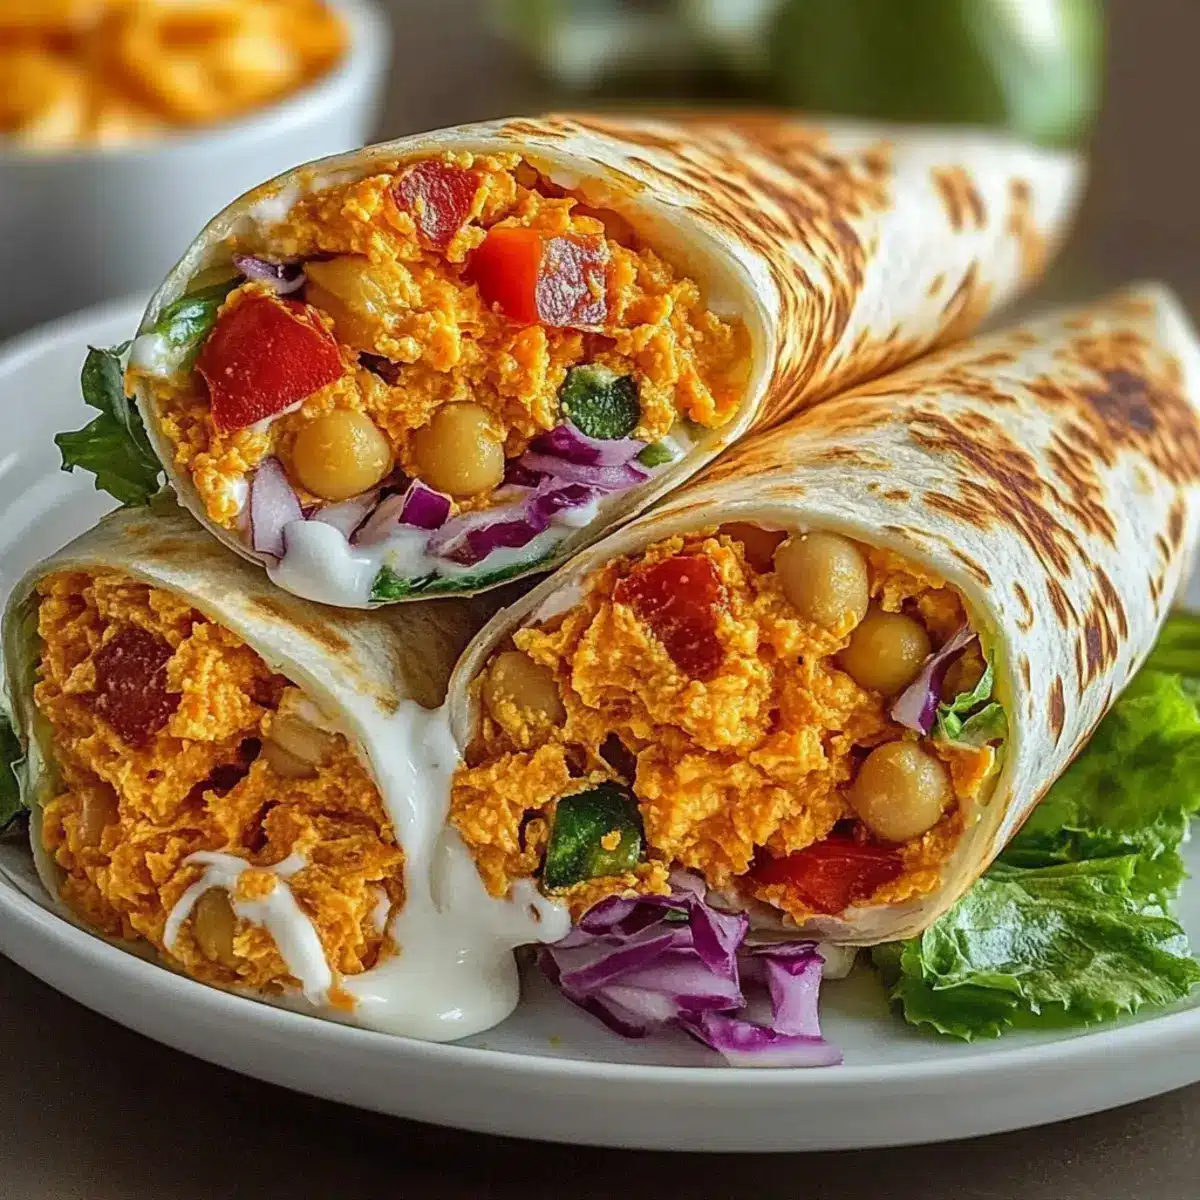
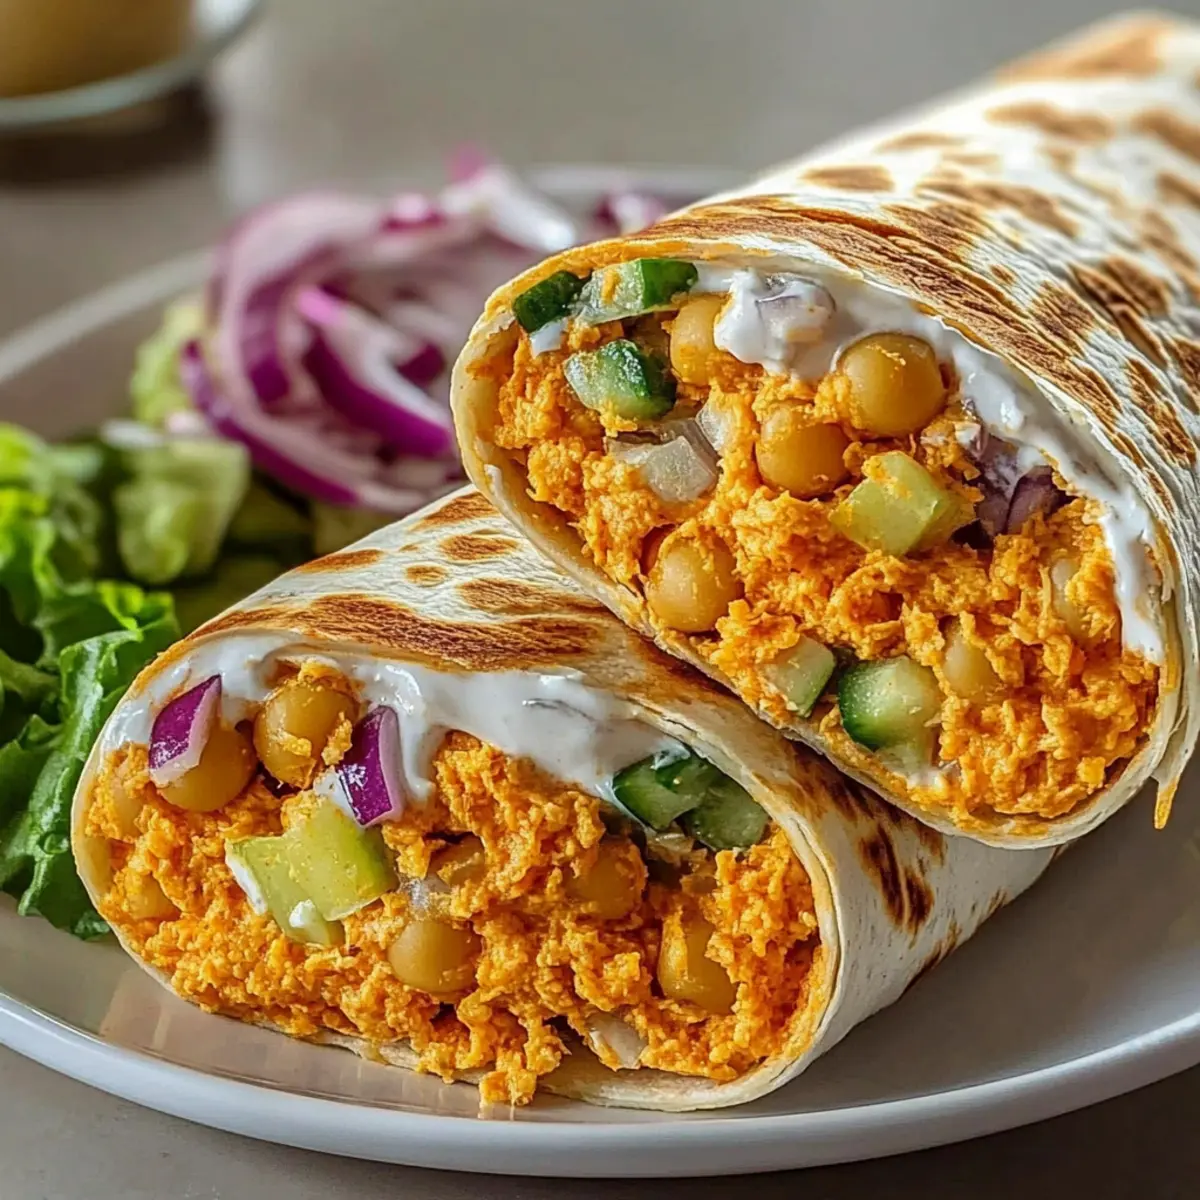
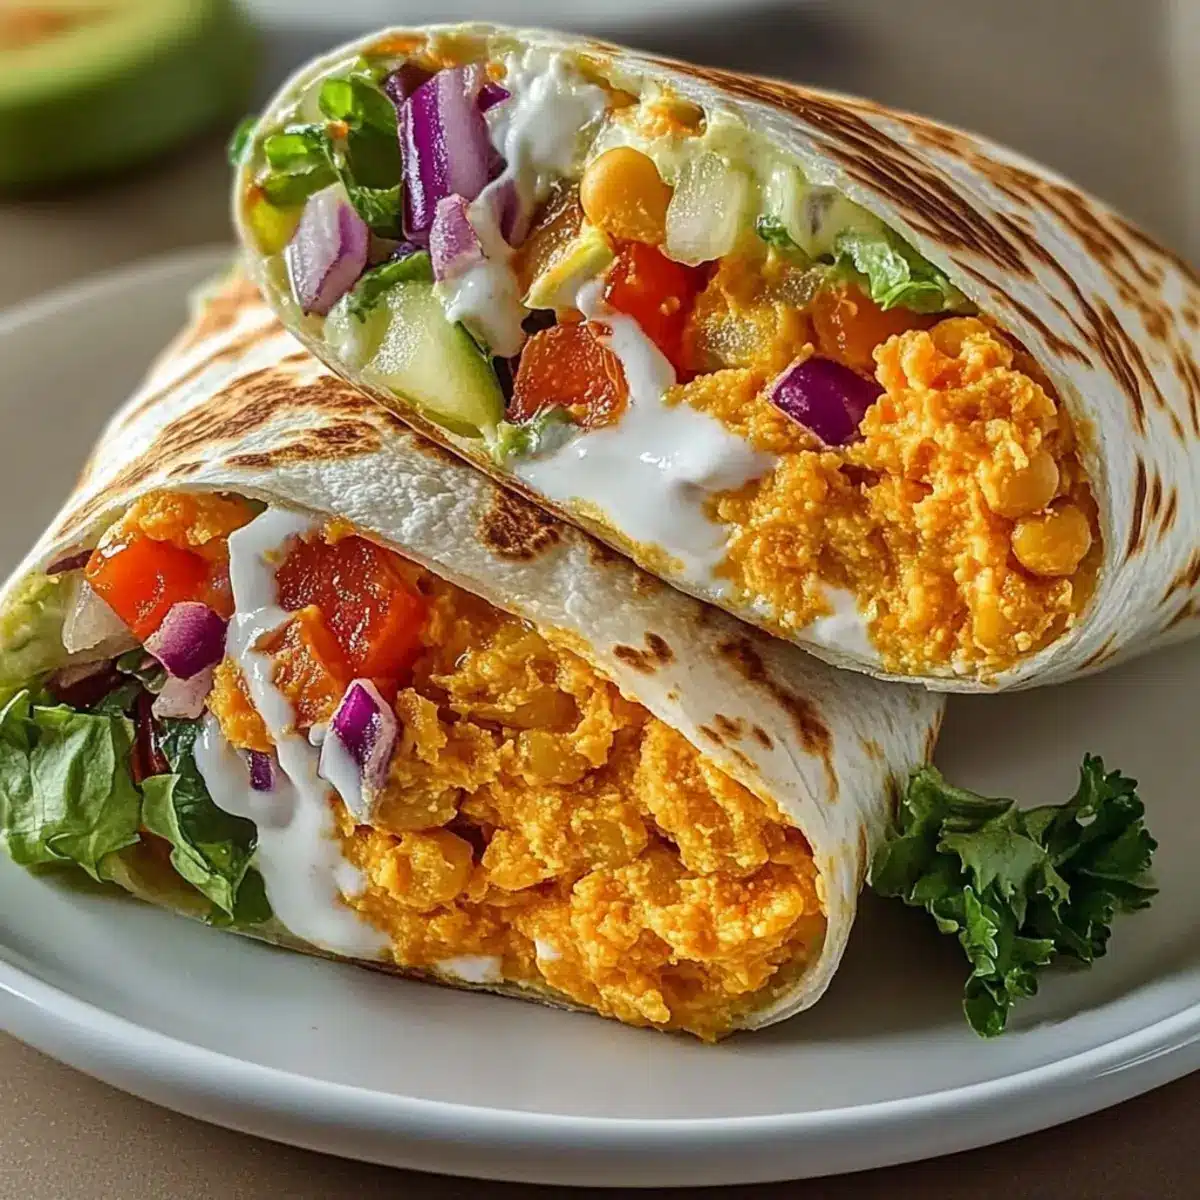
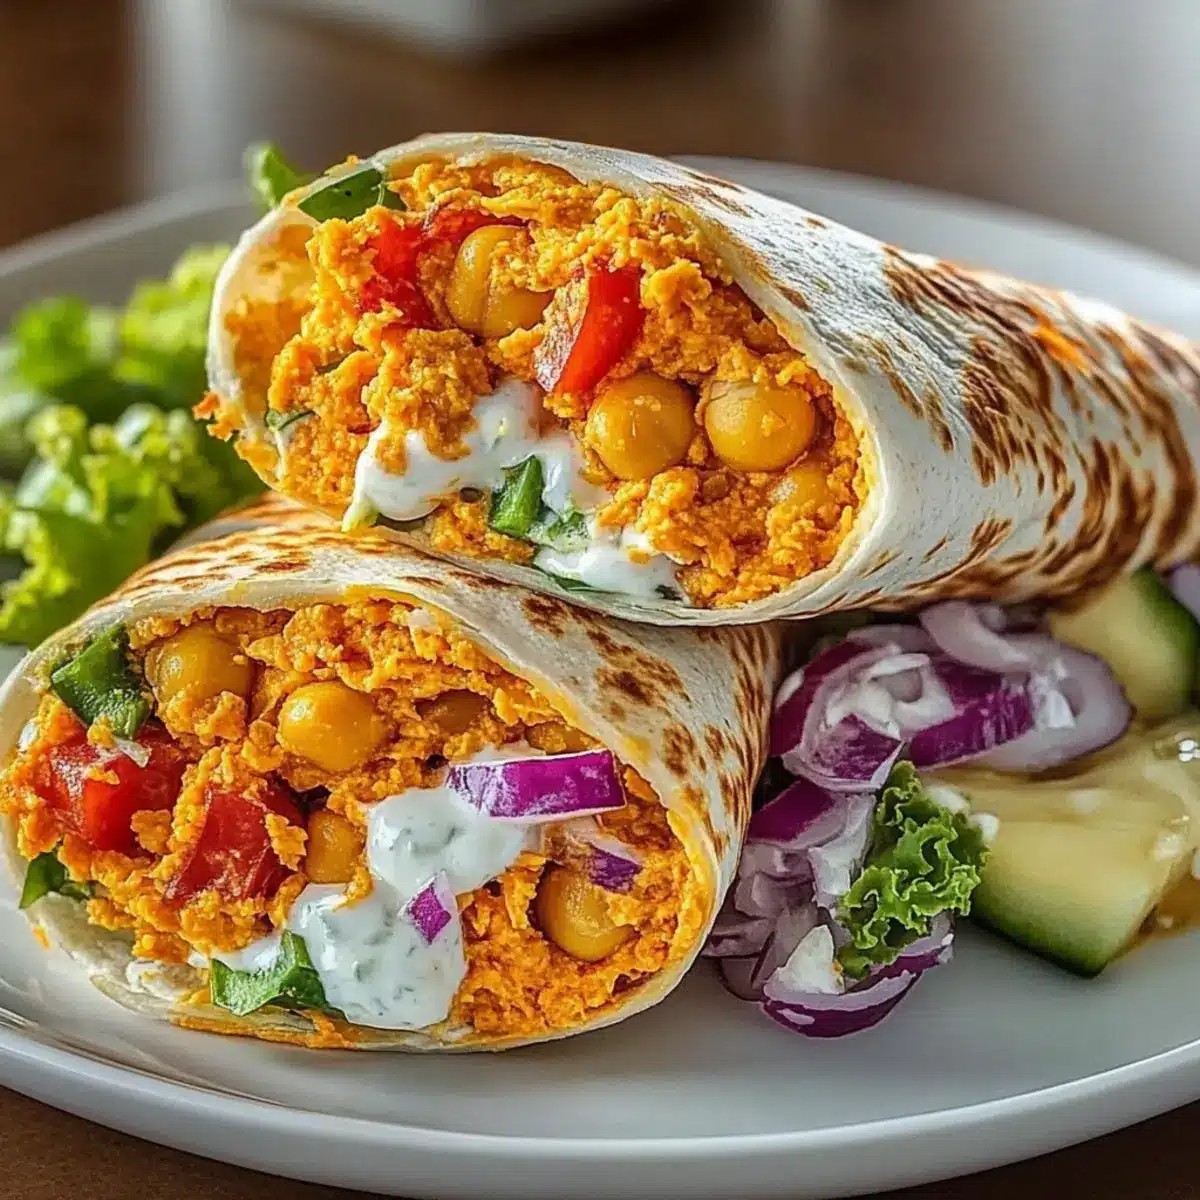
As I poured the vibrant Buffalo sauce over my chickpeas, a wave of anticipation washed over me. These 15-Minute Buffalo Chickpea Wraps are not just a feast for the eyes; they’re a celebration of flavor and convenience, perfect for anyone ready to ditch takeout in favor of homemade goodness. Packed with protein-rich chickpeas and the crunchy freshness of crisp veggies, these wraps deliver a satisfying bite with a delightful spicy kick. What’s more, they cater to various dietary needs, offering both gluten-free and plant-based options without sacrificing taste. Whether you’re in a rush for lunch or seeking a simple yet delicious dinner, these wraps have got you covered. Ready to add a fiery twist to your meal rotation? Let’s dive into this quick and easy recipe!
Why Try These Buffalo Chickpea Wraps?
Quick, easy prep: Made in just 15 minutes, these wraps are the ultimate solution for those busy days when time is of the essence.
Flavor explosion: The spicy Buffalo sauce pairs perfectly with creamy yogurt and fresh veggies, ensuring every bite is packed with vibrant taste.
Customizable options: Feel free to swap in gluten-free tortillas or use vegan mayo to tailor these wraps to your dietary needs, keeping everyone happy.
Crowd-pleaser: Not only are these wraps perfect for quick meals, but they’re also a fun, flavorful way to impress friends at your next gathering—serve alongside some crunchy veggie sticks for a complete snack!
Health-conscious choice: High in protein from chickpeas and loaded with fresh produce, these wraps deliver nutrition without compromising flavor. Want more ideas? Check out these flavorful Keto Crunchwraps Guilt for variety!
Buffalo Chickpea Wraps Ingredients
For the Wrap Filling
• Chickpeas – Provide a protein base; canned chickpeas make prep super simple.
• Vegan Mayonnaise or Greek Yogurt – Adds creaminess; you can use regular mayo based on your preference.
• Buffalo Hot Sauce – Delivers that spicy kick; adjust to your heat tolerance for milder wraps if needed.
• Fresh Lemon Juice – Brightens the flavor profile and balances the spices.
• Celery – Adds needed crunch and that refreshing bite.
• Carrot – Offers sweetness and texture; grated is best for blending effortlessly.
• Red Onion – Provides a sharp flavor that cuts through the richness of the wrap.
• Fresh Parsley – Adds a pop of freshness; optional if you’re in a pinch.
• Garlic Powder – Enhances overall flavor depth with minimal effort.
• Smoked Paprika – Contributes a subtle smoky flavor that rounds out the dish.
• Salt and Black Pepper – Essential for your flavor adjustments; taste as you go.
For the Wraps
• Tortillas (flour or whole wheat) – The base for your wraps; gluten-free options are available if needed.
• Shredded Lettuce – Provides a crisp bite and a refreshing touch.
• Diced Tomatoes – Adds juiciness and a boost of flavor.
• Shredded Cheddar Cheese or Vegan Cheese (optional) – Introduces richness; optional if you prefer a lighter wrap.
• Ranch or Blue Cheese Dressing (optional) – For drizzling, adds extra creaminess and flavor contrast.
Feel free to get creative with these Buffalo Chickpea Wraps! The robust flavors and customizable ingredients make them a versatile option for any meal.
Step‑by‑Step Instructions for Buffalo Chickpea Wraps
Step 1: Mash Chickpeas
Begin by opening a can of chickpeas and draining them well. In a mixing bowl, use a fork or potato masher to mash the chickpeas, leaving some chunks for added texture. This should take about 2–3 minutes. The goal is to create a creamy yet slightly lumpy mixture that will bring your Buffalo Chickpea Wraps to life.
Step 2: Mix Salad Components
In the same bowl with the mashed chickpeas, add 2-3 tablespoons of vegan mayonnaise or Greek yogurt, followed by 2-3 tablespoons of Buffalo hot sauce, freshly squeezed lemon juice, diced celery, grated carrot, chopped red onion, and a sprinkle of fresh parsley. Season with garlic powder, smoked paprika, salt, and pepper. Stir until all ingredients are evenly combined, which should take about 2 minutes.
Step 3: Prepare Tortilla Base
Take your tortillas and lay them flat on a clean surface. Evenly distribute a handful of shredded lettuce and a generous portion of diced tomatoes onto each tortilla. This ensures a fresh crunch in every bite of your wraps. Make sure not to overload the tortillas; keeping the filling manageable will help with rolling later.
Step 4: Fill Wraps
Spoon the flavorful Buffalo chickpea mixture down the center of each tortilla, making sure to distribute it evenly. If you like, drizzle some ranch or blue cheese dressing over the top for an extra creamy touch. This will enhance the flavors and complement the spiciness of the chickpeas.
Step 5: Roll Wraps
To roll the wraps, start by folding in the sides of each tortilla over the filling. Then, tightly roll from the bottom up, ensuring that the filling is secured inside. Aim for a snug roll to prevent any spillage. This step should take about a minute per wrap, ensuring they are well-contained for serving or packing.
Step 6: Serve or Pack
Once your Buffalo Chickpea Wraps are rolled, you can cut them in half for easier handling or serving. If you’re on the go, wrap them in foil for a convenient transport option. These wraps are best enjoyed fresh but can be stored in the fridge if needed. Just remember to keep the filling and tortillas separate to maintain crispness!
What to Serve with 15-Minute Buffalo Chickpea Wraps
There’s nothing quite like crafting a meal that tantalizes the taste buds and brightens the table with vibrant accompaniments.
- Crunchy Veggie Sticks: Carrot and cucumber sticks provide a refreshing crunch, balancing the spicy Buffalo flavors of the wraps beautifully.
- Sweet Potato Fries: Their natural sweetness complements the spiciness of the wraps, creating a delightful contrast in taste and texture.
- Creamy Avocado Dip: Gentle, creamy avocado dip cools the heat from the wraps, making each bite more deliciously balanced.
- Tangy Coleslaw: Crunchy coleslaw adds a satisfying crispness and a vinegary zing that enhances the richness of the chickpea filling.
- Fruit Salad: A light and refreshing fruit salad brings sweetness and a burst of freshness to your meal, cleansing the palate perfectly.
- Chilled Sparkling Water: Serve with a slice of lemon for an effervescent drink that complements the bold flavors of the Buffalo chickpeas.
- Herbed Quinoa Salad: A protein-packed quinoa salad with fresh herbs creates a lovely side that is both filling and vibrant, making the meal heartier.
- Mango Salsa: Sweet and spicy mango salsa adds a tropical twist, enhancing the flavor profile while bringing a beautiful color to your plate.
How to Store and Freeze Buffalo Chickpea Wraps
Fridge: Store assembled wraps in an airtight container for up to 3 days, but for maximum crispness, keep fillings and tortillas separate.
Freezer: If you’ve prepped extra wraps, freeze them before rolling in foil. They’ll stay fresh for up to 2 months; just thaw in the fridge before serving.
Reheating: For best results, heat the filling in the microwave and assemble in fresh tortillas. This keeps the wraps delightful and crunchy!
Make-Ahead Tip: Prepare the Buffalo chickpea filling in advance and store it separately. It can last up to 3 days in the fridge, making meal prep a breeze.
Buffalo Chickpea Wraps Variations & Substitutions
Customize these scrumptious Buffalo Chickpea Wraps to make them your very own by incorporating fun swaps and flavor twists!
-
Gluten-Free: Use gluten-free tortillas to keep these wraps accessible for those with dietary restrictions while still enjoying that robust taste.
-
Extra Protein: Swap chickpeas for canned white beans or cooked lentils for an equally satisfying protein base that mixes beautifully with the spicy sauce. There’s something wonderfully hearty about beans that makes every bite fulfilling.
-
Veggie Boost: Add colorful bell peppers or crunchy cucumbers to amp up the nutrient profile and add an extra layer of texture. You’ll love the crunch!
-
Dairy-Free Delight: For a complete dairy-free experience, substitute the cheese with a vegan alternative or simply omit it. The flavors of the chickpeas and Buffalo sauce will still shine brightly.
-
Creamy Alternatives: Use vegan ranch or dress it up with a splash of tahini instead of the typical mayo or yogurt for a unique twist that still retains creamy goodness.
-
Heat Levels: Adjust the amount of Buffalo sauce to either spice it up or scale it back for a milder version. A little sweet chili sauce can also be added for a sweet-heat blend!
-
Layered Flavors: Incorporate spices like cumin or chili powder to the chickpea mixture for an extra flavor dimension, tantalizing your taste buds even more.
-
Wrap Style: Try wrapping the filling in lettuce leaves instead of tortillas for a fresh, low-carb alternative that still packs all the flavor.
If you’re on the hunt for more exciting meal ideas, be sure to check out the delicious Keto Crunchwraps Guilt for a satisfying twist! And don’t forget to explore the flavors of the Blt Wraps Sauce for a whole new experience!
Expert Tips for Buffalo Chickpea Wraps
- Mash Texture: Aim for a chunky mixture: While mashing chickpeas, leave some whole for texture; this adds heartiness to the wraps.
- Seasoning Matters: Taste as you go: Adjust spices and sauces to your liking to prevent overwhelming heat from the Buffalo sauce.
- Keep Crunch: Store smartly: Separating the chickpea filling from the tortillas prevents sogginess if you’re prepping ahead for these Buffalo Chickpea Wraps.
- Veggie Variety: Get creative: Add in your favorite veggies like bell peppers or cucumbers for extra nutrition and crunch.
- Dairy-Free Delight: Use alternatives: For a fully vegan option, stick to vegan mayo and plant-based cheese for a cruelty-free experience.
Make Ahead Options
These Spicy Buffalo Chickpea Wraps are a fantastic choice for meal prep, making busy weeknights a breeze! You can prepare the chickpea filling up to 3 days in advance and simply store it in an airtight container in the refrigerator. To keep the tortillas fresh and crisp, it’s best to store them separately. When you’re ready to enjoy them, assemble the wraps just before serving to maintain that delicious crunch. Simply lay the tortillas flat, add a layer of shredded lettuce, spoon in your prepped Buffalo chickpea mixture, and roll them up tightly for a quick, satisfying meal that’s just as tasty as fresh!
Buffalo Chickpea Wraps Recipe FAQs
How do I choose the best chickpeas for my wraps?
Absolutely! For convenience, canned chickpeas are often the go-to option. Make sure to look for cans that are free from any damage and don’t have dark spots on the chickpeas themselves. If you prefer a fresher option, try cooking dried chickpeas, which can add a firmer texture to your wraps. Just soak them overnight and boil them until tender!
How should I store the wraps to maintain freshness?
To maintain the crispness of your Buffalo Chickpea Wraps, it’s best to store the fillings separately from the tortillas. Use an airtight container for the stuffed filling in the fridge, where it will last for up to 3 days. When you’re ready to enjoy, assemble them fresh!
Can I freeze these wraps?
Yes, you can! If you’re prepping for the future, freeze the fillings in a freezer-safe container for up to 2 months. For best results, don’t assemble the wraps but store the chickpea mixture separately. Once you’re ready to eat, thaw the filling in the fridge overnight and roll them into tortillas when you’re ready to enjoy!
What should I do if the wraps feel soggy after storage?
Very! To prevent sogginess, make sure not to add too much dressing when filling the wraps. If they do happen to get soggy, try toasting the assembled wraps in a skillet over medium heat for a few minutes, which can help revive their crunch!
Are these wraps suitable for people with dietary restrictions?
Definitely! These Buffalo Chickpea Wraps are naturally gluten-free when using gluten-free tortillas and can easily be made vegan with vegan mayo and cheese alternatives. Always check labels for any hidden allergens, especially for those with nut or soy allergies.
What are some good serving suggestions for these wraps?
Very! These wraps pack nicely alongside crunchy veggie sticks like celery or bell pepper strips and sweet potato fries for a hearty meal. You can also serve them with a side of ranch or blue cheese dressing for dipping, providing a delicious contrast to the spicy filling!
Spicy Buffalo Chickpea Wraps That Wow in Just 15 Minutes
Ingredients
Equipment
Method
- Begin by opening a can of chickpeas and draining them well. In a mixing bowl, use a fork or potato masher to mash the chickpeas, leaving some chunks for added texture. This should take about 2–3 minutes.
- In the same bowl with the mashed chickpeas, add vegan mayonnaise or Greek yogurt, Buffalo hot sauce, freshly squeezed lemon juice, diced celery, grated carrot, chopped red onion, and a sprinkle of fresh parsley. Season with garlic powder, smoked paprika, salt, and pepper. Stir until all ingredients are evenly combined, which should take about 2 minutes.
- Take your tortillas and lay them flat on a clean surface. Evenly distribute a handful of shredded lettuce and a generous portion of diced tomatoes onto each tortilla.
- Spoon the flavorful Buffalo chickpea mixture down the center of each tortilla, making sure to distribute it evenly. Drizzle some ranch or blue cheese dressing over the top if desired.
- To roll the wraps, start by folding in the sides of each tortilla over the filling. Then, tightly roll from the bottom up, ensuring that the filling is secured inside.
- Once your Buffalo Chickpea Wraps are rolled, you can cut them in half for easier handling or serving. Wrap them in foil for a convenient transport option.
Leave a Reply